School’s out, and summer vacation unfurls in front of parents and children like a ribbon so long no one can quite see its end. Kids love the feeling of infinite free time. Parents perhaps less so. I combined childlike, freewheeling joy with a grown-up sense of purpose by creating a day of family fun. Starting with a handmade game, then moving into creative snack time, and finishing with a craft activity with keepsake-quality results, I made this the best day ever with masterful planning. It was so good, in fact, that we might do it a few more times across the summer.
Easy Activities for Kids During Summer Vacation
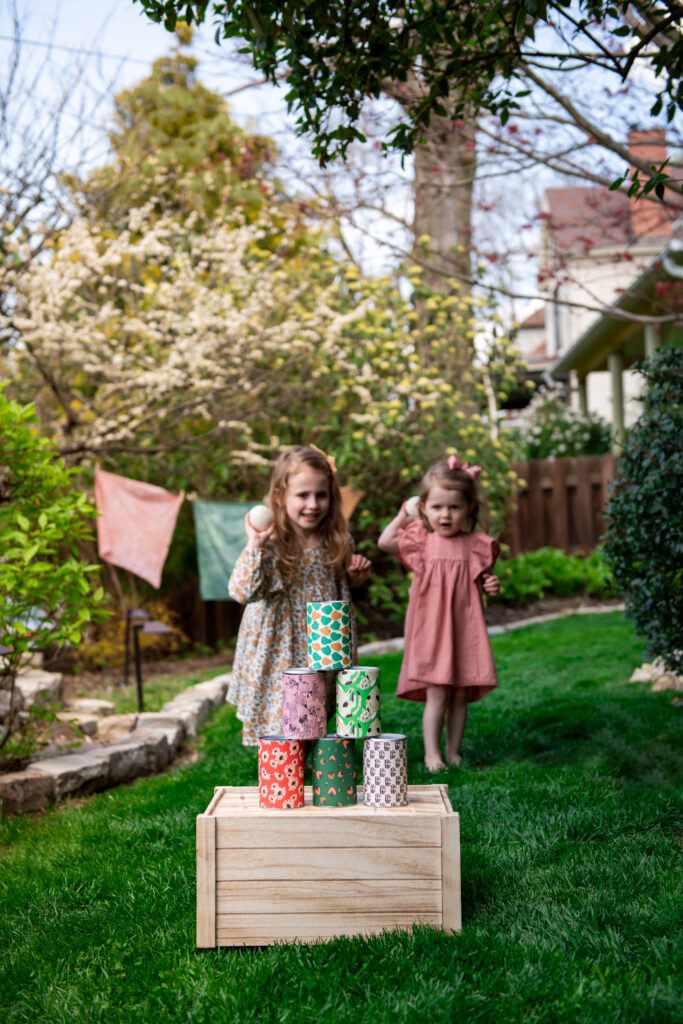
Tin Can Toss Game
My kids love nothing more than getting permission to knock something over. This tin can toss game provided a lot of squealing and delight for them, and a sense of satisfaction for me at finally reusing tin cans piling up in our recycling. Wrap the tin cans in patterned paper from used gift bags or have your kids paint on paper. Secure the paper using double-sided tape, or if you’ve got the time and want the cans to hold up to several competitive rounds of toss, decoupage them. Wool dryer balls proved the perfect soft ball to toss around at will.
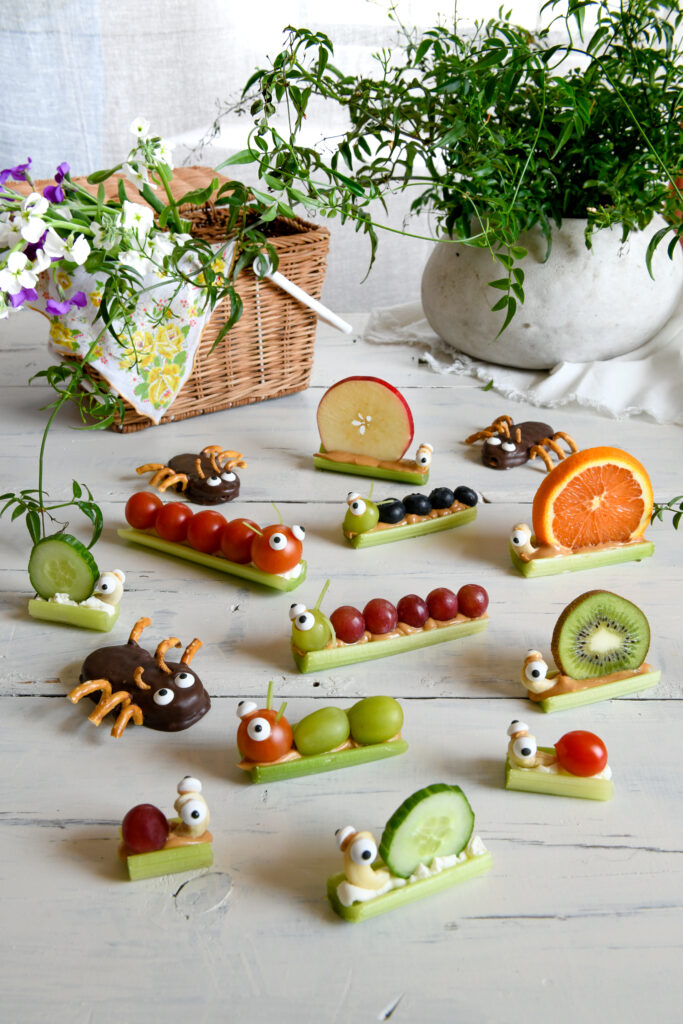
Edible Bugs
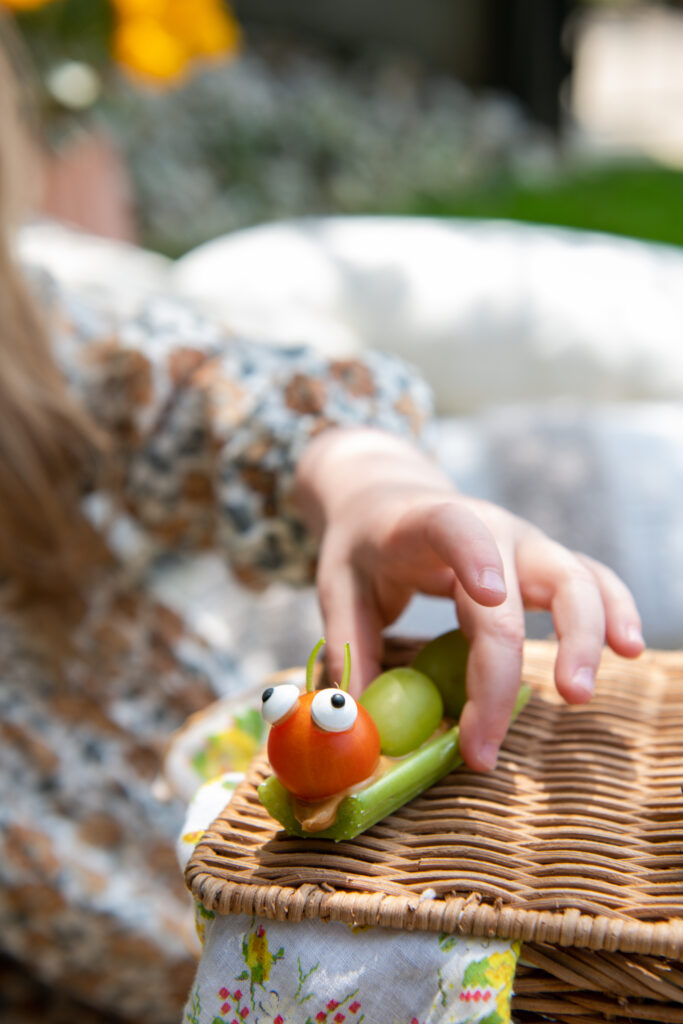
As the old saying goes, if your kids won’t eat it (celery), make it into a bug and put candy eyes on it. I’ve never seen my girls gobble up celery sticks quicker than they did with this snack. We used peanut butter as the “glue” for the sweet variations like grape, apple, and kiwi and softened cream cheese for the savory grape tomato and cucumber. Using raw cashews as heads proved the biggest challenge for tiny hands, so the kids were in charge of assembling the larger grape and grape tomato versions.
The chocolate beetles were made using Nutter Butter cookies dipped in dark chocolate. We used mini-pretzel fragments for the legs and antennae.
Botanical Sun-Printed Napkins
If you’re looking for an art project that gets everyone outside and results in beautiful keepsakes, look no further than sunprinting. The materials include solar dye (jacquardproducts.com), white unbleached linen napkins, and collected botanicals from around the yard. Have your kids collect branches, leaves, ferns or flora (the larger the better). The dye needs to be applied to the fabric in a dark room (it will begin developing the minute any sun hits), so go to the basement or lower the shades while you dip the fabrics in the dye or brush it on.
Place the fabric on something hard such as cardboard, and place botanicals in the pattern you desire. We put a piece of plexiglass over top of the design and carried it outside to develop for 30 or so minutes in full sun. The kids loved watching the colors change and couldn’t believe the magic of the final result. It is the perfect artwork to wear, hang in a bedroom, or use as a scarf for beloved wall animals.
Story, Photography, and Styling by Erin Kelly
Subscribe to TABLE Magazine’s print edition.
