Home Blog Page 177

Italian Rainbow Cookies

0
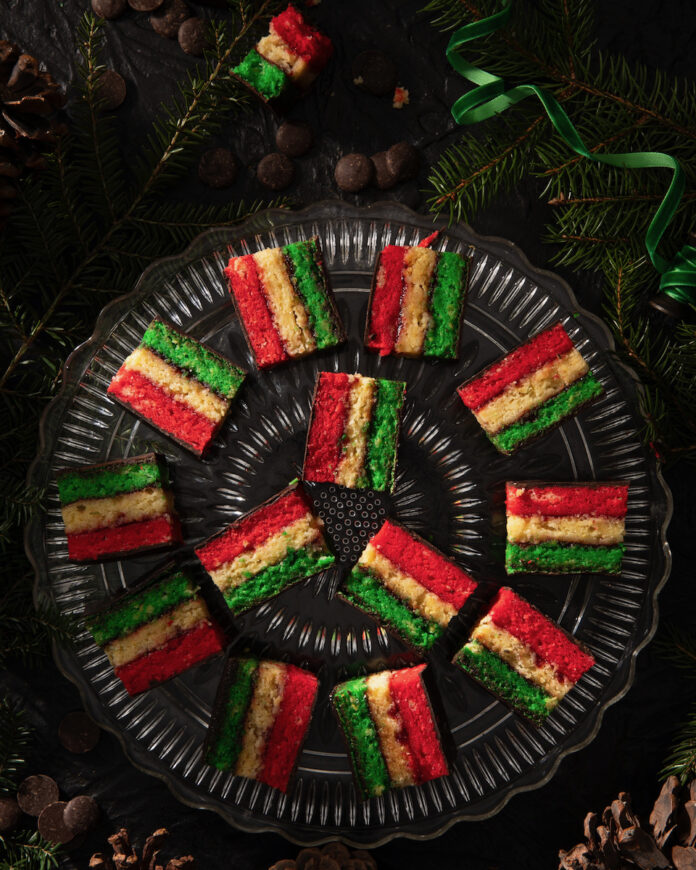
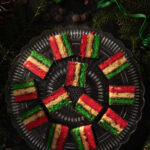
Italian rainbow cookies arranged into a spiral

Rachel Walton wowed the judges of our cookie table competition with this Italian Rainbow Cookies recipe. Rachel won Judge’s Choice for these beautifully presented and carefully baked treats. For another Italian baked good, try our Italian Love Knots.
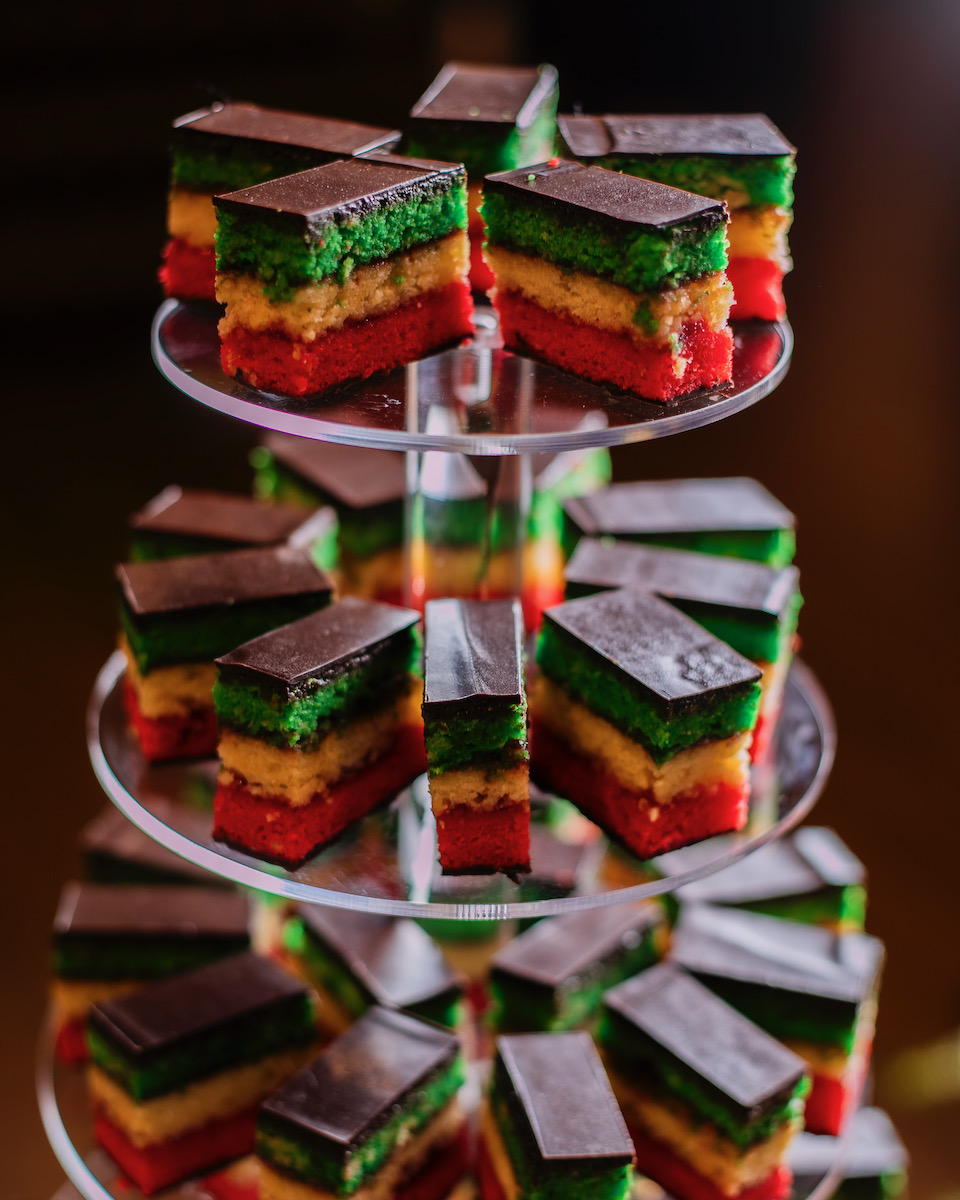
Italian rainbow cookies stacked on a tower and topped with chocolate
Photo by Laura Petrilla

Are Italian Rainbow Cookies Actually Italian?

The short answer: yes and no. They are not actually from Italy. But they do come from Italian-American communities in the northeastern United States like in Boston and New York. They are inspired by the traditional Italian dessert called “pasta di mandorle,” which is made from almond paste, and replicate the red, green and white color triad of the Italian flag.
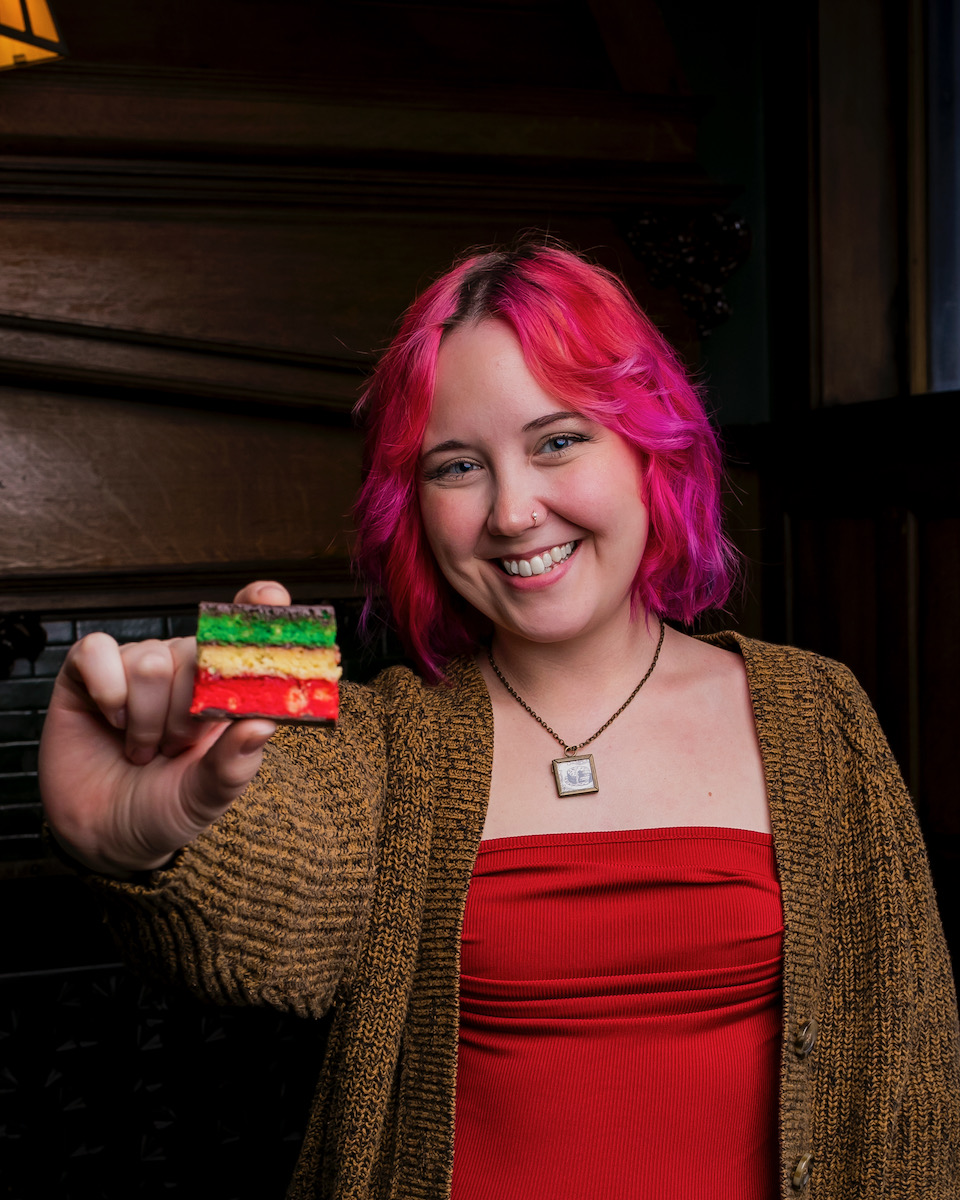
 
Rachel Walton, a woman with pink hair wearing a brown cardigan, holds her Italian Rainbow cookies

Photo by Laura Petrilla
Print
clock clock iconcutlery cutlery iconflag flag iconfolder folder iconinstagram instagram iconpinterest pinterest iconfacebook facebook iconprint print iconsquares squares iconheart heart iconheart solid heart solid icon
Italian rainbow cookies arranged into a spiral

Italian Rainbow Cookies


  • Author: Rachel Walton

Description

Three layers of deliciousness!


Ingredients

Scale
  • 5 ¼ oz almond flour
  • 14.8 oz powdered sugar
  • 2 t almond extract
  • 1 lb butter room temp
  • 3 eggs
  • 3 egg yolks
  • 6 egg whites
  • 2 ½ oz sugar
  • 8 ¾ oz all purpose, sifted

For Assembly:

  • Dark chocolate as needed
  • Raspberry jam as needed


Instructions

  1. The recipe yields one quarter-sheet cake for each of the 3 layers. Prepare three quarter-sheet trays by putting parchment down and pan spraying. Set aside.
  2. Using a mixer fitted with a paddle attachment, add butter, powdered sugar, almond flour and almond extract. Once all ingredients are incorporated, whip on high for 2-3 minutes until light in color.
  3. Pour almond mixture in the largest bowl you have and set aside.
  4. Sift all purpose flour onto a piece of parchment, set aside.
  5. Using a mixer fitted with a whisk attachment, add whole eggs and egg yolks to the mixing bowl and whip on high until they form a ribbons.
  6. Meanwhile in another mixing bowl fitted with a whisk attachment whip egg whites to stiff peaks then slowly add in sugar, making a meringue.
  7. Add about a pint of flour to the almond mixture and fold together.
  8. Add half of the whole egg mixture and fold together. Repeat with the rest of the egg mixture.
  9. Add the rest of the flour and half of the egg white meringue to the bowl, fold together.
  10. Add the rest of the egg whites and fold together until combined.
  11. Divide batter evenly between 3 small bowls.
  12. In one bowl add 15 grams of liquid green food dye and fold together, then add to 1 prepared sheet tray and spread evenly across.
  13. In one of the other bowls add 15 grams of liquid red food dye and fold
    together, then add to 1 prepared sheet tray and spread evenly across.
  14. Take the last bowl and add it to 1 prepared sheet tray and spread evenly across.
  15. Bake at 325 for 11 minutes in a convection oven.

For Assembly:

  1. Start by lining a cutting board with a piece of parchment paper.
  2. Turn over the green layer onto the cutting board, allowing the cake to lay upside down on the cutting board.
  3. Add raspberry jam to cake and spread evenly across, only add more if needed.
  4. Turn over the white layer onto the layer of raspberry jam, allowing the cake to lay upside down.
  5. Add more of the raspberry jam to the cake and spread evenly across, only add more if needed.
  6. Turn over the red layer onto the layer of raspberry jam, allowing the cake to lay upside down.
  7. Top with another piece of parchment and another cutting board to weight it.
  8. Put it in the fridge overnight.
  9. On the next day, over a double boiler melt a small bowl of dark chocolate and heat to 115 degrees, checking with a temperature gun.
  10. Temper chocolate once it comes to 115 using the seeding method.
  11. Once the chocolate is less than 100 degrees stop adding chocolate, and remove the stacked cakes from the fridge.
  12. Starting with the red layer, add the tempered chocolate, when ready and spread evenly across the entire cake.
  13. Once the tempered chocolate has set, flip the entire thing upside down using cutting boards on each side of the cake until the green side is facing up.
  14. Repeat tempering the chocolate and spreading across evenly on the green side when chocolate is ready.
  15. Once the chocolate has set, grab a container of hot water and a chef’s knife.
  16. Trim the sides of the rainbow cookies.
  17. Cut 1 in x 2 in rectangles to create the finished cookies.

Recipe by Rachel Walton
Styling by Anna Franklin
Photography by Dave Bryce and Laura Petrilla 

Subscribe to TABLE Magazine‘s print edition.
Ube Sweet Soy White Chocolate Cookies

0
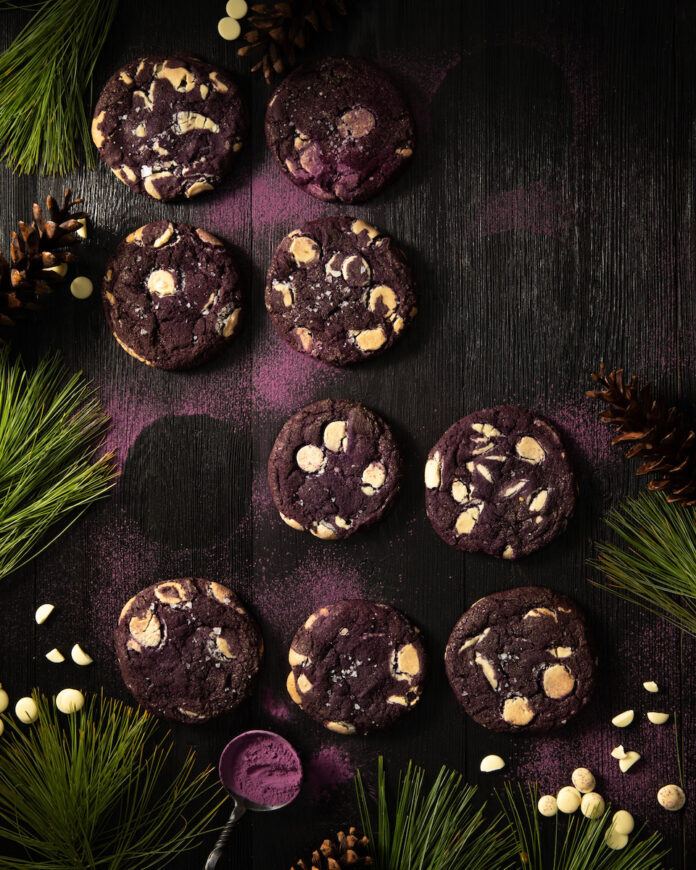
Ube Cookies surrounded by holiday decorations

These ube cookies tied for the gold for the People’s Choice at our cookie table competition. They’re a winner for sure, with delectable bits of white chocolate for mouthwatering sweetness. But we expect nothing less from Selina Progar of Eleven, who also share with us Chocolate Brownies with Lime Glaze.

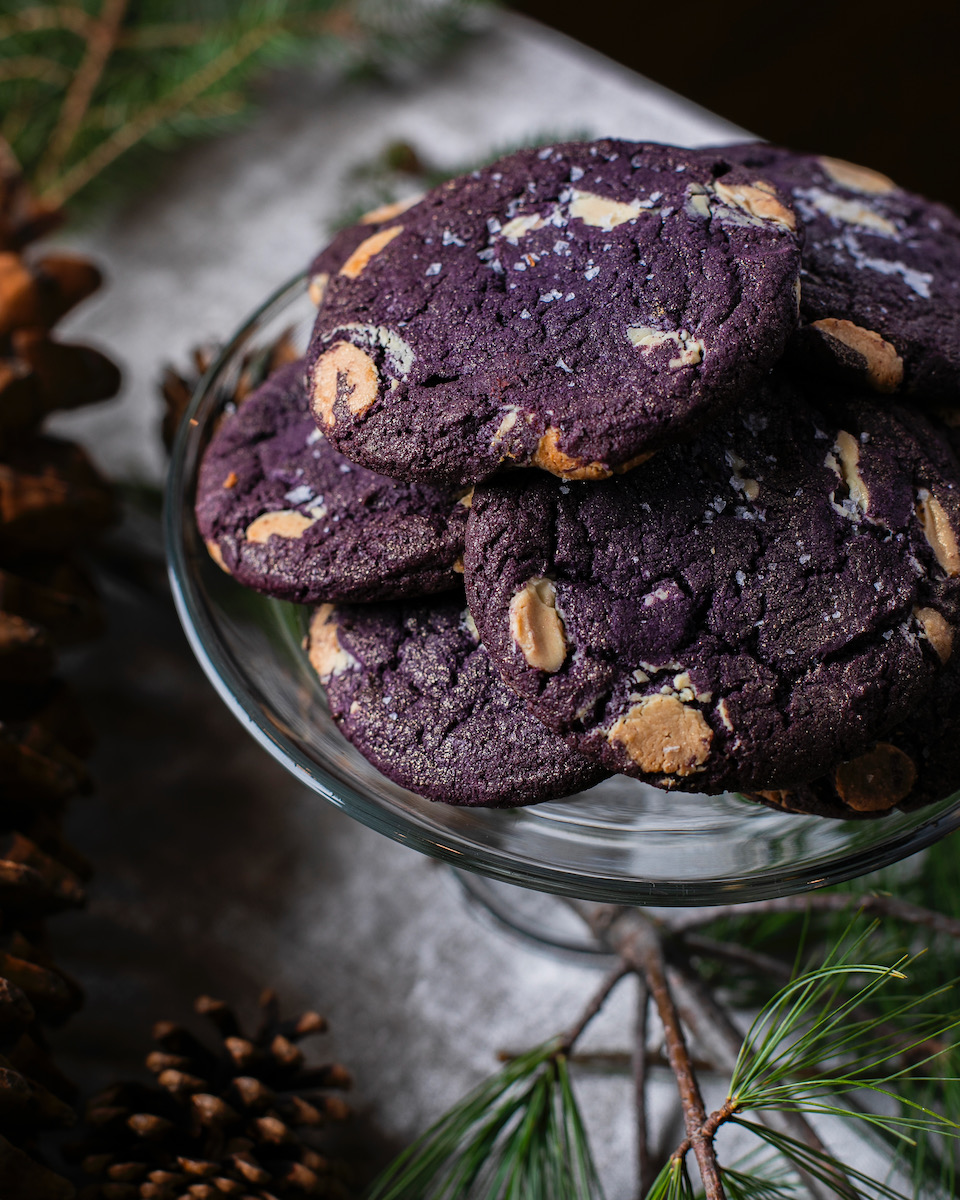
Ube cookies on a glass plate
Photo by Laura Petrilla

Why Are These Ube Cookies Purple? 

Ube is purple due to the presence of anthocyanins, which are water-soluble pigments that can appear red, blue, or purple depending on their pH. Ube’s anthocyanins give it its distinctive deep purple color, which in turn gifts these ube cookies with a slight purple hue. The pigment also is known for its antioxidant qualities, so you can feel healthy too!

 
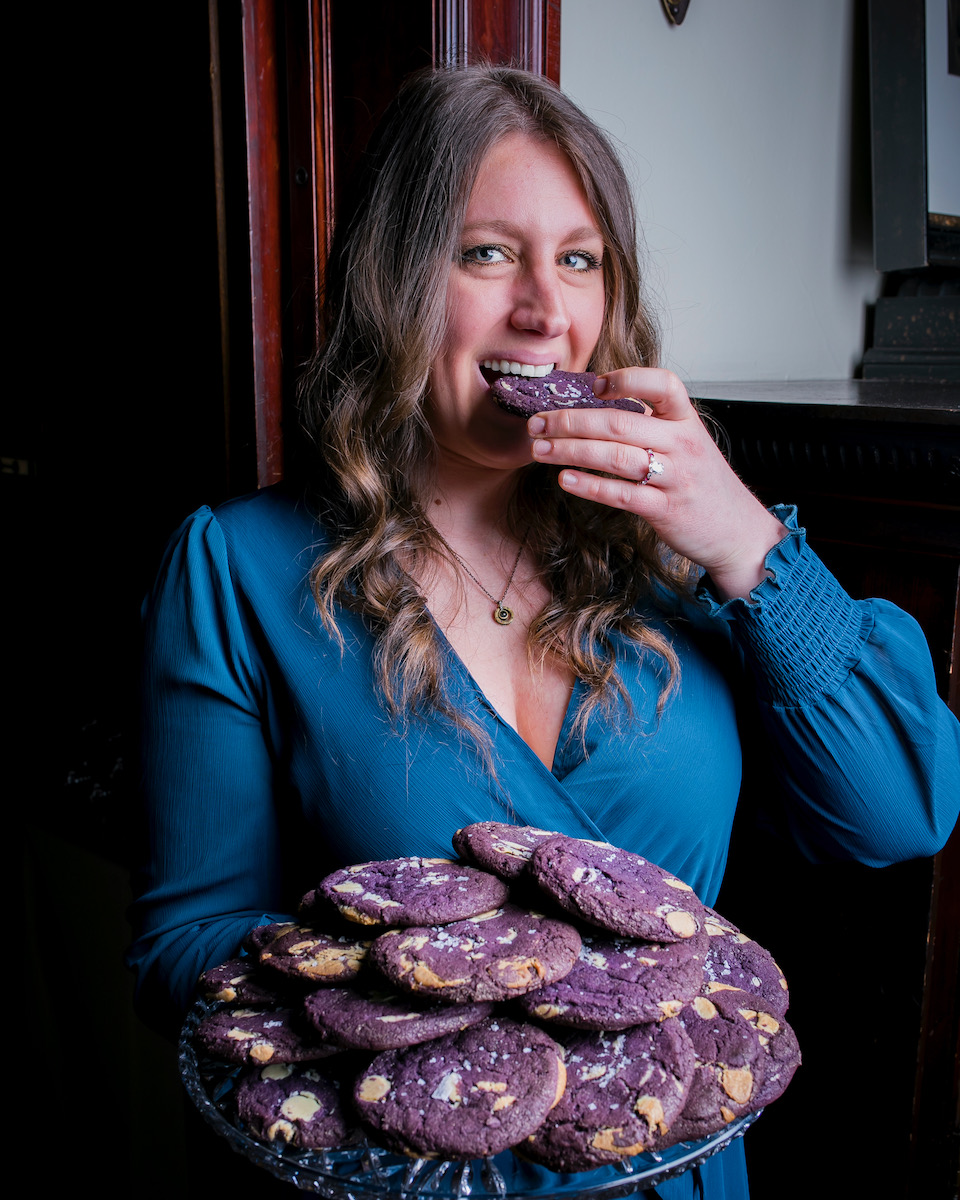
Selina Progar holds her ube cookies on a tray and bites into one

Photo by Laura Petrilla
Print
clock clock iconcutlery cutlery iconflag flag iconfolder folder iconinstagram instagram iconpinterest pinterest iconfacebook facebook iconprint print iconsquares squares iconheart heart iconheart solid heart solid icon
Ube Cookies surrounded by holiday decorations

Ube Sweet Soy White Chocolate Cookies


  • Author: Selina Progar

Description

A twist on classic flavors with a purple hue!


Ingredients

Scale
  • 9 oz Butter, softened
  • 6.7 oz Brown sugar
  • 4 oz Granulated sugar
  • 4 oz Sweet soy
  • 3 Whole eggs (4 oz)
  • 1 oz Ube extract
  • 1 lb All-purpose flour
  • 8.5 g Baking powder
  • 3 g Baking soda
  • 2 oz Ube powder
  • 10 g Salt
  • 10 oz White chocolate
  • Maldon salt for garnish


Instructions

  1. Chop chocolate.
  2. Cream butter, brown sugar, white sugar, sweet soy, baking powder, baking soda, and salt until light and fluffy. Scrape down sides as needed.
  3. Add eggs and ube extract. Mix until incorporated. Scrape down as needed.
  4. Mix in chocolates and add flour and ube powder in a few increments. Pulse the mixer rather than letting it run. Once the flour is added, mix thoroughly, scraping the sides and bottom of the bowl to incorporate all the ingredients evenly. Mix for an additional 4 minutes on medium speed to create a chewy cookie.
  5. Scoop cookies and chill in fridge overnight.
  6. Space evenly on a parchment lined tray.
  7. Bake at 350 degrees for 12 minutes if using a convection oven.

Recipe by Selina Progar
Styling by Anna Franklin
Photography by Dave Bryce and Laura Petrilla

Subscribe to TABLE Magazine‘s print edition.
Cuccidati, Sicilian Fig Cookies

0
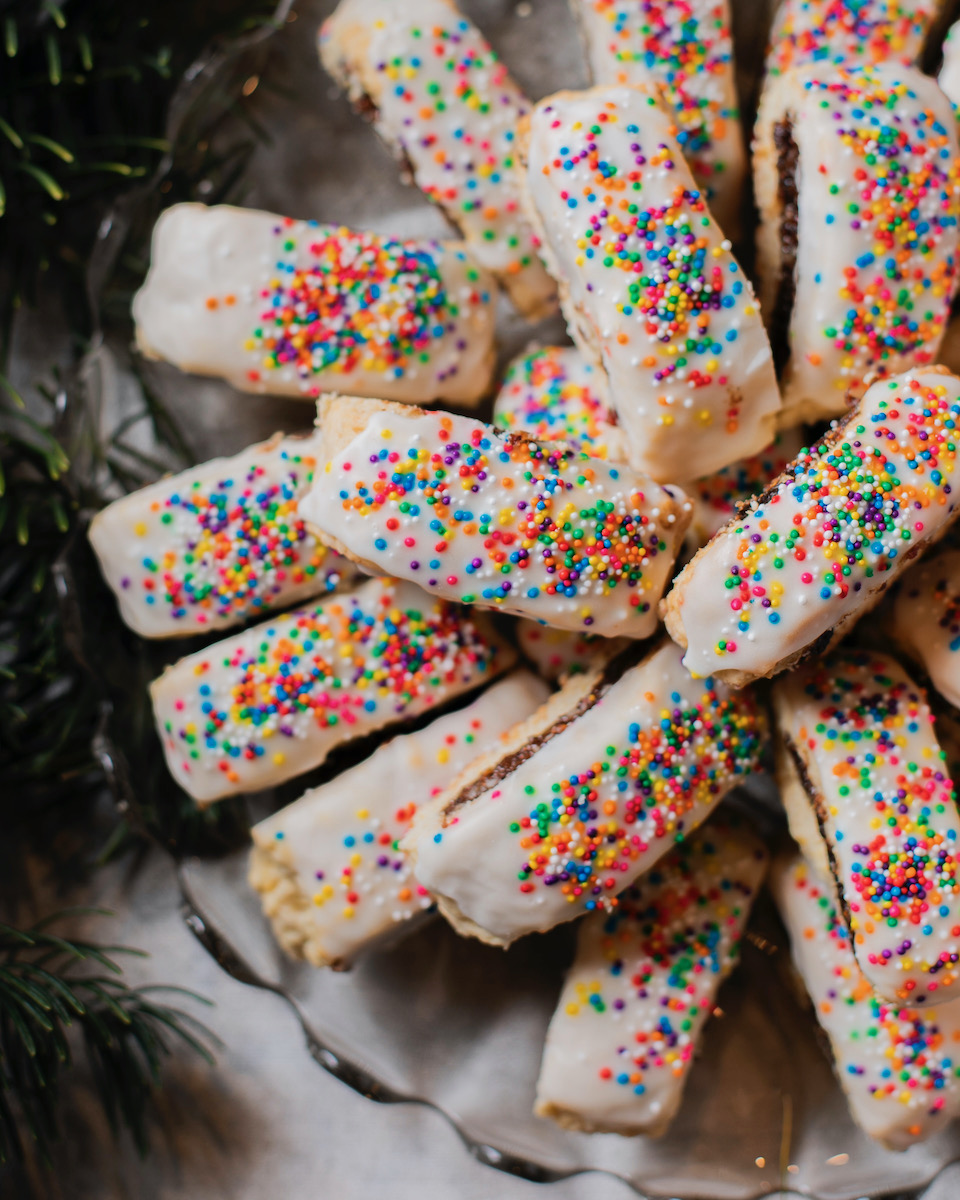
Cuccidati, Sicilian fig cookies, on a brown background

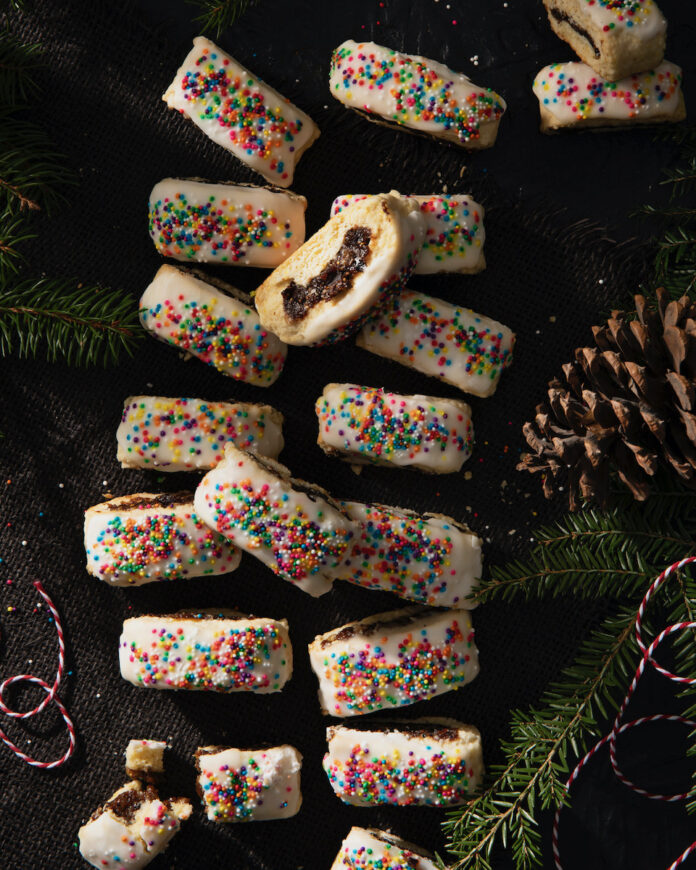
These Cuccidati, traditional Sicilian Fig Cookies, are both a classic Old World recipe and an inventive baking creation from Alane Lovic. They took home second place at our cookie table competition, and it’s not hard to see why with their deliciously aromatic filling and perfectly baked texture. For another fig recipe, try our Easy Fig and Pumpkin Spice Galette.

Cuccidati, Sicilian fig cookies
Photo by Laura Petrilla

History of Cuccidati, Sicilian Fig Cookies

The history of these delicious cookies is fascinating! They trace back to the Arab influence in Sicily during the 9th to 11th centuries, when figs were cultivated and used extensively in various dishes. The combination of figs with nuts and spices was common in Middle Eastern sweets, and this culinary tradition carried over into Sicilian cuisine. Today, Italian families often associate cuccidati with festive occasions, particularly Christmas.

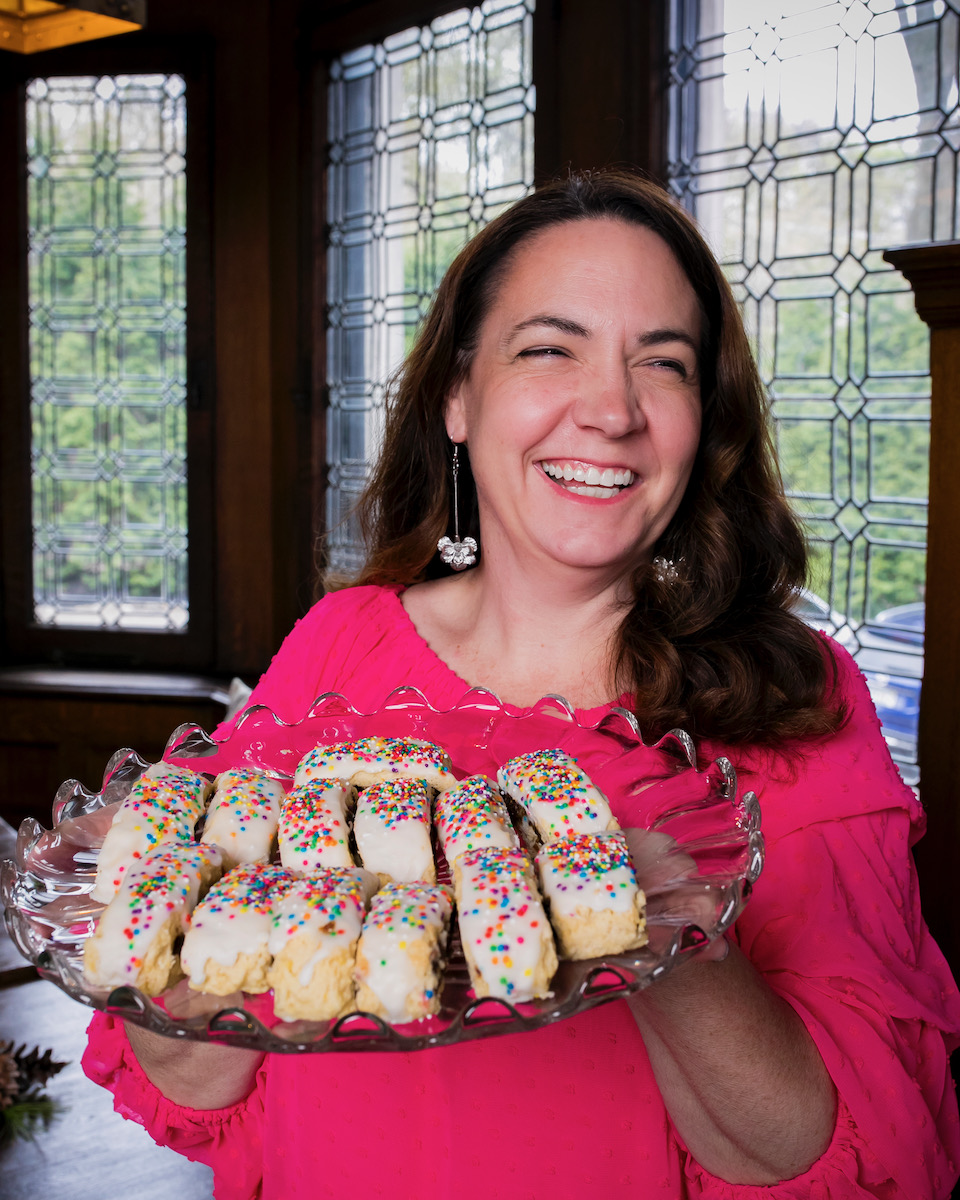
Alane Lovic with her Sicilian fig cookies

Photo by Laura Petrilla
Print
clock clock iconcutlery cutlery iconflag flag iconfolder folder iconinstagram instagram iconpinterest pinterest iconfacebook facebook iconprint print iconsquares squares iconheart heart iconheart solid heart solid icon
Cuccidati, Sicilian fig cookies, on a brown background

Cuccidati, Sicilian Fig Cookies


  • Author: Alane Lovic

Description

Both traditional and inventive.


Ingredients

Scale

For the Dough:

  • 4 cups All-purpose flour
  • ¾ cups Sugar
  • 1 ½ tbsp Baking powder
  • ¼ tsp Salt
  • 1 large Egg, beaten
  • 1 tbsp Vanilla extract
  • 16 tbsp Unsalted butter, cut into pieces (2 sticks)
  • ½ to ¾ cup Milk

For the Filling:

  • 2 ½ cups Dried figs
  • 1 cup Dried dates
  • 1 cup Raisins
  • 1 cup Chopped walnuts or almonds (I used walnut)
  • ½ cup Apricot jam or marmalade
  • ½ cup Honey
  • 1 tbsp Orange zest
  • 1 tsp Ground cinnamon

For the Icing:

  • ½ cup Confectioner’s sugar
  • 1 tbsp Milk
  • Nonpareils for decoration (round sprinkles)


Instructions

For the Dough:

  1. In a large bowl, mix flour, sugar, baking powder and salt.
  2. Add the egg and vanilla
  3. Cut in the butter using a pastry blender or two knives pulled in opposite directions. The dough should resemble cornmeal consistency.
  4. Slowly, add ½ cup milk, mixing it with your hands. Add additional milk until it just comes together. Be careful not to make the dough too wet.
  5. Once the dough is together, roll it into a long cylinder shape and wrap it in plastic wrap. Refrigerate for 45 minutes to an hour.

For the Filling:

  1. In a food processor, fruit grinder or high intensity blender, combine and finely chop figs, dates and raisins. You may need to do this a little at a time.
  2. Add the nuts, jam, honey, orange zest, and cinnamon. Pulse to mix it or combine with fruit in a separate bowl.

For the Icing:

  1. Whisk together confectioner’s sugar and milk until it forms a thick glaze. Reserve nonpareils for final decoration.

Assembling the Cuccidati:

  1. Heat oven to 350 degrees.
  2. Unwrap and cut the dough in half.
  3. Roll out one half at a time on a lightly floured surface into a long rectangle. Use a dough scraper to shape it.
  4. Use half of the filling to make a log down the middle of the dough, then fold one side over it and then the other. Lightly pinch the dough together so it sticks.
  5. Cut cookies to desired size. (I used a ruler and made mine 1-inch per piece in length.) Transfer the cookies to a parchment-lined baking sheet, seam side down.
  6. Bake for 15 minutes until the cookie is slightly brown on the edges and bottom. They should look slightly dry. Let cool for a few minutes and then transfer to a cooling rack.
  7. Once the cookies are completely cooled, sift the confectioner’s sugar into a bowl and add milk. Mix until smooth. Drizzle the glaze on top of the cookies a few at a time, sprinkling nonpareils on top.
  8. Allow the icing to dry before serving. They can be frozen but the nonpareils may bleed when defrosting. They’re still delicious, though!

Recipe by Alane Lovic
Styling by Anna Franklin
Photography by Dave Bryce

Subscribe to TABLE Magazine‘s Print edition

Italian Wedding Cookies

0
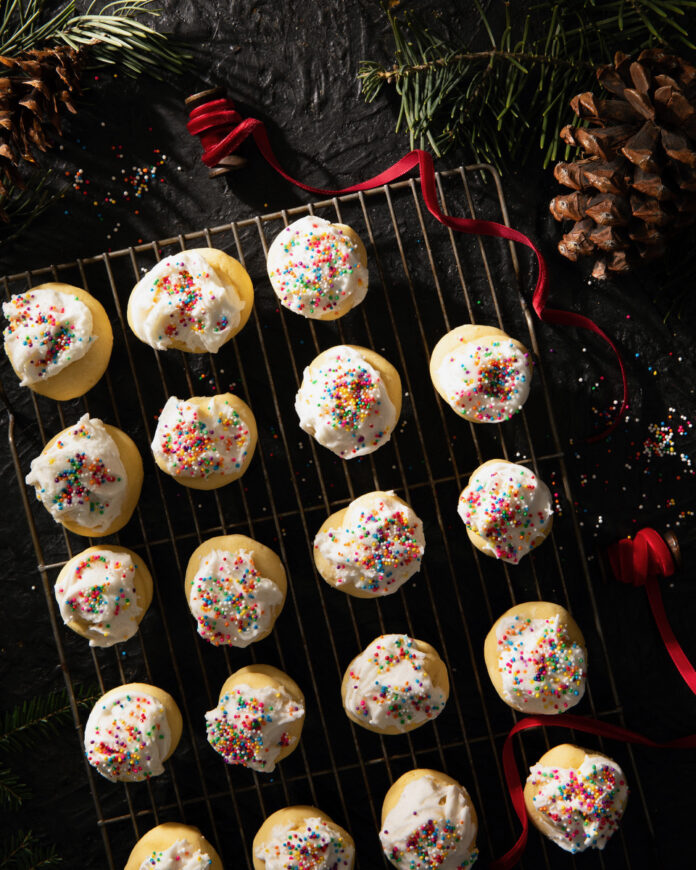
A tray of Italian wedding cookies

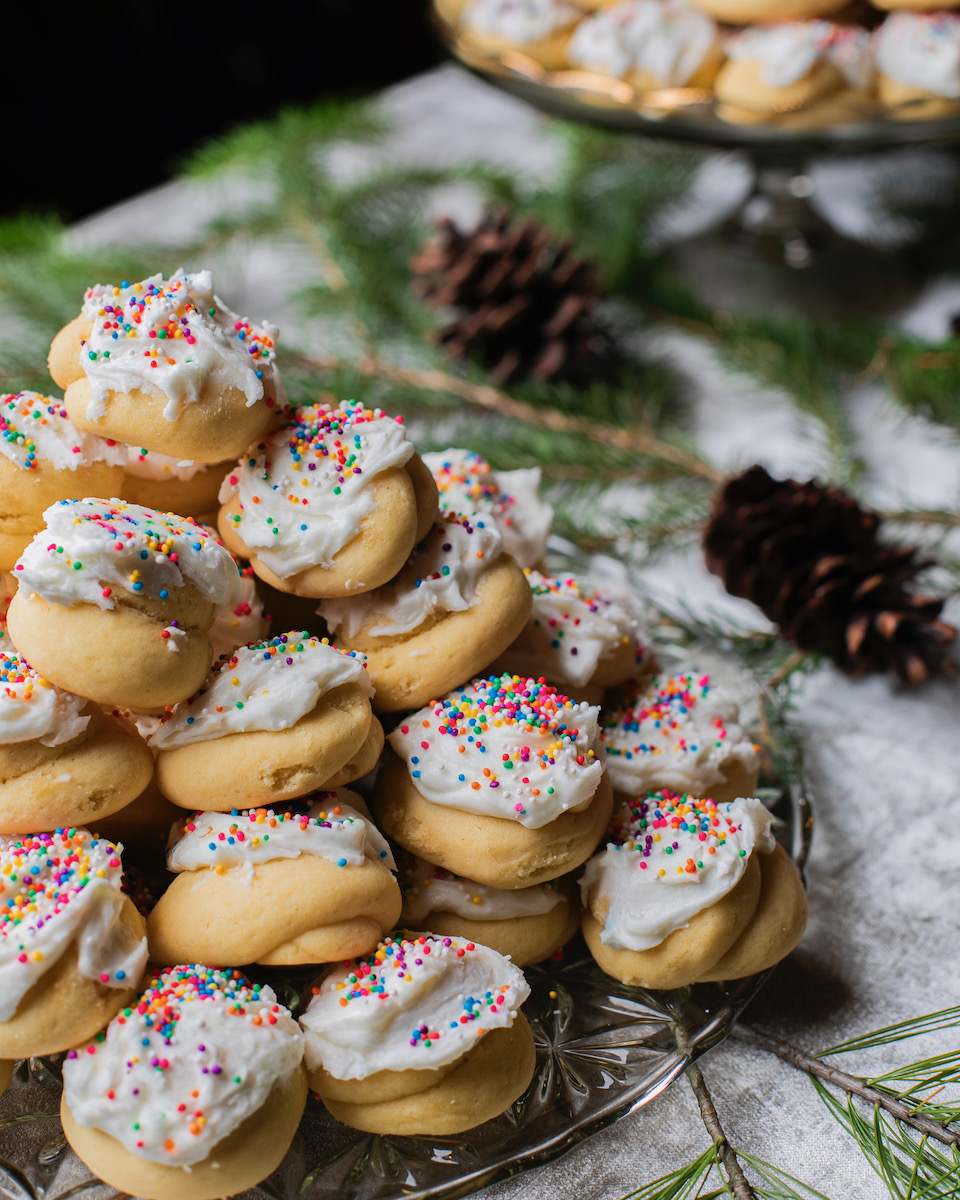
These Italian Wedding Cookies call for a celebration. No one knows how to bring people together like the Italians, with large family gatherings and warm, welcoming feasts for guests. However, these cookies don’t just need to be for a wedding! Make them as a celebration of self-love, too. We hope you enjoy them as much as we did at our cookie table competition. For more Italian recipes, check out our list of Italian Cookbooks for the Serious Cook.

Italian Wedding Cookies stacked on top of each other and frosted with non-pareils
Photo by Laura Petrilla

History of Italian Wedding Cookies

Anginetti (the Italian word for these Italian Wedding Cookies) are believed to have originated in the Campania region of Italy, particularly in the city of Nola. They are often associated with celebrations and special occasions, like weddings. As Italian immigrants brought their culinary traditions to the United States, anginetti cookies gained popularity in Italian-American communities.  Their bright flavor and sweet aroma make them a popular choice for celebrations.

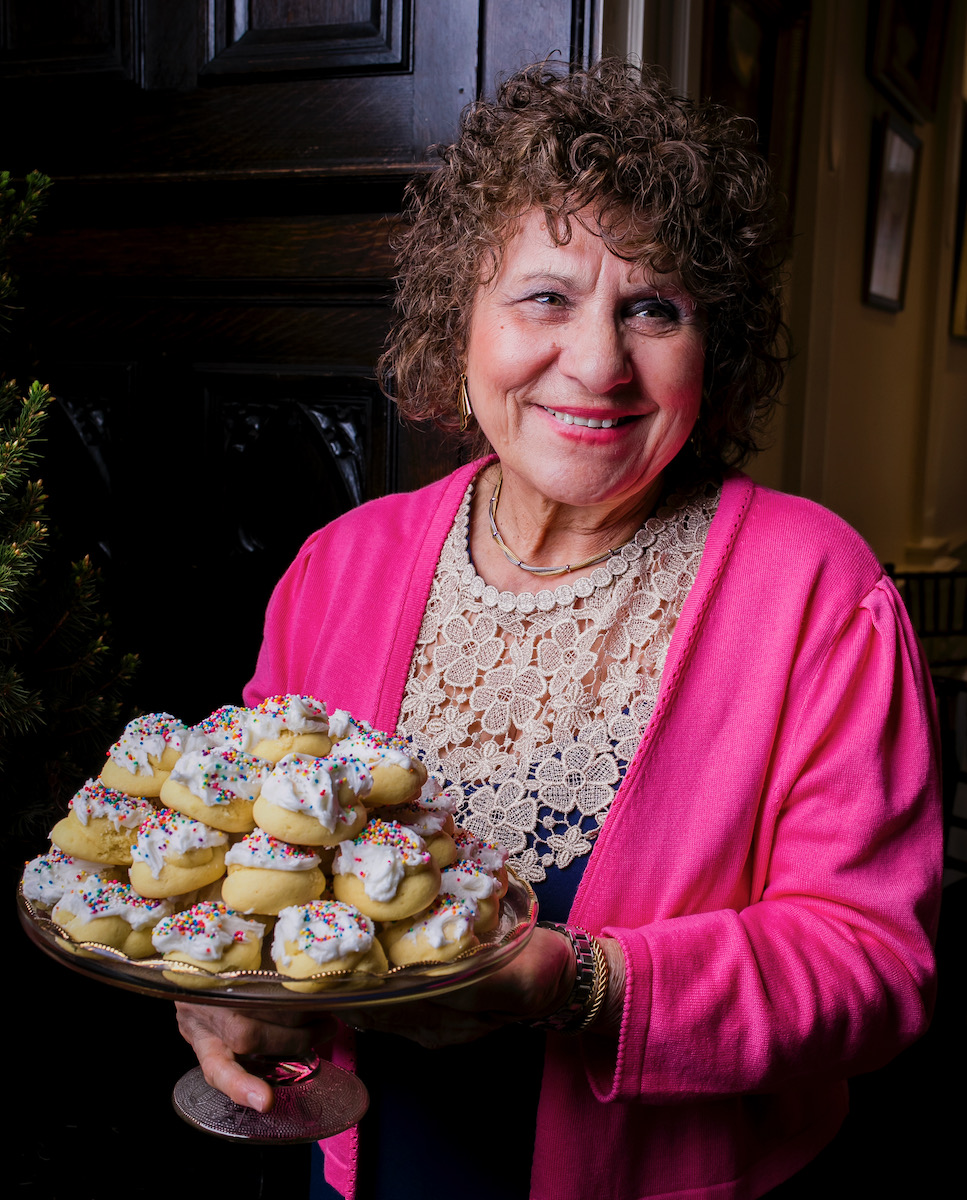
A woman in a pink jacket holds a tray of Italian wedding cookies

Photo by Laura Petrilla
Print
clock clock iconcutlery cutlery iconflag flag iconfolder folder iconinstagram instagram iconpinterest pinterest iconfacebook facebook iconprint print iconsquares squares iconheart heart iconheart solid heart solid icon
A tray of Italian wedding cookies

Italian Wedding Cookies


  • Author: Angela Bucco, Made by Teresa Talkowski

Description

Cookies fit for a celebration.


Ingredients

Scale
  • 6 eggs
  • 2 sticks of butter
  • 1/2 bottle lemon or orange extract
  • 5 cups all-purpose flour
  • 5 tsp baking powder
  • 1 cup sugar

For the Icing

  • 1 box powdered sugar
  • 1 /2 stick butter
  • 2 tbsp milk
  • 1 tsp vanilla
  • rainbow non-pareils to finish


Instructions

  1. Cream sugar and butter until light and fluffy.
  2. Add eggs one at a time, then add extract.
  3. In a separate bowl mix together the flour and baking powder. Add to the butter mixture.
  4. Form cookies and bake at 350 degrees for 13 minutes.
  5. Remove from the pan and place in a large pot lined with dish towels and cover pot immediately.
  6. Mix the frosting ingredients until well incorporated. When the cookies have cooled completely, ice and sprinkle with rainbow non-pareils.

Recipe by Angela Bucco
Made by Teresa Talkowski
Styling by Anna Franklin
Photography by Dave Bryce and Laura Petrilla

Subscribe to TABLE Magazine‘s print edition.
Judy’s Lady Locks

0
Small white cookies, lady locks, on a dark brown background

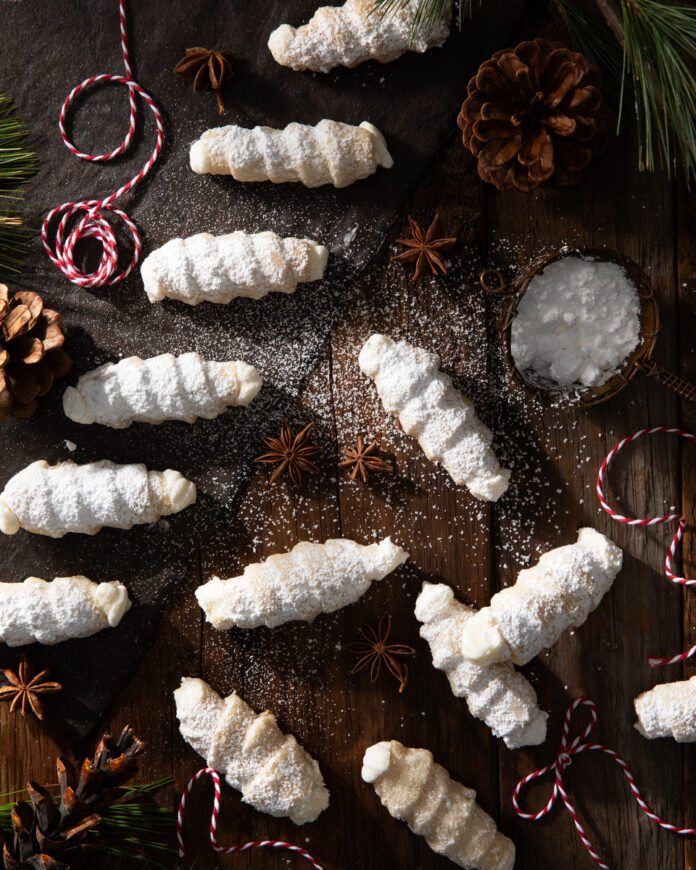
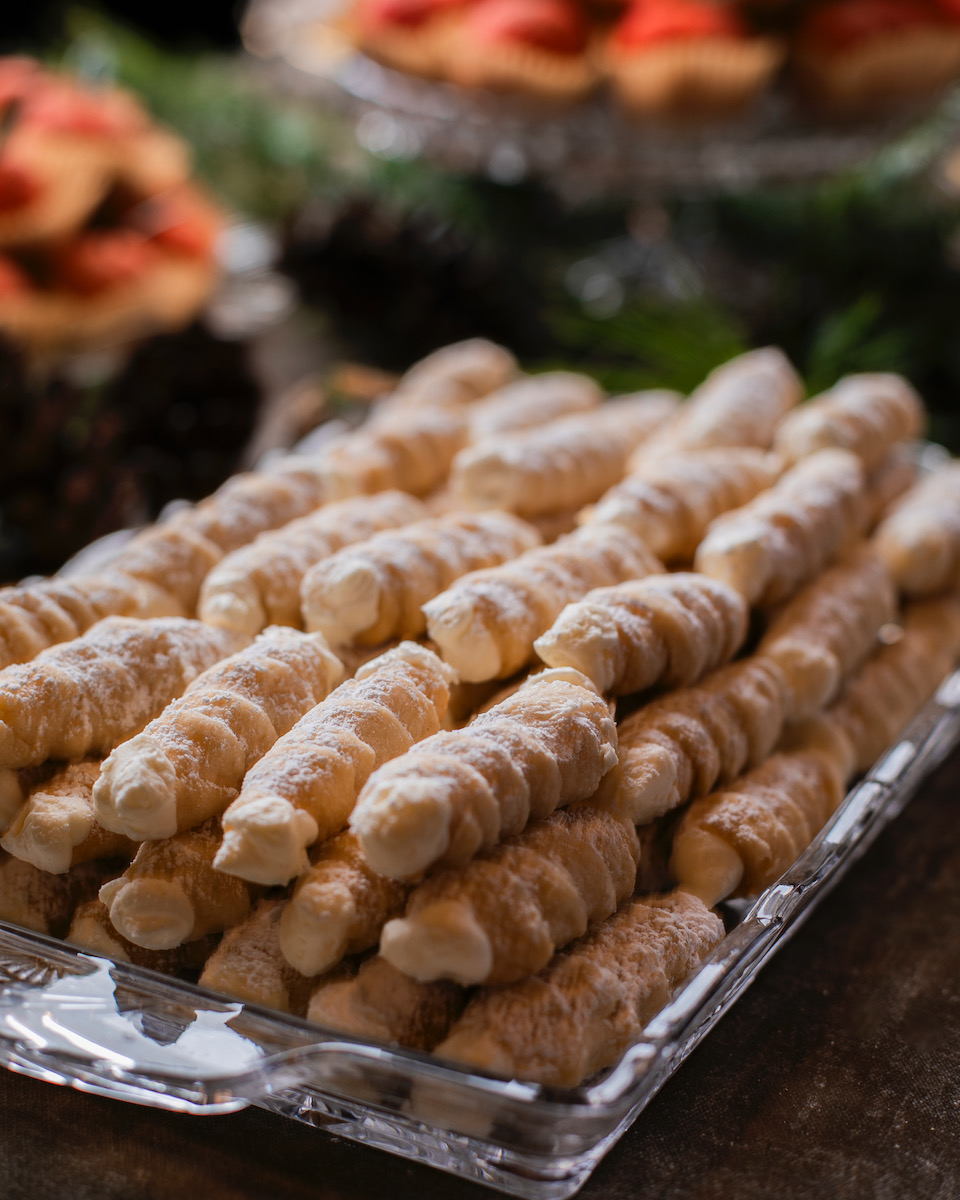
Lady Locks, like the cookie table, are a holiday tradition for many Pittsburgh families. This recipe by Alyssa Blair will yield a baked good as sweet as making these cookies is with your babushka. Plus, they have a rich and interesting history, as they came to Pittsburgh with the Eastern European immigrants that also gave the city its signature food, pierogies. Dive into these flakey and delicious bundles of cream filled goodness. 

A table of lady locks
Photo by Laura Petrilla

The Origin of Lady Locks

Lady locks, also known as “baker’s hats” or “cannon balls,” are a type of pastry that originated in Eastern Europe, particularly in the regions of the former Austro-Hungarian Empire. They are made from a rich, buttery dough, often layered and rolled, then shaped into delicate spirals. The name comes from the pastries’ elegant appearance, resembling locks of hair. Their precise origin can be difficult to pinpoint, as variations exist in different cultures, but they remain a cherished dessert in many Eastern European households, including as part of many Pittsburgh cookie tables. 

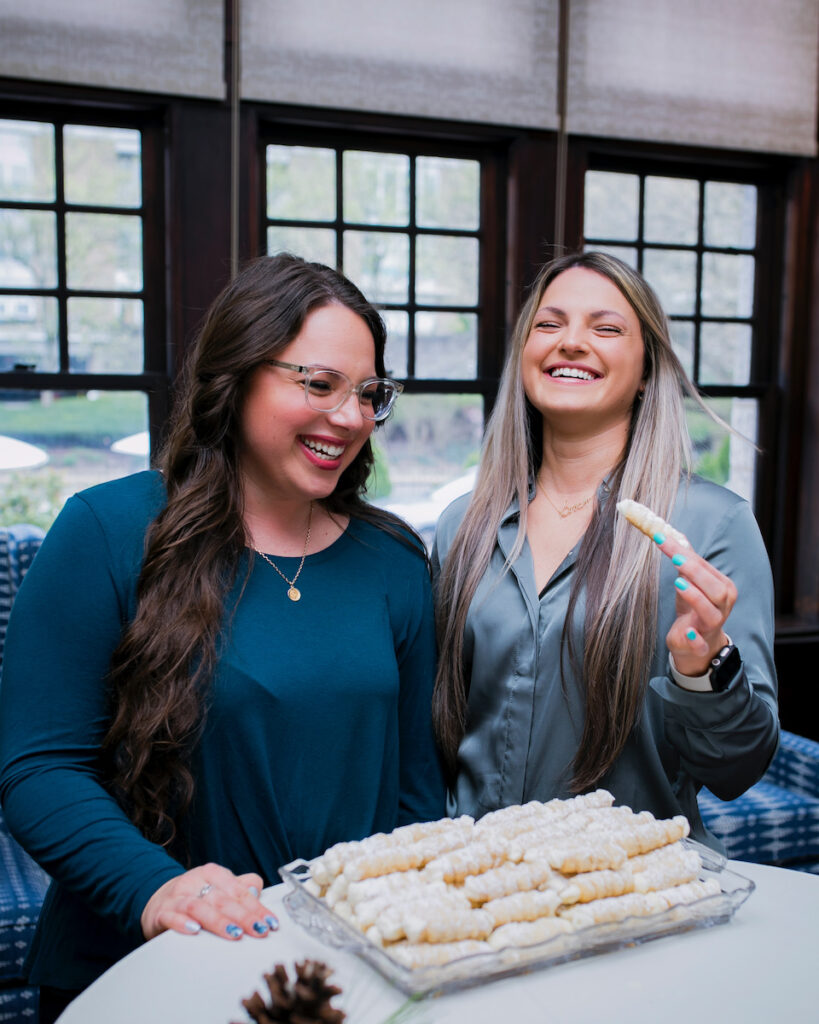
Two women enjoy lady locks
Photo by Laura Petrilla
Print
clock clock iconcutlery cutlery iconflag flag iconfolder folder iconinstagram instagram iconpinterest pinterest iconfacebook facebook iconprint print iconsquares squares iconheart heart iconheart solid heart solid icon
A table of lady locks

Judy’s Lady Locks


  • Author: Alyssa Blair

Description

A tasty tradition.


Ingredients

Scale

For the Shells

  • 2 cups margarine
  • 3 1⁄4 cups flour
  • 2 tbs sugar
  • 1⁄2 tsp salt
  • 3⁄4 cups milk

For the Filling:

  • 4 cups powdered sugar
  • 1⁄2 pint whipped cream
  • 3 tsp vanilla extract
  • 3 cups margarine, room temperature


Instructions

  1. Preheat oven to 350 degrees.
  2. Mix together the butter and sugar in the bowl of a stand mixer until light and fluffy (approximately 3-4 minutes). Incorporate the milk into the mixture, then add the flour and salt until well combined. Chill dough overnight or for a minimum of 2 hours.
  3. Divide dough into 4 batches. Roll out on a floured surface to 1/8 inch thickness and cut into 1 /2” wide strips that are approximately 10 inches long.
  4. Wrap the strips around Lady Locks molds and place on a baking sheet, 2 inches apart. You can also use clothespins that are wrapped in foil if you don’t have Lady Locks molds.
  5. Bake at 350 degrees for 13-15 minutes depending on your oven, or until the shells start barely browning.
  6. Remove from the oven and allow to cool for 2-3 minutes before removing them from the molds. Tip: Do not allow the shells to cool completely on the mold. They will crack and crumble more easily if they are completely cooled.
  7. After removing the shells from the molds, set aside to cool completely and prepare your filling.
  8. Add powdered sugar, cream, and vanilla to the bowl of a stand mixer and mix for 5 minutes.
  9. Incorporate half of the margarine (3 sticks or 1 ½ cups) into the mixture and mix for another 5 minutes.
  10. Add the remaining 3 sticks (1 ½ cups) of margarine to the mixture and mix until light and fluffy for approximately another 5 minutes.
  11. Using a piping bag, fill each shell with the filling.
  12. Store in an airtight container until ready to serve.
  13. Before serving, sprinkle the top with confectioner’s sugar.

Enjoy your lady locks!

Recipe by Alyssa Blair
Styling by Anna Franklin
Photography by Dave Bryce and Laura Petrilla

Subscribe to TABLE Magazine‘s Print edition

Using the KonMari Method as a Fresh Start for Home Design

0
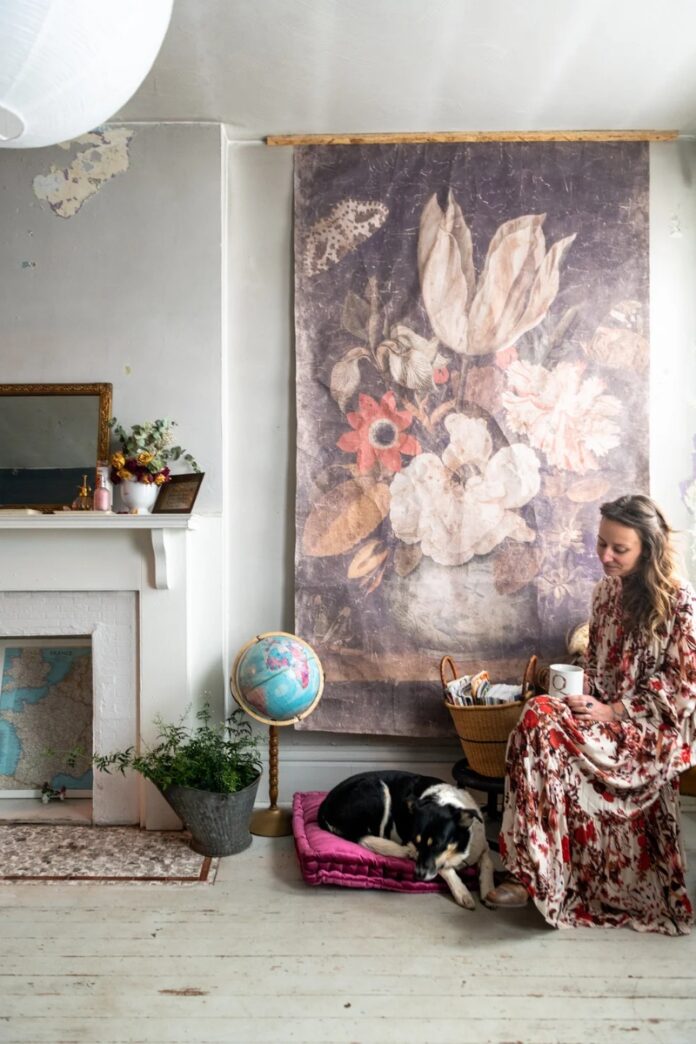
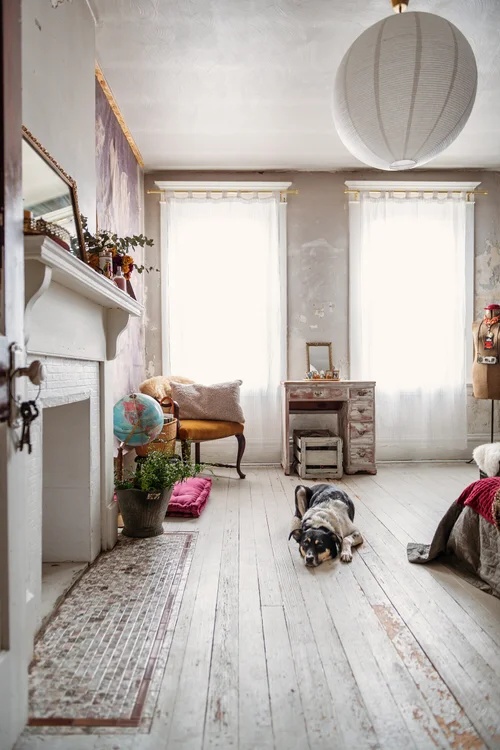
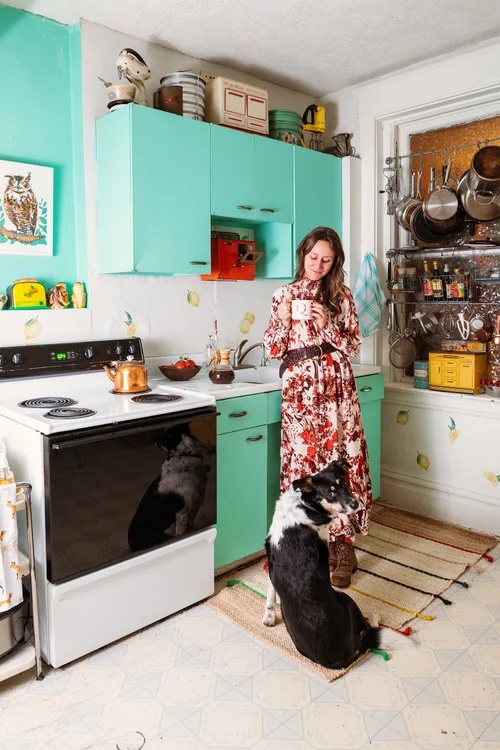
A woman, Quelcy Kogel, in a long floral dress sits with a coffee cup next to a large, faded floral tapestry and a sleeping black and white dog on a magenta cushion in a rustic, minimalist living room.

Long-time TABLE contributor Quelcy Kogel turned the end of the year into a fresh start and an affirmation of growth and forward movement, and she began the process at home.

With the a new year upon us, a symbolic “fresh” start, I found myself, like many, in an introspective state. Perhaps it was the effect of the calendar change, or perhaps it was wanting to make sense of a tough season of stretching myself too thin. Either way, cozied under the blanket of dark, winter nights, I spent a lot of time reflecting. I reviewed a decade of photos and social media posts. I journaled the heartbreaks, the milestones, and the lessons learned. On top of that, I reevaluated my relationships, my work, my values, as well as the backdrop for the whole decade – my home.

Designing a Home Using the KonMari Method

I felt my priorities shifting, and my home needed to reflect that growth. So, like a caterpillar, I spun myself into a protective cocoon in an effort to re-emerge with more clarity and a new look. Painting walls, investing in a new couch, updating light fixtures, and truly refining my style became the sort of obsessive project that kept me burning the midnight oil in my Polish Hill rental. I wasn’t just making design choices. I was making life choices. Here I was practicing the mantra I had put in place for the new decade: less to have more.

I didn’t mean less in the very Instagrammable sense of the word – a muted wall, a fiddle leaf fern, a sharp shadow, and only a hint of furniture in sight. I meant “less” as a lens, as a means of evaluation to have more energy, more focus, more fullfilment, and more calm. After all, I do love things. I love flea markets, antique shops, and also surrounding myself with storied objects.

Making a Fresh Start

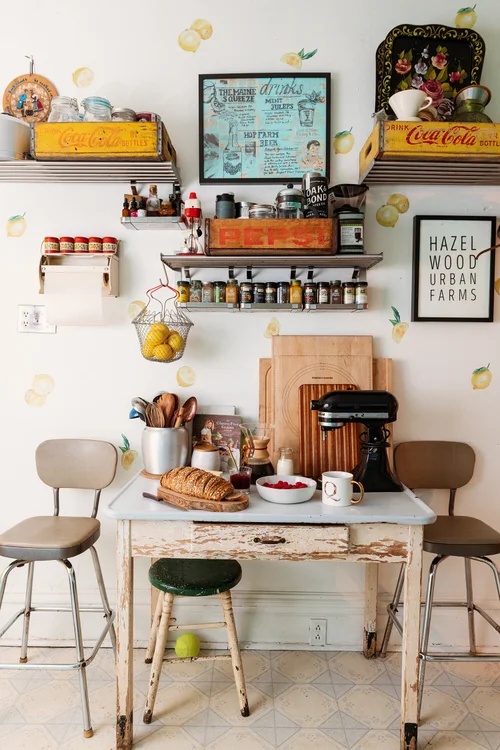
As a food and prop stylist, there’s a certain justification for my maximalist leanings. My apartment is like Mary Poppins’ magical carpet bag. An art director will make a request, I can root around and reemerge with a piece to fill a space and round out a composition. Yet, the line between “necessity” and overwhelming was becoming blurry, so I somewhat subconsciously revisited Marie Kondo, the now-household name behind the book, The Life-Changing Magic of Tidying Up.

Her “KonMari” brand of minimalism asks the simple yet profound question, “Does this [object] spark joy?” Minimalism is about living with less, but Marie’s method champions living with what you cherish. It’s a process for honoring the person you are becoming, not the person you were in the past, and it looks different for everyone.

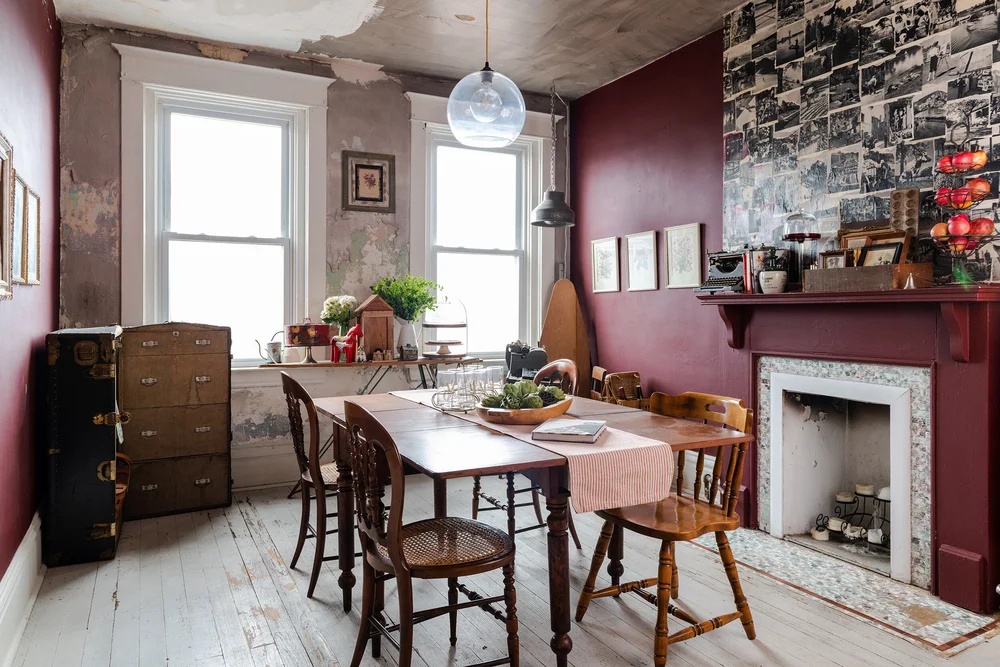
A vintage-style dining room with distressed white wooden floors, burgundy walls, a collage photo wall, and a wooden table with mismatched chairs, showcasing a maximalist home interior.

Personalizing the method even more, I like to evaluate in terms of, “is this [object, opportunity, relationship, etc] a ‘hell yeah!’ or a ‘hell no?’” In this way, I can protect my energy for what truly brings me joy and fulfils my purpose. It may start with a forest green, velvet sectional, but this philosophy extends to life and makes strides toward sustainability too.

“This process of honing the home is not about living with less. It’s about living with what you cherish. It’s about honoring the person you are becoming, not the person you were in the past, and it looks different for everyone.”

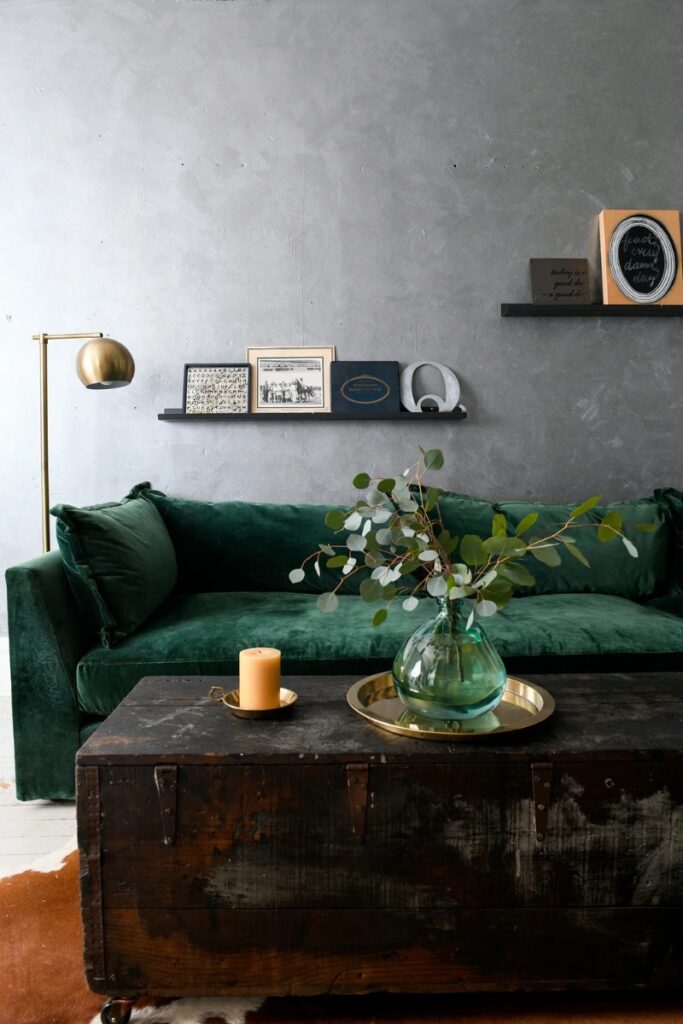
A deep emerald green velvet sofa sits against a textured gray wall, accented by a gold floor lamp and a dark antique wooden trunk used as a coffee table with a glass vase of eucalyptus and a candle on a brass tray.

Continuing to Live by the KonMari Method

Following the KonMari method, if we truly respect the objects we amass, we desire for them to be valued. This means investing in more quality pieces that will grow with us, not buying into trends for trends’ sake. For my style, that means aged, vintage pieces. I debated newer coffee tables, but my gut landed on paying a little more for an antique wooden trunk from Rustfarm (via Etsy). Picking up the trunk led to a beautiful exchange, a shared appreciation, and a piece that brings me joy every time I use it. (It helped that the owner had two Aussies. Herding dogs always bring me joy.)

Valuing objects also means releasing them to someone who will value them rather than hoarding them in an unseen corner or trashing them. I’m a huge proponent of Goodwill and Construction Junction, and feel so fortunate to have a resource in Pittsburgh Center for Creative Reuse, which is now a near daily errand for me. In short, buy less, buy better.

Story by Quelcy Kogel
Photography by Erin Kelly

Subscribe to TABLE Magazine’s print edition.

Beyond the Countertop, The Endless Possibilities of Armina Stone

0
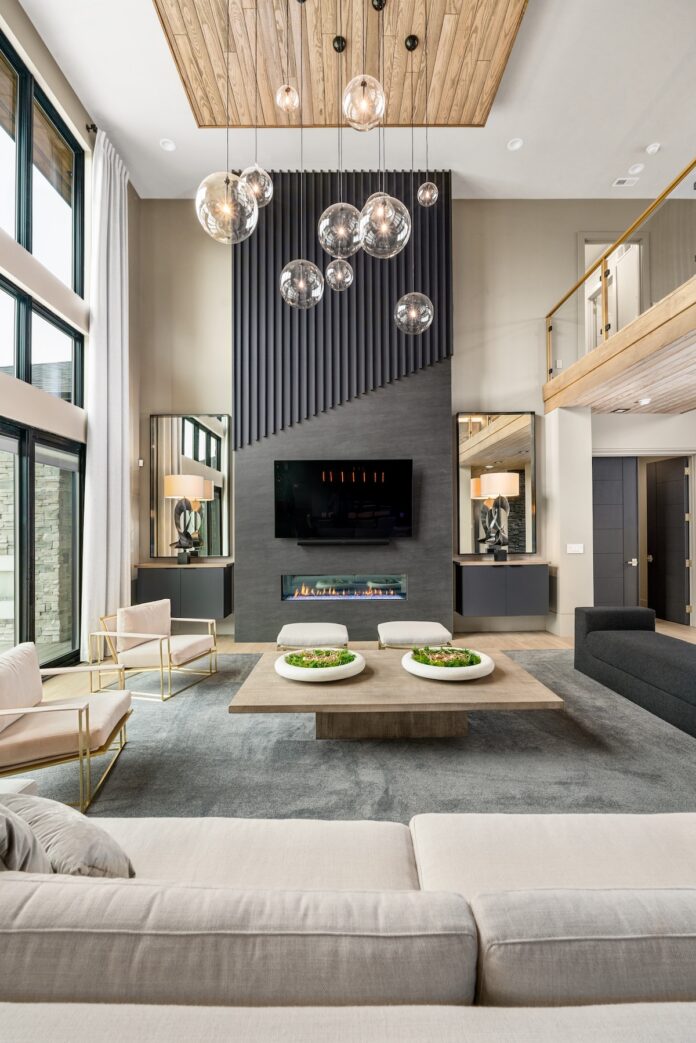
A grey and tan living space with floor to ceiling windows and a floor to ceiling dark grey stone fireplace surround by Armina Stone.

In the world of interior design, stone has been celebrated for its beauty and durability. But at Armina Stone, they believe that the potential of stone extends far beyond traditional applications like kitchen countertops. With a commitment to innovation and craftsmanship, they have redefined the boundaries of what can be achieved with stone transforming spaces into breathtaking works of art.

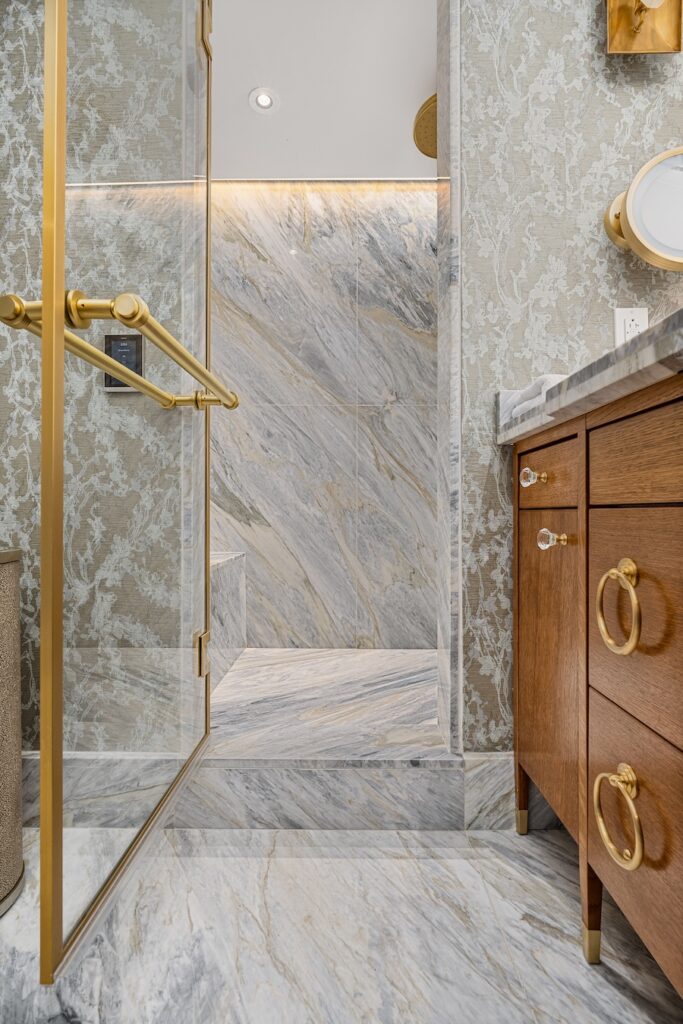
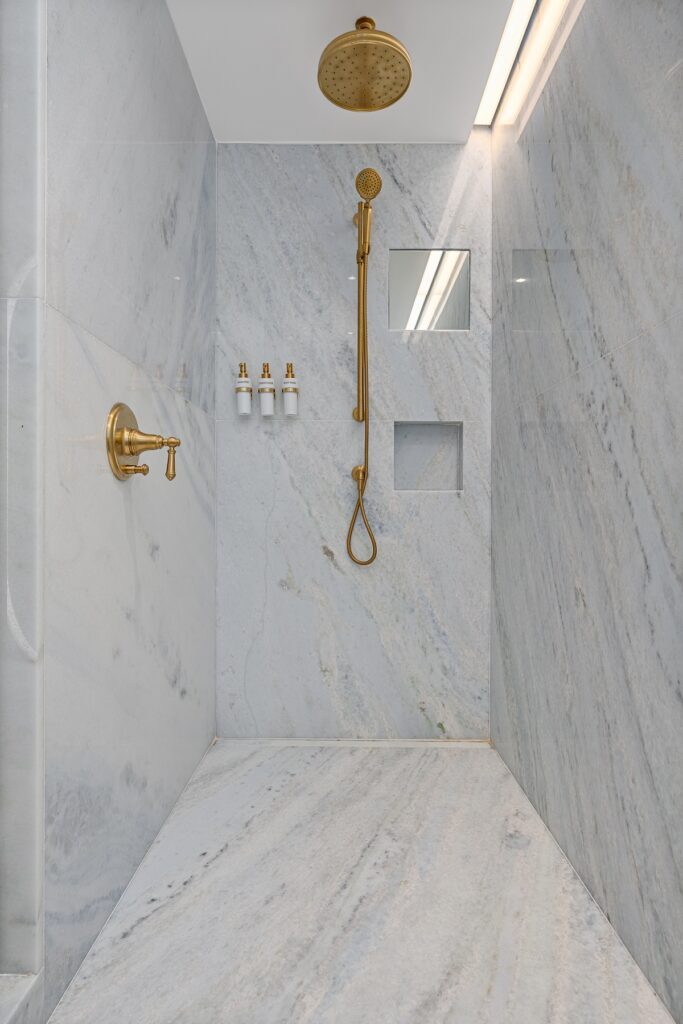
Kitchen waterfall islands and full height backsplashes, their expertise doesn’t end there. Each project is an opportunity to explore new ideas and push the limits of stone craftsmanship. Armina’s stone experts work closely with customers to create personalized kitchen spaces that reflect their unique style and needs. From sleek modern to timeless classic kitchens, their stone installations serve as the centerpiece of any kitchen, but they also inspire creativity in other areas of the home.

Beyond the Countertop, The Endless Possibilities of Armina Stone

Elevating Bathrooms

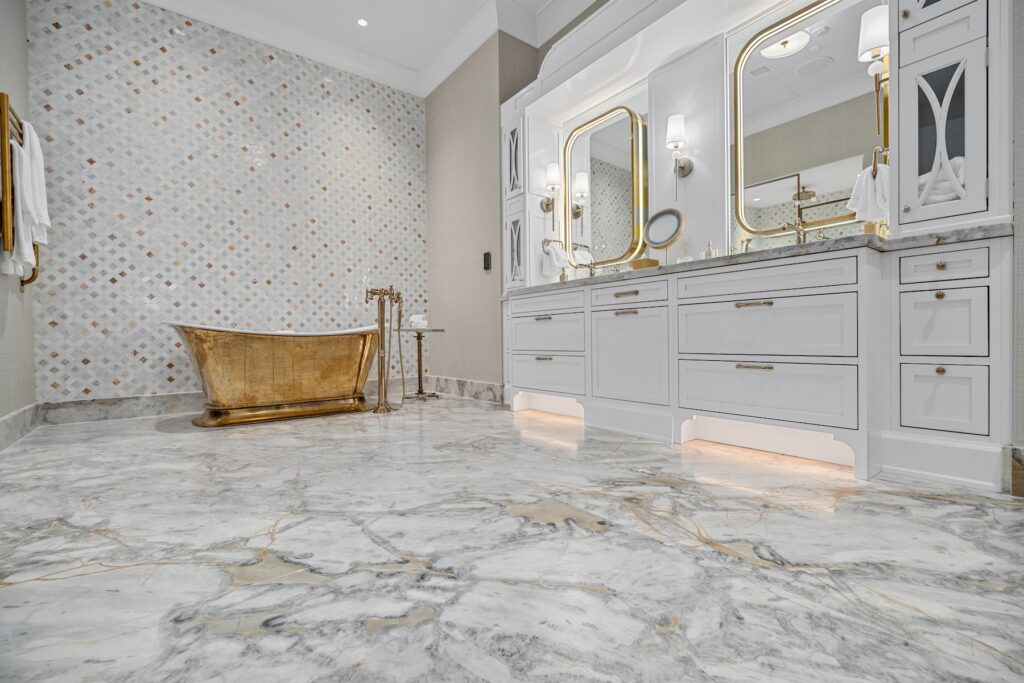
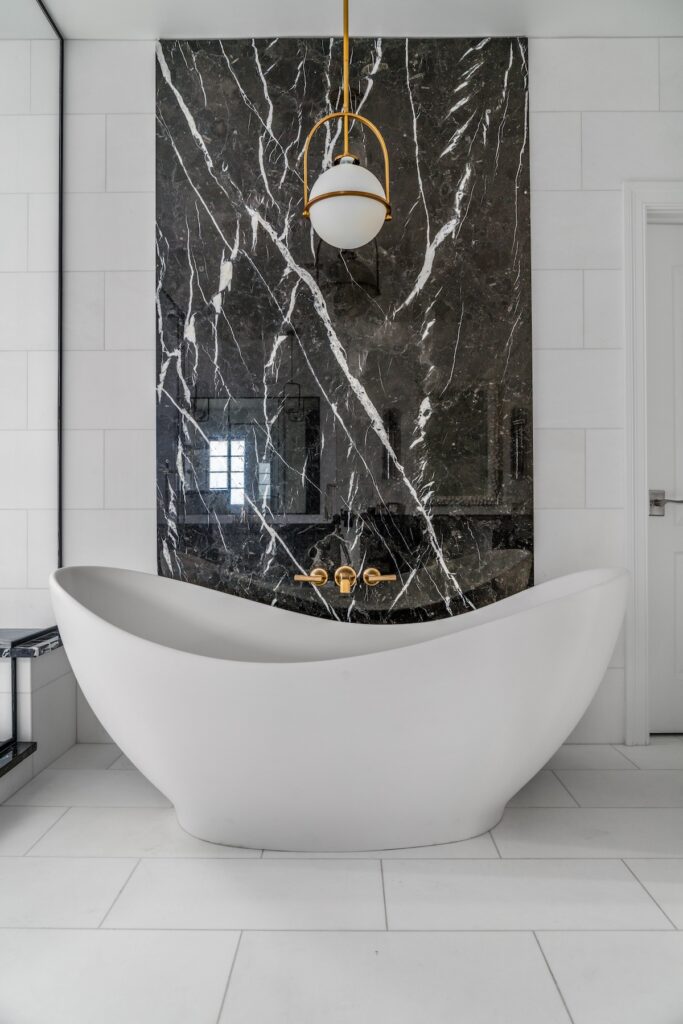
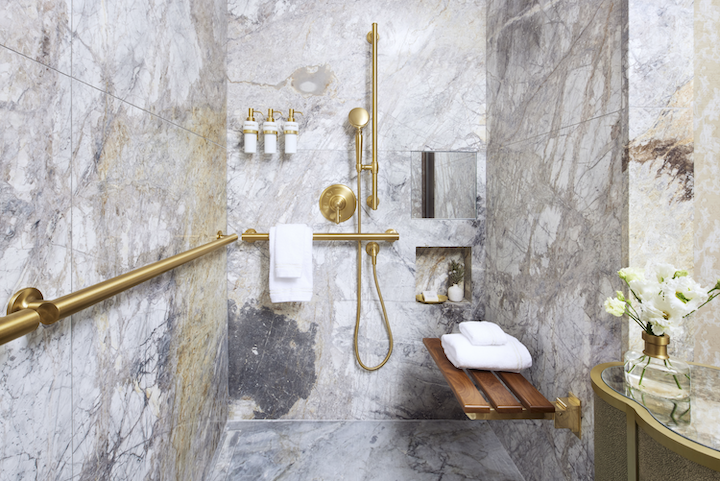
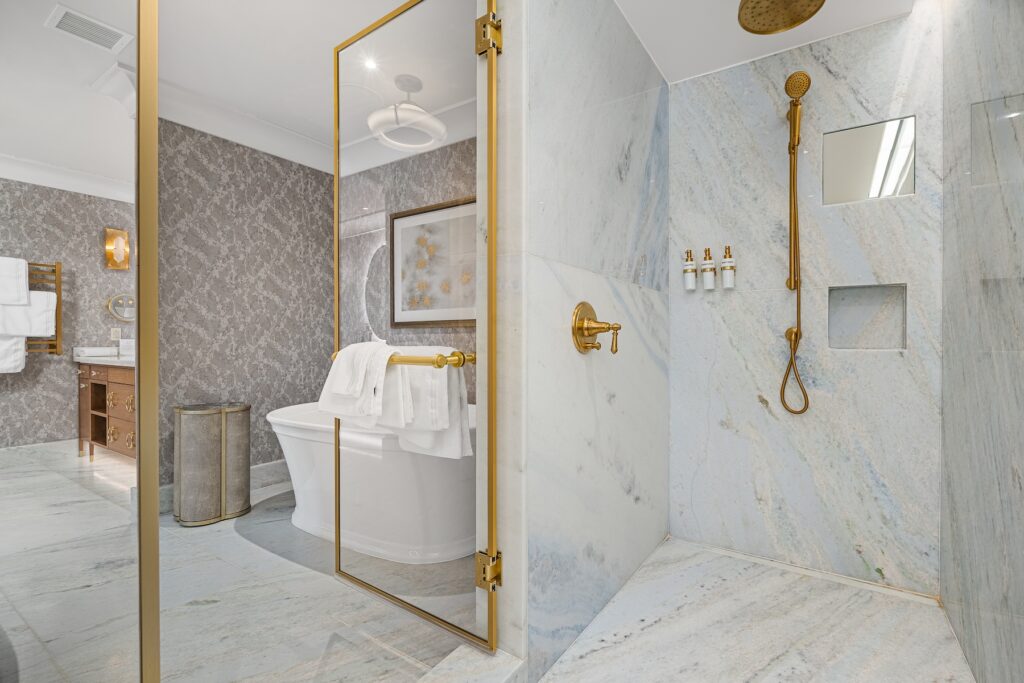
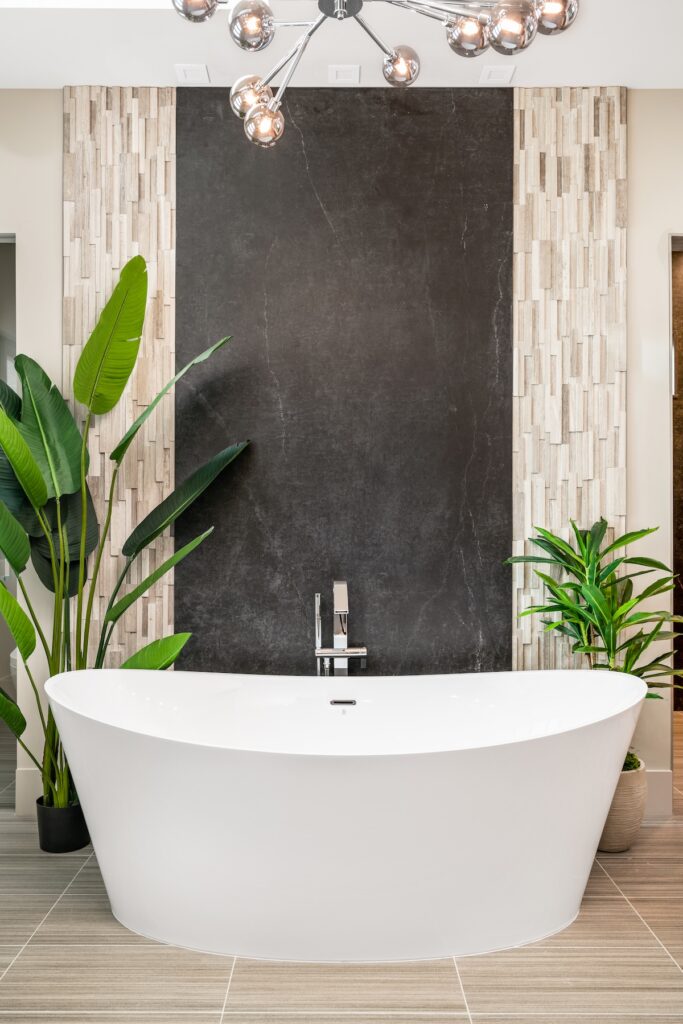
When it comes to bathrooms, Armina Stone’s expertise in stone goes beyond traditional bathroom vanity tops. Armina is at the forefront of bathroom design trends here in Pittsburgh mastering specialized techniques such as floor-to-ceiling shower walls that offer a luxurious and spa-like experience, or a more popular trend is the stone accent wall that serves as a striking backdrop for beautiful standalone bathtubs. Additionally, Armina Stone expanded their repertoire of applications with large slab flooring. This impressive flooring has been flawlessly executed recently throughout the renovated Nemacolin Resort, including all the guest room bathrooms adorned with lavish leathered marble.

Fireplace Surrounds

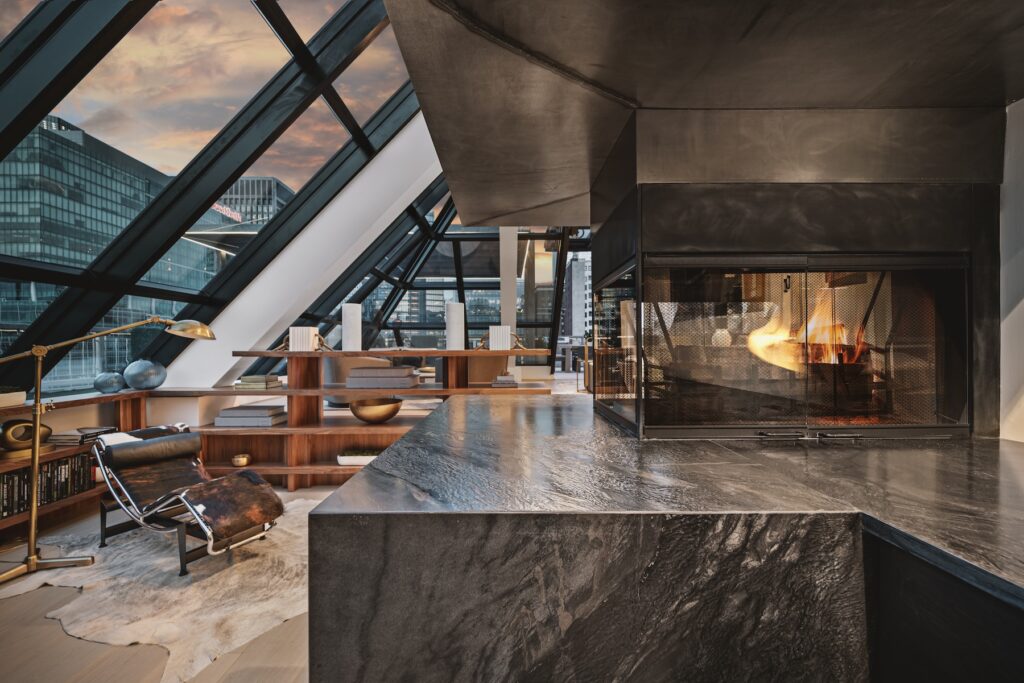
Armina Stone doesn’t just enhance kitchens and bathrooms, their work extends into living areas where stone can create a stunning focal point. Fireplace surrounds are one of their specialties and they take immense pride in their craftsmanship. The trend of floor-to-ceiling fireplaces wrapped in natural stone such as quartzite, marble or bold granite is creating dramatic statements in today’s homes. Armina Stone excels in these challenging installations that often requires larger teams and special equipment. Achieving a flawless install demands perfection in fabrication, as even the slightest error can compromise the entire look. Their team is dedicated to this level of precision with using the highest quality robotic technology for meticulous execution. Armina Stone understands that fireplaces are not just a source of warmth, but a breathtaking centerpiece. 

Homespun Pubs

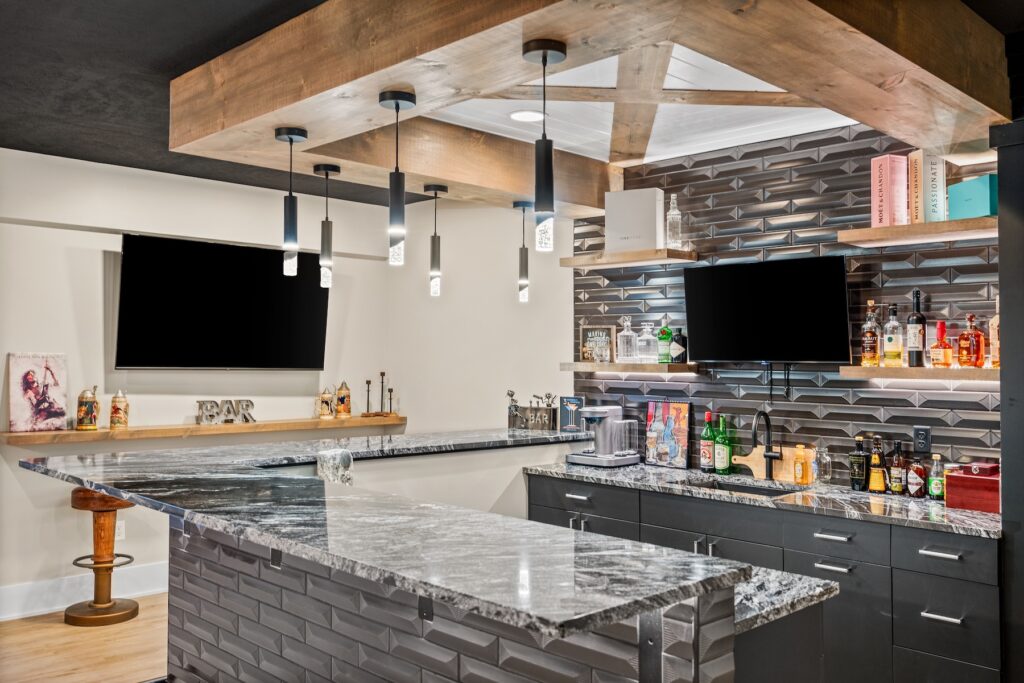
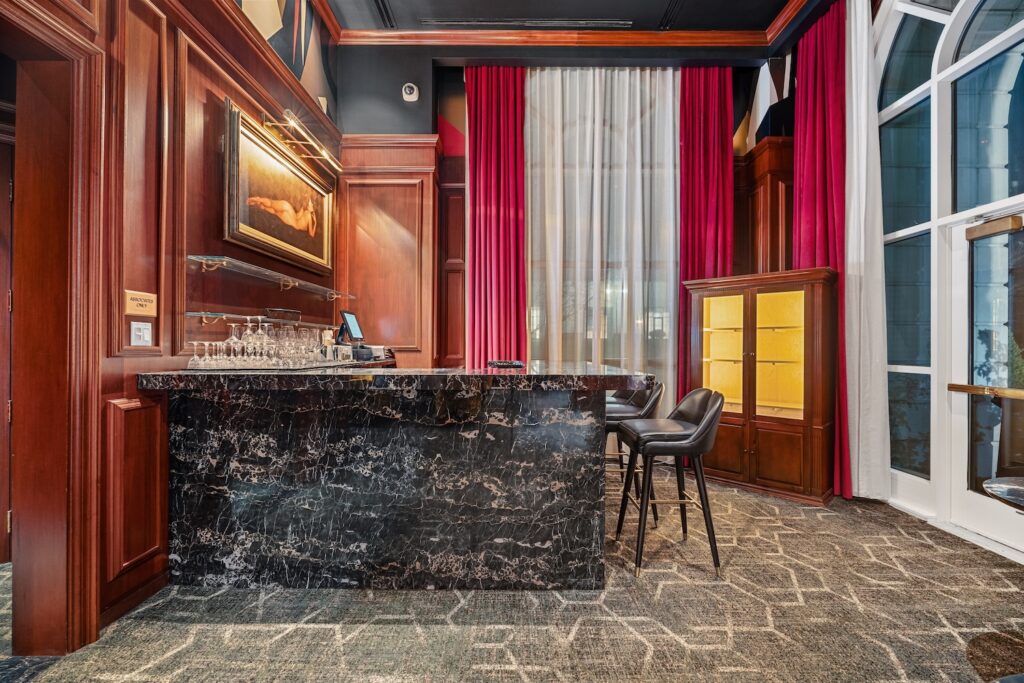
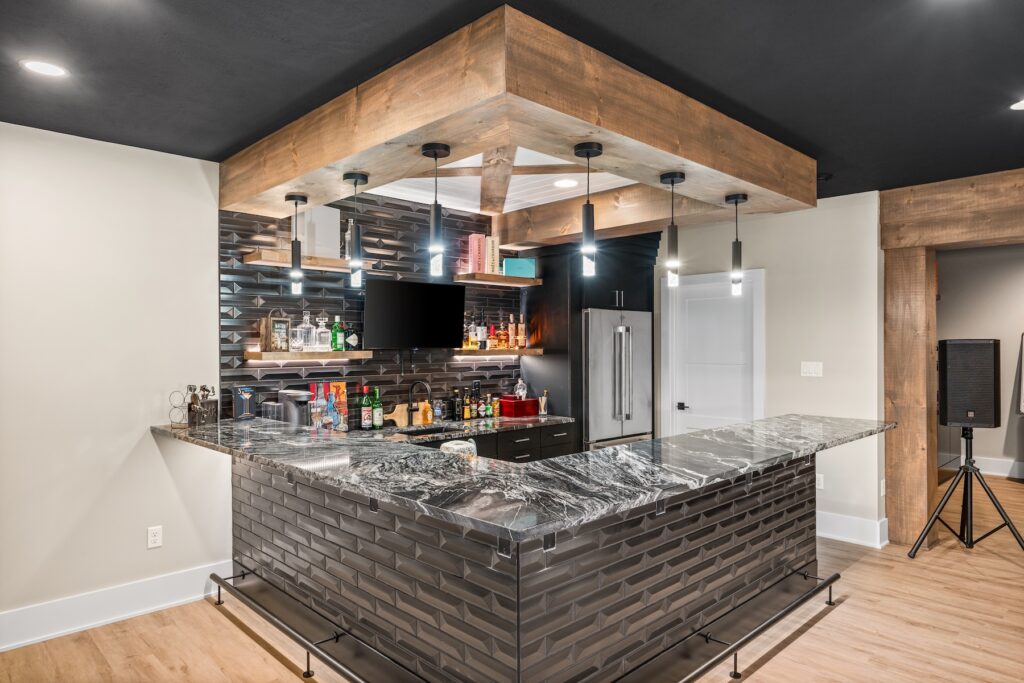
The pandemic has sparked a trend of at-home entertaining prompting many homeowners in Pittsburgh to elevate their basement bars that rival the local pubs. This newfound focus on creating spaces for social gatherings has led to the use of bold stones and unique designs that transform basements into vibrant entertaining areas. At Armina Stone, the diverse inventory offers a wide selection of stones that allow homeowners to embrace daring, bold designs, such as rich black stones that evoke a speakeasy vibe. With these stunning options, homeowners can craft personalized bar experiences that make their basement the perfect setting for hosting family and friends. 

Bistros and Beyond

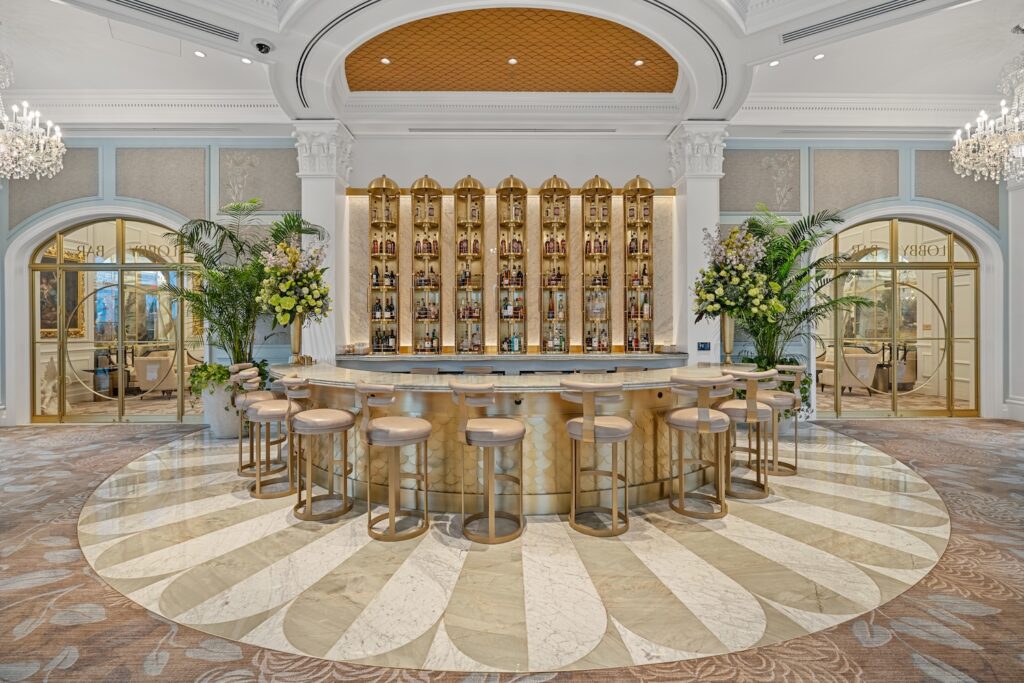
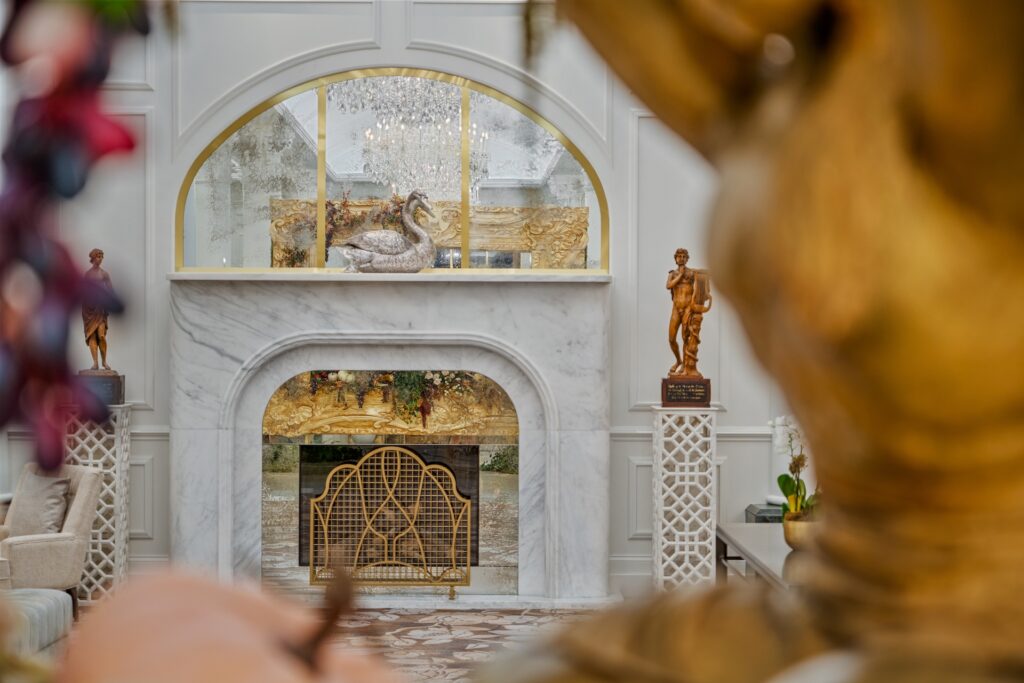
While Armina Stone is well known for stunning residential projects, many may not realize the significant role they play in commercial and hospitality design. Their expertise also extends to creating beautiful spaces in the region’s restaurants and hotels where guests are often enjoying their experiences on surfaces crafted by Armina Stone. Standout restaurants include the popular Lawrence Hall, Bar Botanico, The Vandal, and Convive in Lawrenceville. They also contributed to Pittsburgh’s Landing Hotel, adjacent to Rivers Casino, with exquisite stonework throughout including the reception desk, lobby bar, fireplace tables, and more. Armina Stone’s pride shines through in the recent work of the multi-million-dollar Nemacolin renovation at The Grand Lodge and The Chateau in Farmington, PA. Masterful craftsmanship is highlighted by hand crafted marble fireplaces, guest room bathroom showers and walls, intricate slab marble flooring, and premium hand-made edge profiles, showcasing their dedication to excellence in every detail.

Since 2015, Armina Stone has been pushing the boundaries of what is possible with stone, redefining design possibilities for homeowners, designers, builders, and developers throughout Pittsburgh and the Mid-Atlantic region. As a leader in the industry, they pride themselves on their global access to an extensive range of stones, allowing them to bring any vision to life. The endless possibilities of stone applications are limited only by your imagination.


To learn more about Armina Stone and explore their extensive inventory visit arminastone.com. For the latest stone projects and design inspiration follow them on Instagram (@arminastone).

Check out more possibilities with Armina Stone below.

Story and Photography by Armina Stone

Subscribe to TABLE Magazine‘s print edition.

Excursion, the Portrait of Edgar Kaufmann Sr. at Fallingwater

0
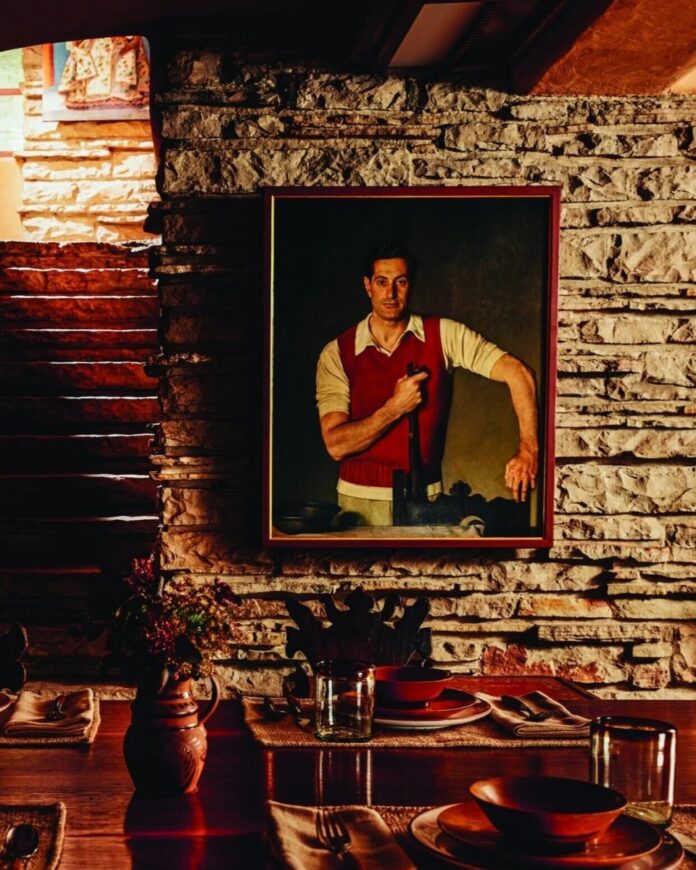
A framed portrait of Edgar Kaufmann Sr. in a red vest and white shirt, holding a walking stick, hanging on a textured stone wall above the set dining table at Frank Lloyd Wright's Fallingwater.

The portrait of Edgar Kaufmann Sr., Excursion, was commissioned by Liliane Kaufmann from its artist, Victor Hammer. It was commissioned in 1929 while the artist was living in Florence, Italy. Hammer holds a special place within the Kaufmann family history as Edgar Kaufmann, Jr. studied painting under Hammer’s tutelage in Europe in the 1930s. The Fallingwater collection also includes examples of his typographic work. The painting was done nearly a decade before the completion of Fallingwater, while the family vacationed in Bear Run cabin. Edgar Sr. is portrayed in an open collared shirt and sweater vest and posed holding a walking stick. It’s in tranquil contrast to his workaday suit-and-tie personae.

All About Excursion, the Portrait of Edgar Kaufmann Sr. at Fallingwater

A split-face comparison image of the portrait of Edgar Kaufmann Sr. showing the pre-conservation side (right) with a yellowed varnish layer and the recently conserved side (left) revealing the original colors and detail of his face and red sweater.

Though eighty years old, the portrait was not always displayed at Fallingwater. It moved from the family’s apartment in the William Penn Hotel to their Richard Neutra house in Palm Springs, California. When it arrived at Fallingwater in 1963, the year the house and its land were entrusted to the Western Pennsylvania Conservancy by Edgar jr., it was hung on the east wall of the main floor, its present location, overlooking the dining table. Inherited upon his father’s death in 1955, Excursion officially came into the collection as a gift from Edgar jr. in 1989 and was displayed in the offices of the Western Pennsylvania Conservancy and later in the director’s office at Fallingwater before returning to its place of pride facing the hearth in 1994.

Recently conserved, a process that included removing decades of grime, soot, and nicotine build-up which gave Kaufmann a jaundiced appearance. Small details were also revealed, such as the knitted ribs of Kaufmann’s sweater vest, that had become hidden over time. Like Kaufmann himself, who relished entertaining in his weekend house, Excursion continues to welcome each visitor to Fallingwater.

Story by Scott W. Perkins, Director of Preservation and Collections
Photography by Andrew Burkle
Production by Burkle Hagan
Shot on Location at Fallingwater Thanks to the Western Pennsylvania Conservancy

Subscribe to TABLE Magazine’s print edition.

Peach Cookies

0
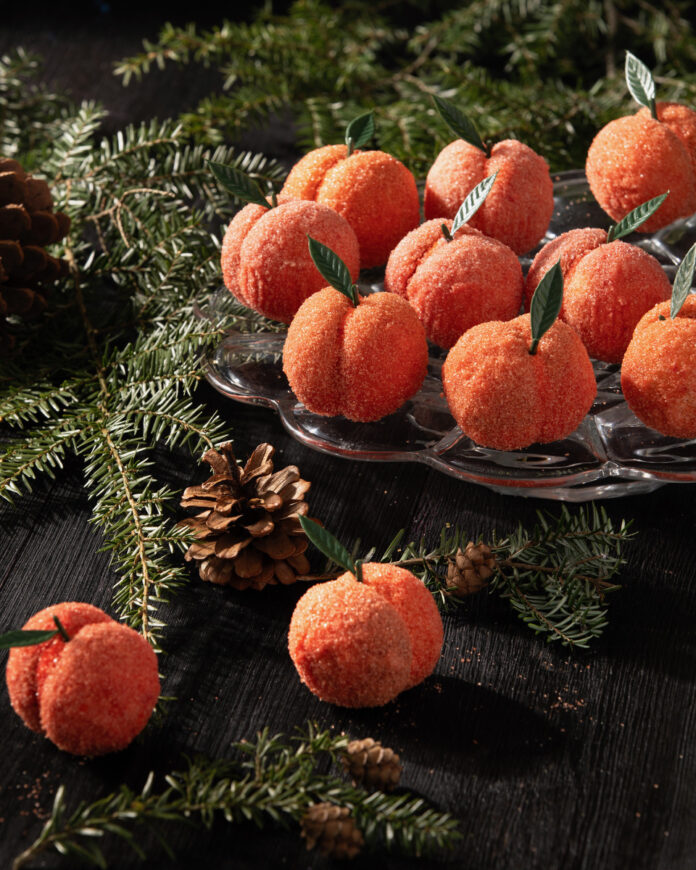
Peach cookies that look like peaches set on a Christmas background

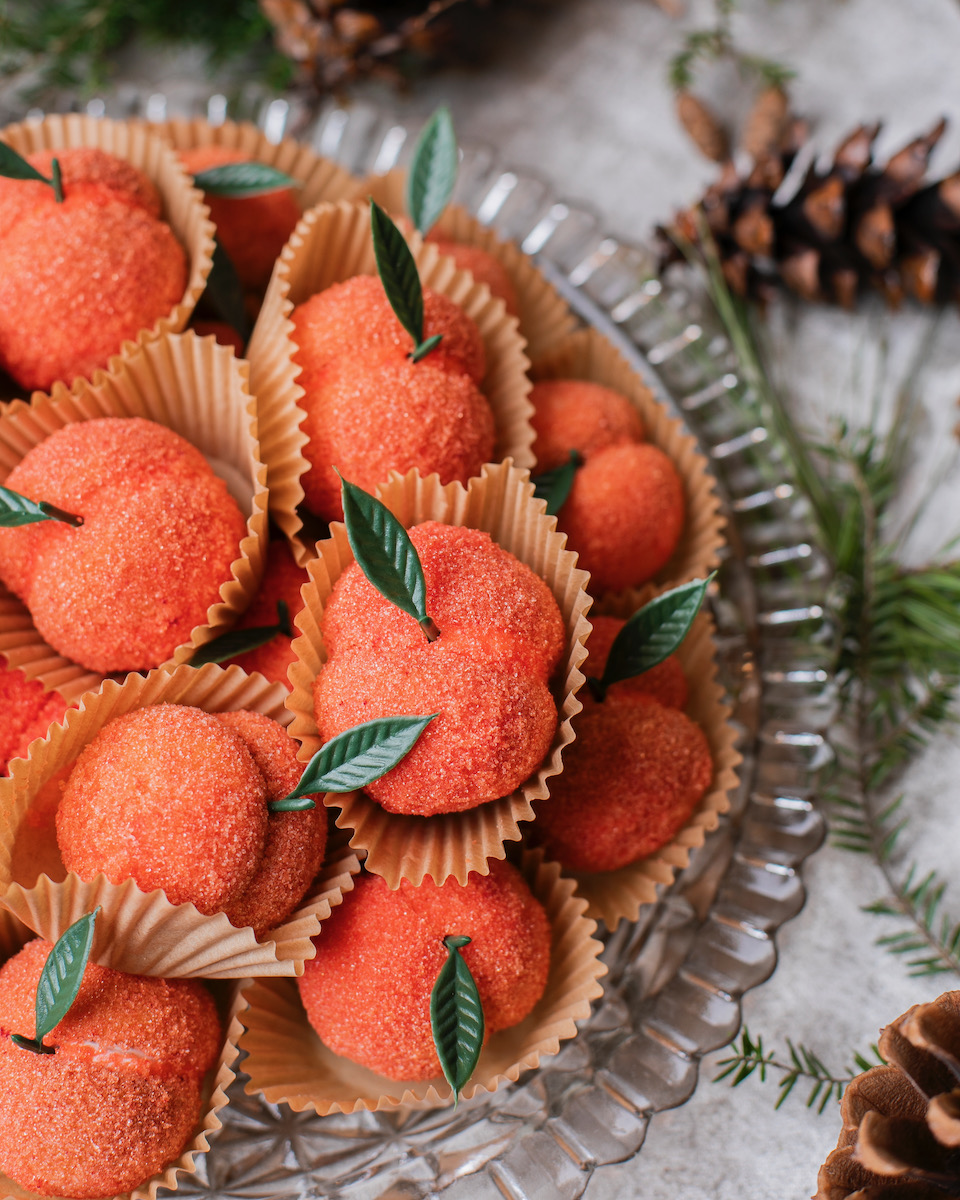
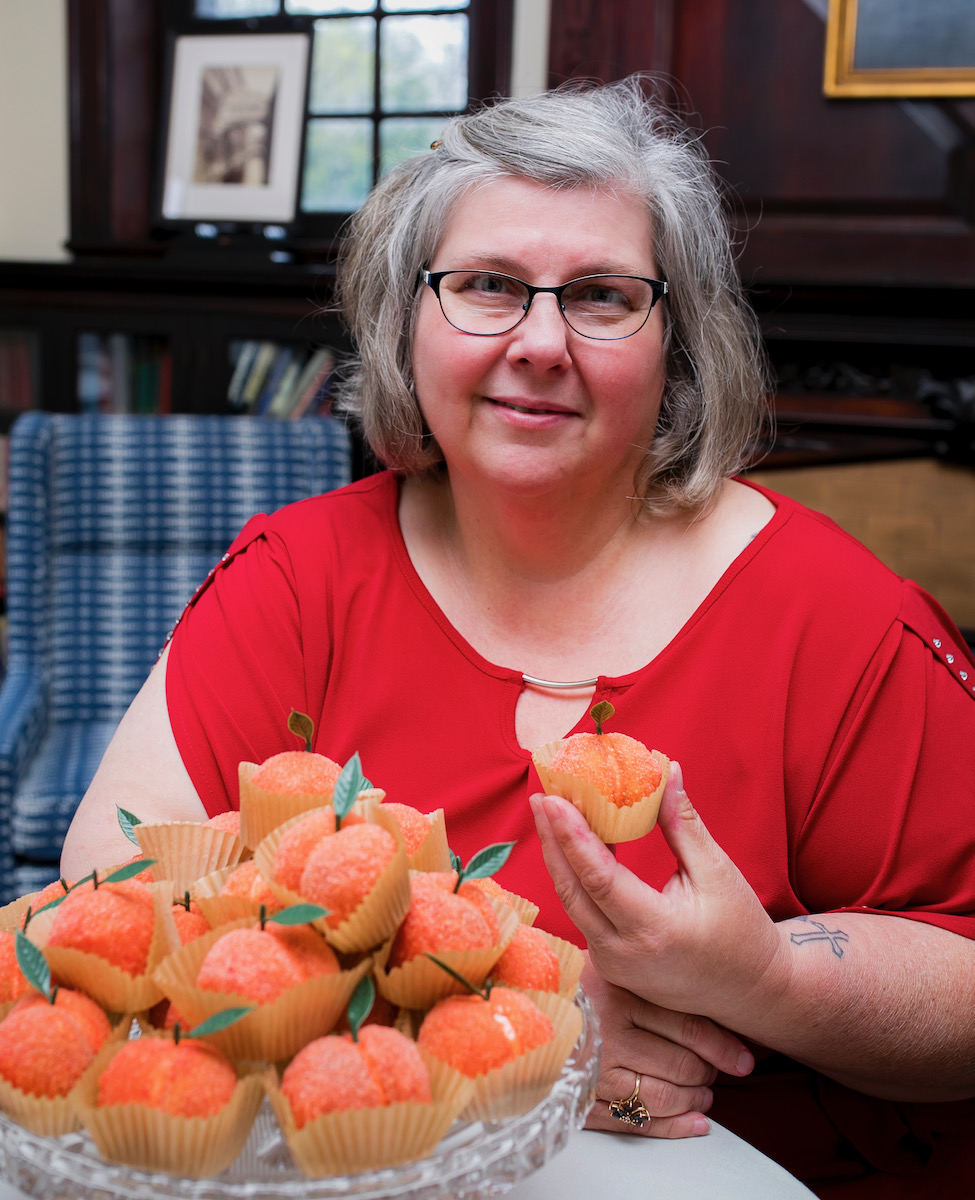
This Peach Cookies recipe blends fruit flavors with the sweet richness of a sugar cookie. Lori Willis brought this recipe to our cookie table, and it’s both beautifully presented and a delicious treat! Just check out how much detail she put into making them look like real peaches. That’s true artistry. For another peach treat, try our Peach Donuts with Donut Peaches.

Orange cookies that look like little peaches on a piece of glassware
Photo by Laura Petrilla

Picking the Right Peach Jam for Your Peach Cookies

Peach Cookies get some of their wonderful flavor from the jam used in the filling. So, you want to be intentional about the kind of jam that you choose. If you’re really thinking ahead, you can homemake peach jam. However, no judgment if you don’t have time for that, because there’s plenty of great peach jam out there on the shelves. Sarabeth’s is great for baking, as is Bonne Maman and Stonewall Kitchen.

Lori Willis, a woman with white hair in a red shirt, sits in front of her peach cookies

Photo by Laura Petrilla
Print
clock clock iconcutlery cutlery iconflag flag iconfolder folder iconinstagram instagram iconpinterest pinterest iconfacebook facebook iconprint print iconsquares squares iconheart heart iconheart solid heart solid icon
Peach cookies that look like peaches set on a Christmas background

Peach Cookies


  • Author: Lori Willis

Description

They even look like peaches!


Ingredients

Scale

For the Peach Cookies

  • 1 ¾ tsp baking powder
  • ¼ tsp salt
  • 10 ½ tbsp softened butter
  • ¼ cup brown sugar and 1/3 cup white sugar
  • 1 egg
  • 2 tbsp sour cream
  • ¾ tsp vanilla

For the Filling and Coating

  • peach jam
  • 6 tbsp milk, divided
  • red and yellow food coloring or peach jello
  • ½ cup sugar


Instructions

  1. Preheat oven to 375 degrees.
  2. Cream butter, sugar, and brown sugar at medium speed for 1 minute. Add sour cream, egg and vanilla and mix until well-blended.
  3. Add dry ingredients.
  4. Scoop 1 tbsp dough into balls, roll, and bake 14-15 minutes.
  5. Allow cookies to cool. Spread 1 tsp of jam across bottom of cookie, and sandwich 2 cookies together.
  6. To decorate, place 3 tbsp milk with red food coloring, and 3 tbsp of milk with yellow food coloring into separate bowls. Brush each cookie with both the red and yellow colored milks, then dip the painted cookie into sugar.

Enjoy your peach cookies!

Recipe by Lori Willis
Styling by Anna Franklin
Photography by Dave Bryce and Laura Petrilla

Subscribe to TABLE Magazine‘s print edition.
Lemon Curd Bars

0
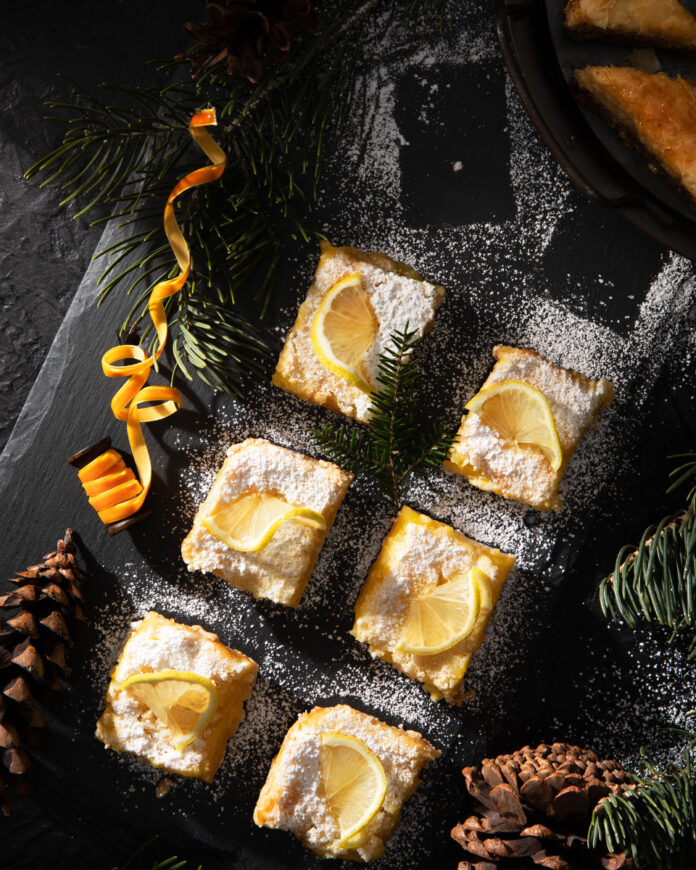
Lemon bars on a black tabletop, covered in powdered sugar

It’s easy to see why these Lemon Curd Bars won third place at our cookie table competition. They’re tasty, easy and fun to make, not too sweet, and are an adaptation of a recipe from the classic cookbook Joy of Cooking. 

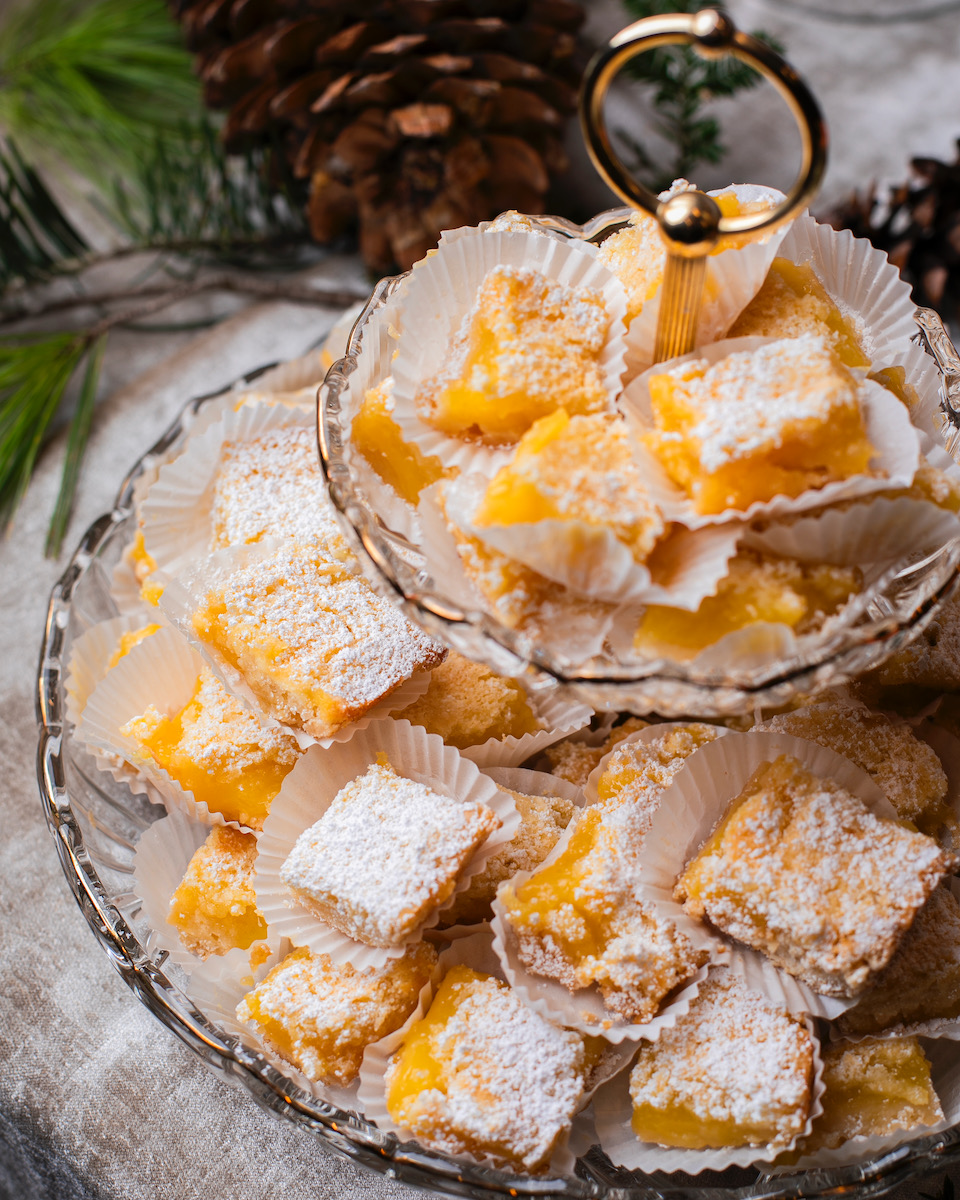
Lemon bars topped with confectionary sugar staged for a party
Photo by Laura Petrilla

Where Do Lemon Bars Come From?

The combination of a shortbread crust with a tangy lemon filling became popular in American cookbooks during the 1930s and 1940s. The simplicity and refreshing flavor of lemon bars made them a favorite for home bakers. A traditional lemon bar consists of a buttery shortbread crust. The crust is then topped with a custard-like filling made from lemon juice, sugar, eggs, and flour. Pastry chefs often dust them with powdered sugar before serving them. By the mid-20th century, people had fallen in love with lemon bars. They’re a staple at potlucks, family gatherings, and bake sales, beloved for their balance of sweet and tart flavors.

For some other lemon recipes, try our Aphrodisiac Lemon Saffron Tort or Low-Carb Keto Lemon Quick Bread. You can also adapt the recipe below to have more or less zest in it to your liking!

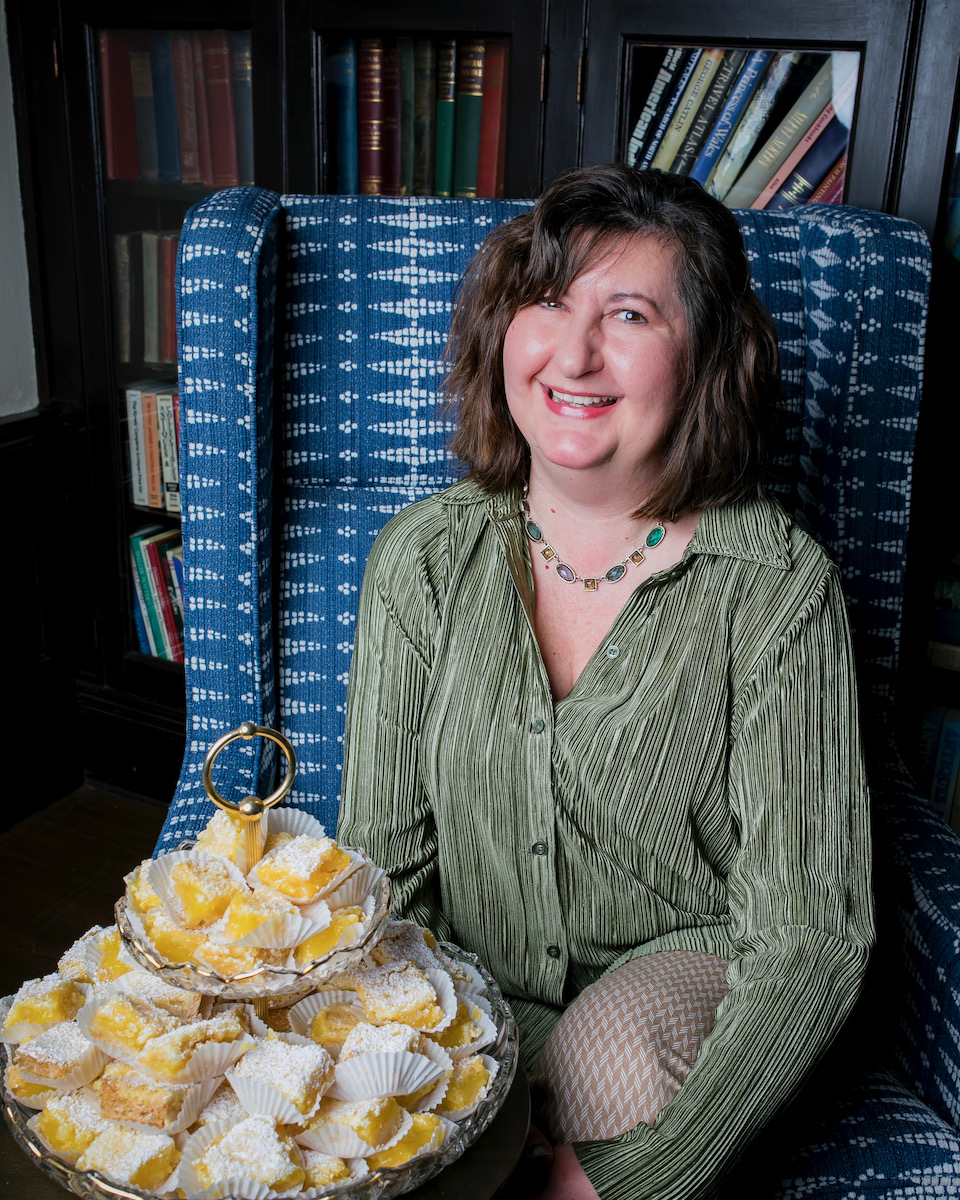
Gretchen Jenkins, a baker, holds a plate of lemon curd bars

Photo by Laura Petrilla
Print
clock clock iconcutlery cutlery iconflag flag iconfolder folder iconinstagram instagram iconpinterest pinterest iconfacebook facebook iconprint print iconsquares squares iconheart heart iconheart solid heart solid icon
Lemon bars on a black tabletop, covered in powdered sugar

Lemon Curd Bars


  • Author: Gretchen Jenkins

Description

A zesty, not-too-sweet confectionary concoction.


Ingredients

Scale
  • 1 1/2 cups plus 1/2 cup all-purpose flour, divided
  • 1/4 cup powdered sugar
  • 12 tbsp cold unsalted butter, cut into small pieces
  • 6 eggs
  • 3 cups sugar
  • Zest of 1 lemon
  • 1 cup plus 2 tbsp fresh lemon juice (4–5 lemons, divided)
  • Confectioner’s sugar for dusting


Instructions

  1. Sift together 1 1/2 cups of all-purpose flour and 1/4 cup confectioner’s sugar.
  2. Sprinkle the small pieces of butter over the top. Using a pastry blender, two knives, or your fingertips, cut in the butter until it is the size of peas in the mixture.
  3. Press the mixture into the bottom of a 13 inch x 9 inch baking pan and 3/4 inch up the sides.
  4. Bake in a 325 degrees preheated oven on the center rack until golden brown, 20-30 minutes.
  5. Set aside to cool.
  6. Reduce oven temp to 300 degrees.
  7. Whisk together 6 large eggs and 3 cups sugar until well-blended.
  8. Stir in grated zest of 1 lemon and 1 cup plus 2 tbsp fresh lemon juice.
  9. Sift 1/2 cup all-purpose flour into the mixture and stir until well-blended and smooth.
  10. Pour the batter over the baked crust; bake again until set, about 35 min.
  11. Remove the pan to a rack to cool completely before cutting into bars.
  12. Dust with confectioner’s sugar when cool, if desired.

Recipe by Gretchen Jenkins (adapted from Lemon Curd Bars Cockaigne recipe from Joy of Cooking)
Styling by Anna Franklin
Photography by Dave Bryce and Laura Petrilla

Subscribe to TABLE Magazine‘s print edition.
Don't Miss