Home Blog Page 121

Mama Maté Cocktail

0
A Mama Maté cocktail in a tall glass filled with ice, garnished with a dried lime wheel, with a green plant in the background.

The team at Bar Botanico brings cachaça, Brazil’s national spirit, to the forefront of the flavors in this cocktail, the Mama Maté. The earthy, dry, and bitter taste of cold-brew maté tea round out the funky, crazy aromatic, rum-related flavor. They come together in a refreshingly light sipper, perfect to pull out on the unexpectedly warm October days of “second summer.”

Mama Maté Cocktail Recipe

The talented team at Bar Botanico shared another memorable cocktail with TABLE Magazine. Their Coconut Coquito is a wonderfully celebratory drink and we highly recommend it, especially during the winter holidays.

Print

clock clock iconcutlery cutlery iconflag flag iconfolder folder iconinstagram instagram iconpinterest pinterest iconfacebook facebook iconprint print iconsquares squares iconheart heart iconheart solid heart solid icon
A Mama Maté cocktail in a tall glass filled with ice, garnished with a dried lime wheel, with a green plant in the background.

Mama Maté Cocktail


  • Author: Bar Botanico

Description

Infused with international flavors. 


Ingredients

Scale


Instructions

  1. Give all the ingredients a quick, vigorous shake with ice. Then strain and serve into a Collins glass over ice.
  2. Serve with a dehydrated lime garnish!

Recipe by Bar Botanico
Photography by Maggie Weaver

Subscribe to TABLE Magazine’s print edition.

Red Wedding Cocktail

0
A red cocktail in a coupe glass with an orange peel garnish, with a blurry background of bar bottles.
The Red Wedding is one of many Negroni riffs offered by Spork during Negroni Week.

Garden-to-table, gourmet-centric Spork rewrote their entire menu for Negroni Week, showcasing some of their delicious – and wacky – house-created riffs. Old-fashioned Moxie Cola gives the classic mix of gin and Campari a bubbly, sweet lift in their Nervegroni while rum and Angostura Amaro add a tiki flair in the Rock-A-Bony Tiki Negroni. They are keeping those recipes secret, however.

Red Wedding Cocktail Recipe

The riff they’ve shared with us, the Red Wedding, reworks the original, 1:1:1 negroni recipe to feature two Italian aperitifs: bittersweet Cynar and orange, herbal Aperol. Stir up this herbal, floral Negroni at home. If you enjoy it, you might want to learn more about What Makes the Perfect Negroni!

Print
clock clock iconcutlery cutlery iconflag flag iconfolder folder iconinstagram instagram iconpinterest pinterest iconfacebook facebook iconprint print iconsquares squares iconheart heart iconheart solid heart solid icon
A red cocktail in a coupe glass with an orange peel garnish, with a blurry background of bar bottles.

Red Wedding


  • Author: Spork

Description

Three spirits, one delicious cocktail. 


Ingredients

Scale
  • 1 oz Bluecoat Gin
  • 1 oz cynar
  • 1 oz Aperol
  • Orange peel, for garnish


Instructions

  1. Stir ingredients together with ice, and strain into a coupe glass.
  2. Express the orange peel over the glass, garnish, and enjoy!

Recipe by Spork
Photography by Maggie Weaver

Subscribe to TABLE Magazine’s print edition.

Pink Peppercorn Negroni

0
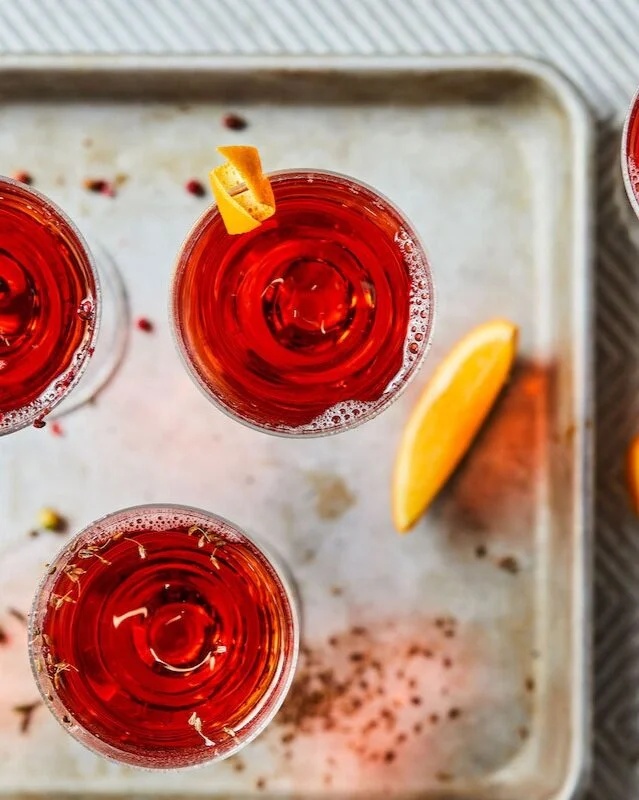
Three Pink Peppercorn Negronis in coupe glasses on a metal tray, garnished with orange peels and scattered pink peppercorns.

Simple with just a touch of sweet spice, the Peppercorn Negroni from De Fer Coffee & Tea is the Saturday midday pick-me-up we all need. Visit the cafe’s Strip District location and start with a coffee before working through the menu of negroni riffs, or break out your mixology skills and infuse your gin at home with pink peppercorns. Once you’ve started infusing flavors into the bottles in your liquor cabinet, you may never stop. It’s a delicious thing to do!

Infusing Flavors into Liquor for our Pink Peppercorn Negroni

Adding fresh, delicious flavors into your liquor cabinet is easy. Start with a clean mason jar, or other container with a light lid. Add copious amounts of orange or pineapple or coffee beans or, in the case of the Pink Peppercorn Negroni, pink peppercorns. Fill with liquor, and then be patient. Let the mixture sit at least 48 hours. Some mixologist do their steeping in the refrigerator, and let the process go for a week. If you’d like to get started with at home infusing, take a look at this TABLE Magazine article on DIY Infused Liquours. You’ll love the results.

Print
clock clock iconcutlery cutlery iconflag flag iconfolder folder iconinstagram instagram iconpinterest pinterest iconfacebook facebook iconprint print iconsquares squares iconheart heart iconheart solid heart solid icon
Three Pink Peppercorn Negronis in coupe glasses on a metal tray, garnished with orange peels and scattered pink peppercorns.

Pink Peppercorn Negroni


  • Author: DeFer

Description

A bit of peppercorn adds a sharp, smoky note. 


Ingredients

Scale


Instructions

  1. To age the gin, add ⅛ tsp of whole pink peppercorns per ⅕ oz of gin and rest 24-48 hours before straining for use.
  2. When the gin is aged, add all ingredients to a glass and serve with ice. Serve in a coupe glass. Enjoy!

Drink by De Fer Coffee & Tea
Photography by Adam Milliron

Subscribe to TABLE Magazine’s print edition.
Q-Groni

0
A cocktail in a stemmed glass with an orange peel garnish, with a blurred orange half in the background.

Big, rich, bold, and bitter. That’s how distiller and mixologist Ryan Kanto describes the Q-Groni, a traditional recipe of gin, sweet vermouth, and Campari. The choice of vermouth, Carpano Antica, is what sets it apart from the other Negronis. It’s a delicious counterpoint to the gin, Kanto explains, helping to bring out the notes of cardamom present in most gin varieties.

Other Negroni Recipes

The negroni is one of TABLE Magazine’s most popular cocktails. One of the reasons for this is that there are endless variations on this cocktail’s combination of gin, bittersweet aperitif, and sweet vermouth. Try a few o our favorite variations on the classic Negroni cocktail:

The Negronish is a low calorie variation!

The Apple Cider Negroni, with its notes of apple, is perfect for fall.

The Oaxacan Nights Negroni uses tequila instead of gin.

The Espresso Negroni incorporates a a bit of espresso, bringing in the best of both the Negroni tradition and the very popular Espresso Martini.

Print
clock clock iconcutlery cutlery iconflag flag iconfolder folder iconinstagram instagram iconpinterest pinterest iconfacebook facebook iconprint print iconsquares squares iconheart heart iconheart solid heart solid icon
A cocktail in a stemmed glass with an orange peel garnish, with a blurred orange half in the background.

Q-Groni


  • Author: Ryan Kanto

Description

Switching up the negroni.


Ingredients

Scale


Instructions

  1. Stir ingredients with ice, strain, and serve up with orange peel garnish.

Notes

Bartender’s note: Kanto tends to like his Negronis stiff and served up, but he wouldn’t turn one down served over ice.

Drink by Ryan Kanto
Photography by Maggie Weaver

Subscribe to TABLE Magazine’s print edition.

Sticky Little Sausages

0
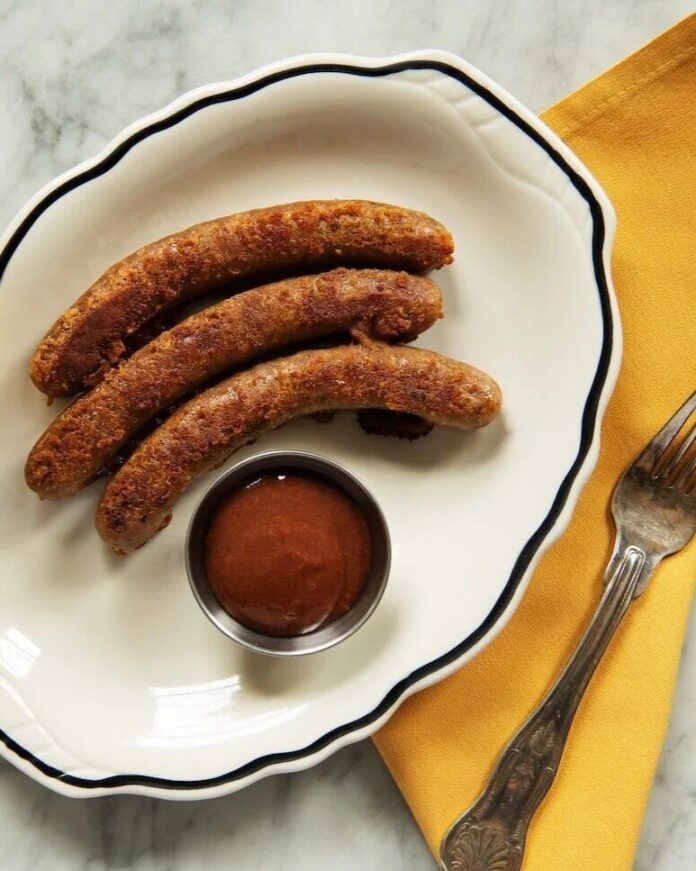
A plate with three grilled sausages and a small dish of sauce on the side, next to a yellow napkin and a fork.

Rich, savory, and irresistibly juicy, these Sticky Little Sausages are a true flavor bomb in every bite. Created by Cozy Royale, this recipe combines tender pork shoulder, braised pork skin for natural stickiness, and a bold mix of garlic, black pepper, and anchovy paste for deep, umami-packed flavor. Fried to perfection in natural lamb casings, they’re the kind of snack that disappears fast once they hit the table.

Sticky Little Sausages Recipe

The secret to their signature “sticky” texture lies in the braised pork skin, which releases natural gelatin as it cooks. This not only gives the sausages their unique mouthfeel but also helps lock in moisture for a juicy, satisfying bite. The anchovy paste adds a subtle saltiness and depth without overpowering the pork, making these sausages rich yet perfectly balanced.

Perfect for parties, game-day spreads, or as a standout appetizer, these Sticky Little Sausages are as fun to make as they are to eat. Serve them hot and sizzling straight from the pan, and watch as they become the star of your menu. With just a handful of ingredients and a straightforward method, this recipe proves that sometimes the simplest combinations deliver the biggest flavor.

Print
clock clock iconcutlery cutlery iconflag flag iconfolder folder iconinstagram instagram iconpinterest pinterest iconfacebook facebook iconprint print iconsquares squares iconheart heart iconheart solid heart solid icon
A plate with three grilled sausages and a small dish of sauce on the side, next to a yellow napkin and a fork.

Sticky Little Sausages


  • Author: Cozy Royale

Ingredients

Scale
  • 10 lb pork shoulder
  • 6 lb pork skin, braised (provides gelatin and the “stickiness”)
  • 100 g salt
  • 25 g black pepper
  • 50 g fresh garlic
  • 75 g anchovies, made into a paste
  • 1 1/4 lb ice water


Instructions

  1. Grind and feed into natural lamb casings, fry, and serve.

Recipe by Cozy Royale
Photography by Michael Marquand

Subscribe to TABLE Magazine’s print edition.

Easy Hot Honey Peach Galette

0
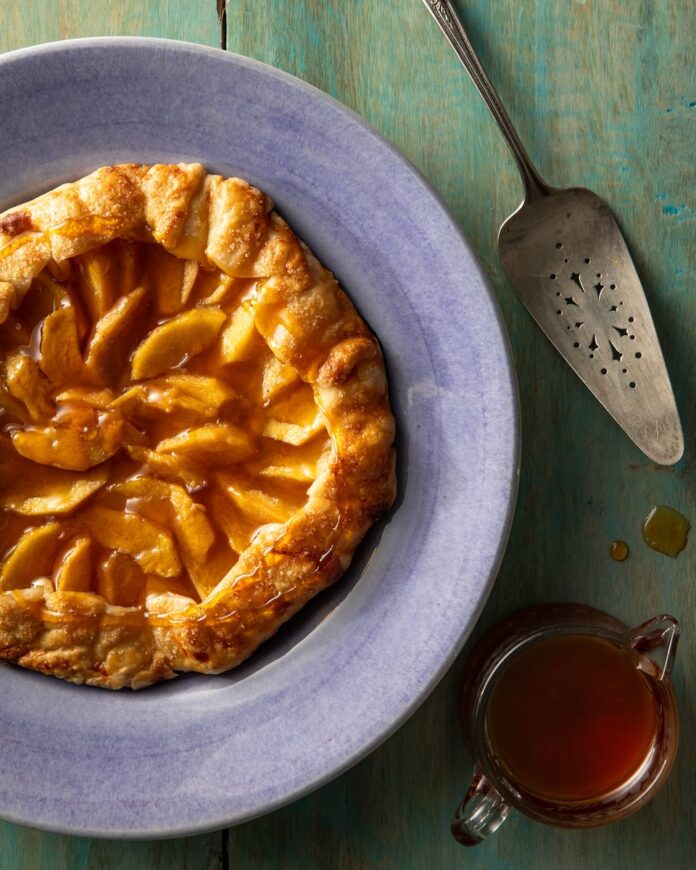
A round Easy Hot Honey Peach Galette sits on a blue plate with a pie spatula sitting beside it.

Transform summer’s sweetest, juiciest bounty into an easy-to-make dessert with this Hot Honey Peach Galette. Forget fussy pies that require tons of patience and handiwork. Instead, this rustic, free-form pastry celebrates creativity and the sun-ripened flavors of peaches. Plus, a drizzle of spicy hot honey only makes things more mouthwatering. It’s a simple yet elegant treat that brings together warm, sweet, and a subtle kick, making it the perfect dessert for any summer gathering.

When are Peaches in Season?

Summer is the time for peaches whenever these fuzzy bulbs of pink and orange ripen. You’ll find this juicy fruit from late May to early October but their peak is from July to August when they are at their most delicious. This all depends though on what region you are in. Those in a warmer region in the southern states may find their peaches harvest earlier, even in April. If you live in a northern state where the winter keeps things cool till practically June, your peak peach season will come later in the summer, sometimes lasting into September.

Print
clock clock iconcutlery cutlery iconflag flag iconfolder folder iconinstagram instagram iconpinterest pinterest iconfacebook facebook iconprint print iconsquares squares iconheart heart iconheart solid heart solid icon
A round Easy Hot Honey Peach Galette sits on a blue plate with a pie spatula sitting beside it.

Easy Hot Honey Peach Galette


  • Author: Keith Recker

Description

The naturally sweet nature of peaches makes a match with sticky and delectable hot honey.


Ingredients

Scale
  • 1 round frozen pie crust (I recommend Dufour)
  • 5 small peaches, peeled and sliced into 1/4-inch slices
  • 1/4 cup hot honey
  • 3 tbsp sugar (brown or white)
  • 2 tsp lemon juice (fresh is best)
  • 1 tsp ginger
  • ¼ tsp nutmeg
  • Pinch of salt
  • 2 tbsp cornstarch

For finishing:

  • 1 egg
  • 1 ½ tbsp sugar (turbinado or demerara preferred but optional)
  • ¼ cup hot honey


Instructions

  1. Defrost pie crust according to instructions on package.
  2. Line a baking sheet or pizza pan with parchment paper or a silicone baking mat. Preheat oven to 350.
  3. In a large mixing bowl, whisk together lemon, hot honey, ginger, nutmeg, salt, and cornstarch until well combined. Peel and slice peaches and add them to the bowl. Stir to coat.
  4. Center the pie crust on the prepared baking surface.
  5. Pretend there’s a compass on your pie crust and place one slice of peach at north, south, east, and west positions, about one inch in from the edge of the crust. Now add slices to create a tidy circle.
  6. Fill the empty center with slices.
  7. Drizzle any extra juices left in the bowl on top of the slices.
  8. Fold the edges of the crust up onto the outer ring of peach slices, crimping every 1.5 inches or so.
  9. In a small bowl, beat the egg. With a brush, wash the folded and crimped crust with egg. Sprinkle sugar on the crust…and on the peaches, too. You could add a sprinkle of nutmeg here, too.
  10. Place in oven and bake for approximately 35 minutes, until crust is golden and crisp.
  11. Remove from oven when done. Let cool to room temperature. Loosen galette from surface using a thin spatula. Slide it onto a serving plate.
  12. Just before slicing and serving, drizzle ¼ cup hot honey all over the galette. You could add whipped cream or ice cream to each plate as you serve the galette. Enjoy!

Recipe and Styling by Keith Recker
Photography by Dave Bryce

Subscribe to TABLE Magazine’s print edition.

A Haunted House with a Picket Fence Halloween Cocktail

0
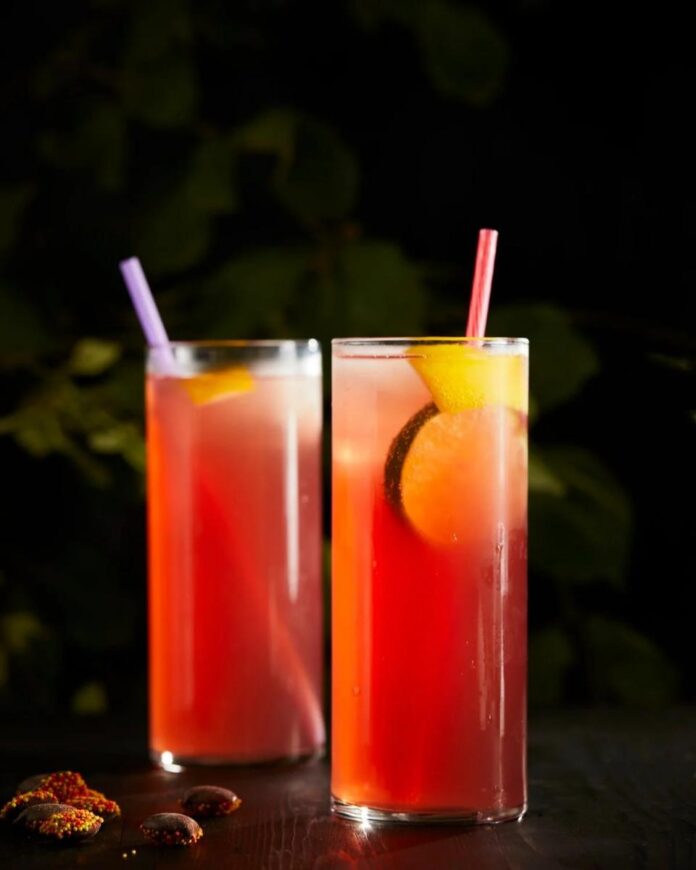
Two tall highball glasses with a reddish-pink cocktail and a colorful straw, garnished with fruit slices.

“Punch is a little bit like a family gathering,” says bartender Kaitlin Fellers. “A bunch of mismatched ingredients come together, and for some reason, they make something that’s pretty wonderful.”

A Haunted House with a Picket Fence Halloween Cocktail Recipe

In this party-ready punch, Kaitlin matches bourbon and cream sherry with the warm spice of ginger syrup. Finished off with the fruity effervescence of cider – to keep the cocktail sparkling all night long – A Haunted House with a Picket Fence has something for everyone.

We think this is a perfect batch cocktail to make ahead of time for a grown-up Halloween party. The name fits the occasion, and the flavor is perfect for a crisp autumn evening. You can explore more batch cocktail options here: Holiday Batched Cocktails for Your Gatherings.

Print
clock clock iconcutlery cutlery iconflag flag iconfolder folder iconinstagram instagram iconpinterest pinterest iconfacebook facebook iconprint print iconsquares squares iconheart heart iconheart solid heart solid icon
Two tall highball glasses with a reddish-pink cocktail and a colorful straw, garnished with fruit slices.

A Haunted House with a Picket Fence


  • Author: Kaitlin Fellers

Description

A perfect punch recipe.


Ingredients

Scale

For a party-sized punch:


Instructions

For the ginger syrup:

  1. Roughly chop 2 cups of unpeeled, washed ginger.
  2. Add to a food processor or blender and pulse until finely chopped. In a large pot over medium heat, add your ginger to 6 cups of water and 2 cups of white sugar and stir occasionally until the sugar has dissolved completely and the mixture begins to boil.
  3. Reduce to medium-low heat and let your syrup simmer for about 1 hour, stirring occasionally. Let cool to room temperature and strain off solids with a fine-mesh strainer or cheesecloth. Bottle and refrigerate for up to one month.

For the cocktail:

  1. Add all ingredients except the pear cider to a cocktail shaker and shake to combine. Strain over ice into a highball glass and top with your semi-dry cider.
  2. Garnish with candied ginger, and enjoy!

For a party-sized punch:

  1. Prior to building your punch, use a bundt pan to freeze water into a large ice ring.
  2. Combine all ingredients except for cider in a large punch bowl and stir gently to combine. Top with 4-5 cans of semi-dry pear cider (or more to taste).
  3. Garnish with peeled, sliced ginger, lemon wheels, and orange wheels.

Recipe by Kaitlin Fellers
Photography by Dave Bryce

Subscribe to TABLE Magazine’s print edition.
Mulled Apple Cider with Rum and Vegan Whipped Cream

0
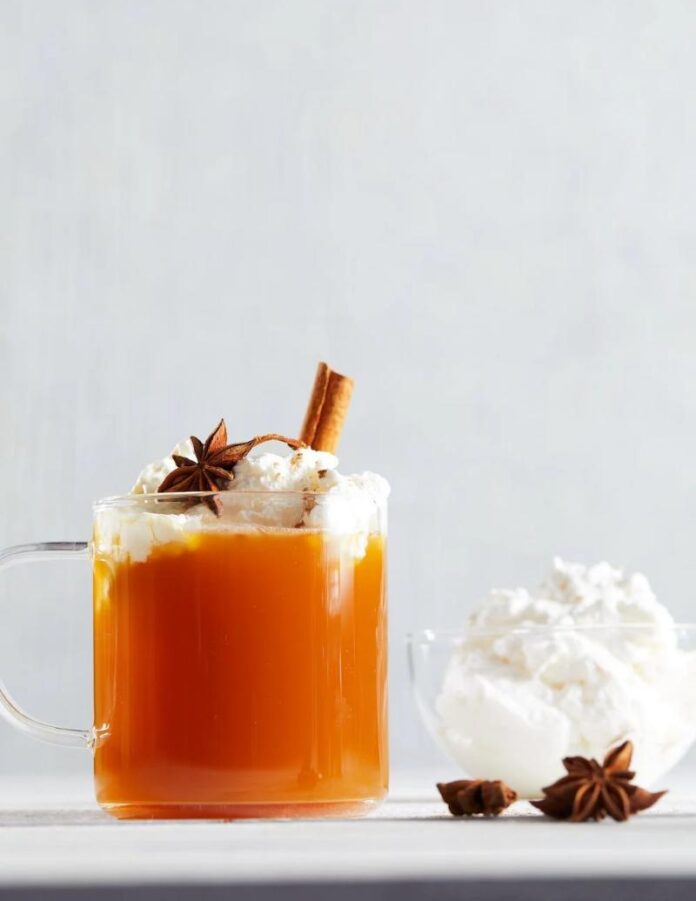
A glass mug of mulled apple cider topped with vegan whipped cream, a cinnamon stick, and a star anise pod.

We’re imagining sitting by the fire with a good book on one of the dark winter nights to come, a cup of mulled apple cider warming our hands. This version, by our friend Liz at Octofree®, includes Soergels Orchards famous apple cider, whole spices like cinnamon sticks and star anise pods, and sliced winter citrus, finished off with Maggie’s Farm Rum and some vegan, soy-free whipped cream for an allergen friendly treat that’s sure to warm you to the core.

What Are the Best Mulled Drinks?

The answer to that question depends on your personal tastes. At TABLE, however, we always share a few tips for a good mulled cocktail: simmer very slowly and do not boil your liquids. Slow, gentle cooking preserves flavor. And always use whole spices to preserve the clarity of your drink and to enjoy the fuller flavors they bring.

If you like the recipe here for Mulled Apple Cider, try our delicious Hot Honey Hot Toddy, or our Smokin’ Hot Toddy. We brewed up the latter as a tribute to recording artist Teddy Swims.

Print
clock clock iconcutlery cutlery iconflag flag iconfolder folder iconinstagram instagram iconpinterest pinterest iconfacebook facebook iconprint print iconsquares squares iconheart heart iconheart solid heart solid icon
A glass mug of mulled apple cider topped with vegan whipped cream, a cinnamon stick, and a star anise pod.

Mulled Apple Cider with Rum and Vegan Whipped Cream


  • Author: Liz Fetchin
  • Total Time: 25 minutes
  • Yield: Approximately 6

Description

Equipment:

  • Large saucepan
  • Sieve
  • Large glass heat-safe bowl
  • Ladle
  • Heat-safe glasses, such as high ball glasses

Ingredients

Scale
  • 6 cups apple cider (check ingredients for your allergens)
  • 1 cinnamon stick
  • 1 whole star anise
  • 1 lemon, sliced into rounds
  • 1 orange, sliced into rounds
  • 1 cup (about 4 shots) dark rum (check ingredients for your allergens)

For Garnish:

  • Vegan, soy-free whipped cream (I like So Delicious CocoWhip)
  • Cinnamon sticks
  • Whole star anise
  • Orange slices


Instructions

  1. Place the cider, cinnamon stick, star anise and lemon and orange slices into a large saucepan and bring to a boil.
  2. Reduce heat to medium-high and simmer for about 20 minutes to allow flavors to combine.
  3. Carefully pour the liquid through a mesh strainer into a large, glass heat-safe bowl.
  4. Add the rum to the bowl and stir to combine.
  5. Ladle rum into heat-safe glasses, such as high ball glasses.
  6. Garnish each glass with a slice of orange, dollop of vegan-soy-free whipped cream, star anise and cinnamon stick.
  • Prep Time: 5 minutes
  • Cook Time: 20 minutes

Recipe by Liz Fetchin, Octofree®
Food Styling Anna Franklin
Photography by Dave Bryce

Subscribe to TABLE Magazine’s print edition.

Baked Zucchini or Squash Fritters with Oregano and Mint

0
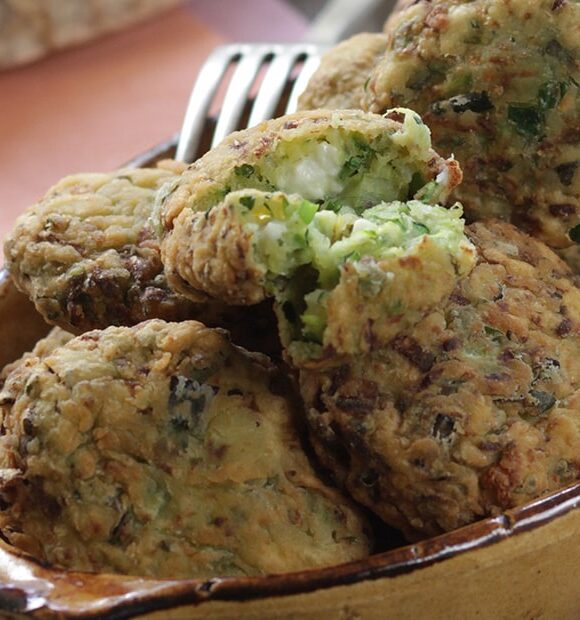
A bowl full of zucchini fritters sits on a table with a fork in the background.

Who doesn’t enjoy an abundance of zucchini and squash in their garden, or at the local farmer’s market, during the summer? Ikarians can relate. In response, you’ll find this popular recipe in home kitchens and on restaurant menus throughout the island.

Straight out of Diane Kochilas’s oven, warm and savory with the coolness of Greek yogurt or tzatziki by their side, these fritters were addictive. They were baked, not fried, so you can indulge in a few extra without guilt. In fall, try Diane’s version with grated fresh pumpkin for a distinctive and delicious holiday meze.

Print
clock clock iconcutlery cutlery iconflag flag iconfolder folder iconinstagram instagram iconpinterest pinterest iconfacebook facebook iconprint print iconsquares squares iconheart heart iconheart solid heart solid icon
A bowl full of zucchini fritters sits on a table with a fork in the background.

Baked Zucchini or Squash Fritters with Oregano and Mint


  • Author: Diane Kochilas
  • Yield: Serves 6 people 1x

Description

Straight out of Diane Kochilas’s oven, warm and savory with the coolness of Greek yogurt or tzatziki by their side, these fritters were addictive.


Ingredients

Scale
  • 2 lb zucchini, trimmed and coarsely grated
  • 2 tsp salt
  • 2/3 cup crumbled feta
  • 2 large eggs, lightly beaten
  • 5 scallions, whites and tender greens, finely chopped
  • 1/3 cup finely chopped fresh mint
  • 1/4 cup finely chopped fresh oregano
  • All-purpose flour as needed
  • Salt and pepper
  • 1 cup flour for dredging
  • Olive oil or other oil for frying


Instructions

  1. Put the grated zucchini in a colander, sprinkle with salt and rub between your palms until wilted, wringing out as much liquid as possible from the vegetable.
  2. To make the fritters, transfer the zucchini to a mixing bowl and add the feta, eggs, scallions, and herbs. Add flour, a few tablespoons at a time, until the mixture is dense enough for a patty to hold its shape when formed. Put the mixture in the refrigerator, covered, for 1 hour.
  3. Preheat the oven to 375 degrees. Line a shallow baking pan with parchment paper and bake the patties, in batches if necessary, until golden and crisp, about 15 – 20 minutes, turning once. You do not need to flour them before baking.

Note: The same recipe may be made with grated fresh pumpkin, too. Serve with Greek yogurt.

Recipe and Photography by Diane Kochilas
Story by Cally Jamis Vennare

Subscribe to TABLE Magazine’s print edition.
Traditional Tamales

0
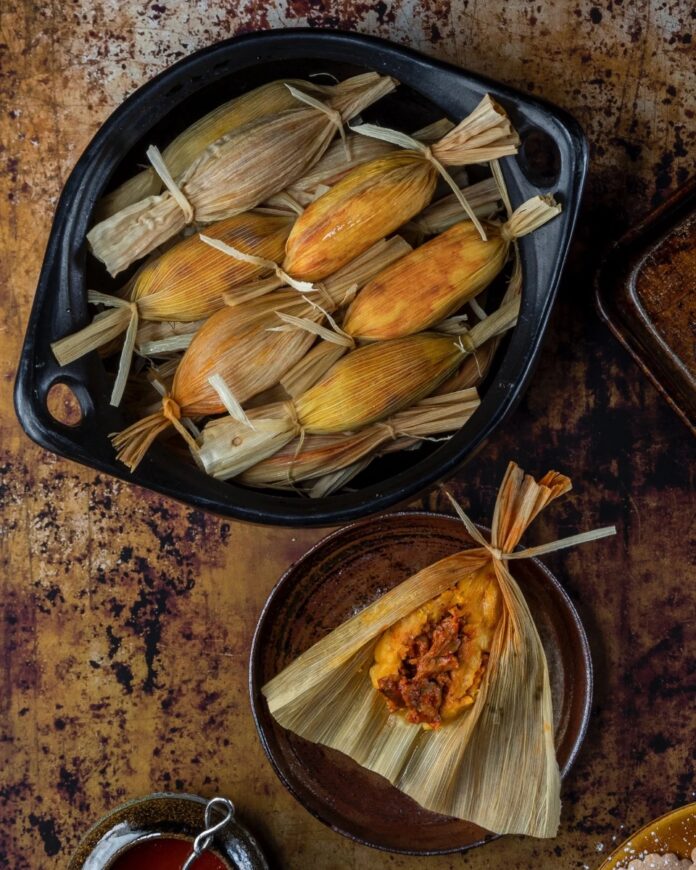
A black bowl filled with traditional tamales wrapped in corn husks, with one unwrapped tamale on a smaller plate showing a rich, red filling.
Five generations of the Martinez family gathered together to share their Christmas traditions with TABLE Magazine.

Tamales are one of the most beloved traditional foods of New Mexico, bringing families together during holidays, celebrations, and Sunday dinners. This authentic New Mexico tamales recipe, shared by Theresa Martinez and her family, shows how to make tender pork tamales wrapped in corn husks with rich red chili sauce and soft masa dough. It’s a dish full of flavor, history, and love—passed down through generations.

Traditional Tamales Recipe

Making homemade tamales may take time, but the process is part of the tradition. From simmering the pork shoulder until it’s tender, to preparing the masa harina dough and soaking the corn husks, every step adds to the final taste. The red chili pork filling gives these tamales their bold Southwestern flavor, making them a favorite in New Mexican kitchens.

Whether you’re preparing tamales for Christmas, a family gathering, or simply to enjoy a taste of New Mexico at home, this recipe will guide you through each step. With simple ingredients and clear instructions, you’ll be able to create tamales that are both authentic and delicious—perfect for sharing with family and friends.

Print
clock clock iconcutlery cutlery iconflag flag iconfolder folder iconinstagram instagram iconpinterest pinterest iconfacebook facebook iconprint print iconsquares squares iconheart heart iconheart solid heart solid icon
A black bowl filled with traditional tamales wrapped in corn husks, with one unwrapped tamale on a smaller plate showing a rich, red filling.

Traditional Tamales


  • Author: Theresa Martinez

Description

This recipe shares how to make traditional New Mexico tamales filled with tender shredded pork simmered in red chili sauce. The masa dough is spread on soaked corn husks, filled, folded, and then steamed until firm for a classic homemade dish.


Ingredients

Scale

For the filling:

  • 4 lb pork shoulder or 3 1⁄2 lb pork butt, trimmed of fat and shredded
  • 8 cups water
  • 1 tbsp garlic salt
  • 1 1/2 tsp salt
  • 4 cups red chili sauce

For the dough:

  • 4 cup masa harina
  • 1 1⁄2 tsp baking powder
  • 1 tbsp garlic salt
  • 2 tsp salt
  • 1 cup lard
  • 50 dried corn husks


Instructions

  1. In a 5-quart roaster oven, bring pork, water, garlic salt, and 1 1/2 teaspoons salt to boil.
  2. Simmer covered, about 2 1/2 hours or until meat is very tender.
  3. Remove meat from broth and allow both meat and broth to cool. (Chilling the broth will allow you to easily remove the fat if you desire to do so.)
  4. Shred the meat using 2 forks, discarding fat.
  5. Strain the broth and reserve 2 cups.
  6. In a large saucepan, prepare the red chili sauce and add meat; simmer, covered for 10 minutes
  7. In a separate bowl, stir together masa harina, baking powder, garlic salt and 2 teaspoons salt.
  8. Add lard to dry mixture, mixing by hand until well blended. Add just enough broth and water to make a thick, creamy paste.
  9. In the mean time, soak corn husks in warm water for at least 20 minutes; rinse to remove any corn silk and drain well.
  10. To assemble tamales, spread 2 tablespoons of the masa mixture on the center of the corn husk. If husks are small, overlap 2 small ones to form one.
  11. Place about 1 tablespoon meat and chili mixture in the middle of the masa.
  12. Fold in sides of husk and fold up the bottom.
  13. Add water to double broiler just below basket
  14. Lean the tamales in the basket, open side up.
  15. Bring water to boil and reduce heat.
  16. Cover and steam 20 minutes, or until dough is firm. Adding water to broiler when necessary.

Story and Photography by Gabriella Marks
Styling by Robert Nachman
Food by Theresa Martinez and family

Subscribe to TABLE Magazine’s print edition.

Don't Miss