Home Blog Page 80

Holiday Pavlova

0
Holiday Pavlova by Karen Unger, CCAC and Allegheny Country Club - JUDGES' & PEOPLE'S CHOICE 1ST PLACE

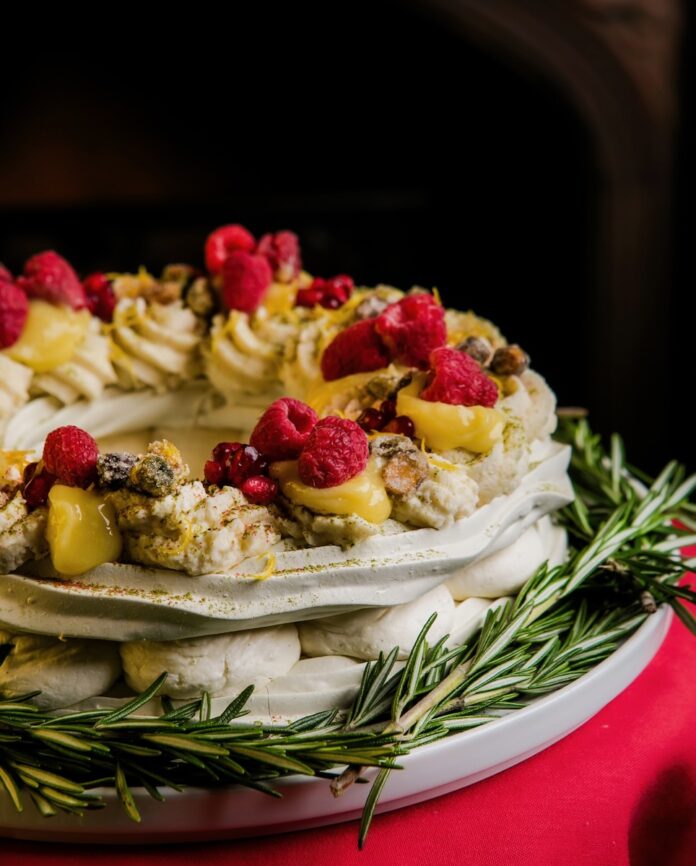
The winner of TABLE’s Annual Holiday Bake Off, according to both judges and guests, was Karen Unger, who works at Allegheny Country Club. Inspired by her workplace, she created a Holiday Pavlova featuring matcha pavlova, vanilla bean mascarpone, lemon curd, pomegranate seeds, and candied pistachio and lemon peels. It took her six tries to perfect the recipe, yet Unger says baking is all about learning and persistence.
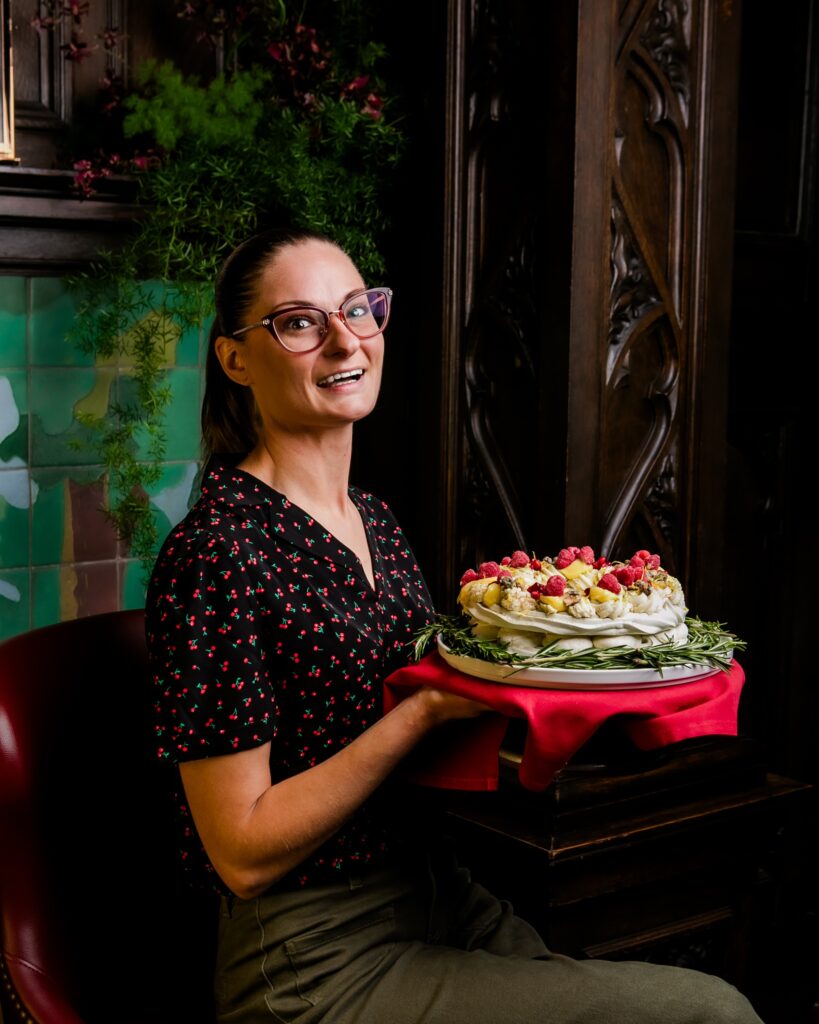
 TABLE Magazine Holiday Bake Off

Unger made her Holiday Pavlova as a part of our second annual TABLE Magazine Holiday Bake Off where five professionals and five student pastry chefs went head-to-head in a battle for the most decadent dessert.

Print
clock clock iconcutlery cutlery iconflag flag iconfolder folder iconinstagram instagram iconpinterest pinterest iconfacebook facebook iconprint print iconsquares squares iconheart heart iconheart solid heart solid icon
Holiday Pavlova by Karen Unger, CCAC and Allegheny Country Club - JUDGES' & PEOPLE'S CHOICE 1ST PLACE

Holiday Pavlova


  • Author: Karen Unger

Description

Matcha pavlova, vanilla bean mascarpone, lemon curd, pomegranate seeds, candied pistachio, and lemon peels. 


Ingredients

Scale

For the matcha pavlova:

  • 8 large egg whites, room temperature
  • 2 1/4 cups granulated sugar
  • 1 tbsp lemon juice
  • 1 tbsp vanilla
  • 1 1/2 tbsp matcha powder
  • 3 tbsp cornstarch

For the vanilla bean mascarpone:

  • 2 cups heavy whipping cream
  • 1 cup mascarpone
  • 5 sheets gelatin
  • 1/2 cup granulated sugar
  • 1 vanilla pod


Instructions

For the matcha pavlova:

  1. Preheat oven to 400 degrees.
  2. In a large bowl, beat the egg whites with a hand mixer on high, until the egg whites hold stiff peaks. Continue to beat the egg whites while slowly adding the sugar, a bit at a time, until the sugar is fully dissolved.
  3. Mix in the lemon juice and vanilla extract. Once it is well-combined, sprinkle in the cornstarch and matcha and continue to beat until the mixture is glossy, about 5 more minutes.
  4. Spoon the meringue mixture onto a parchment paper lined baking sheet. Reduce the oven temperature to 200 degrees. Immediately transfer the pavlova to the oven.
  5. Bake the pavlova for 1 hour and 30 minutes. Turn off the oven and allow the pavlova to cool completely inside of the oven, letting it sit for at least 2 hours.
  6. Store the pavlova in an airtight container until ready to decorate and serve. Try not to decorate more than a couple of hours in advance or the pavlova will soften.

For the vanilla bean mascarpone:

  1. In a bowl of cold water, rehydrate gelatin sheets for 10 minutes.
  2. Spread the vanilla pod with a knife, split it lengthways and scrape out the seeds. Add the vanilla beans to the mascarpone.
  3. In a saucepan, heat the mascarpone and sugar until smooth and creamy. Add the gelatine and stir to dissolve. Remove the mascarpone mixture from the heat.
  4. In a large bowl, whip the cream until stiff. Once the desired texture has been achieved, gently fold the whipped cream into the mascarpone using a blender.
  5. When the mixture is smooth, leave to rest in the fridge for at least 3 hours.
  6. Once the cream has cooled and set, stir it vigorously until it falls slightly: this will make it easier to use for piping onto pavlova.
  7. Use a piping bag to pipe the cream onto the pavlova.

Check out more recipes from our Annual Holiday Bake Off!

Recipe by Karen Unger
Photography by Laura Petrilla

Subscribe to TABLE Magazine‘s print edition.
German Christmas Market in a Cake

0
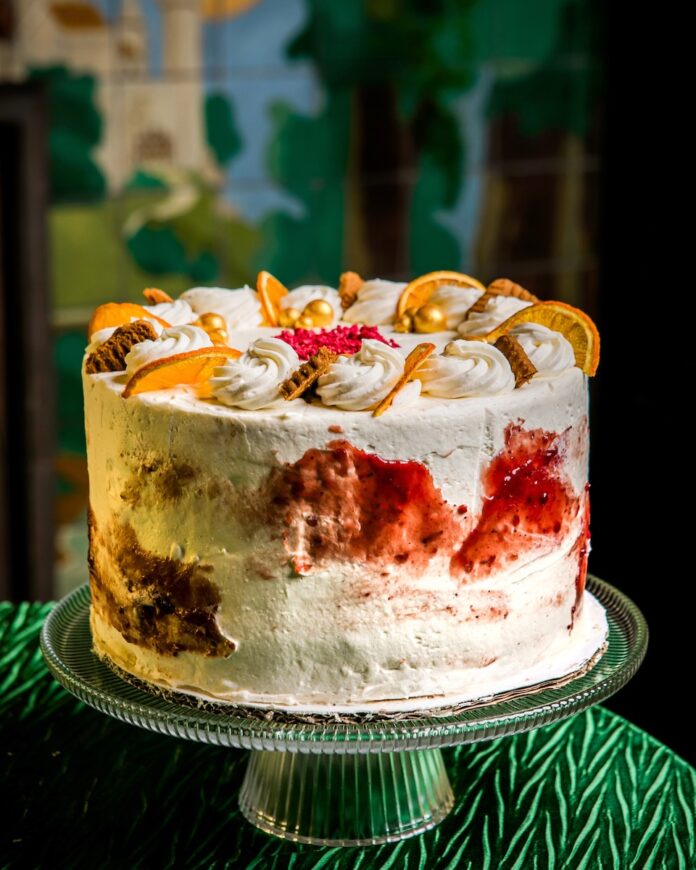
A cake with white icing decorated with orange slices and cranberry displayed on a glass cake plate on a table with a green table cloth.

Recent graduate of CCAC’s Culinary Arts Program Nelly Anderko’s German Christmas Market in a Cake captures the spirit of the holidays in every layer. A buttery speculoos biscuit base supports airy Viennese sponge cakes infused with warm spice. Between each layer, bright orange mascarpone cream and tart mulled wine jelly create a balance of richness and festive flavor. Finished with orange marmalade and Christmas-inspired decorations, this cake evokes the aromas and joy of a traditional European holiday market.

German Christmas Market in a Cake

Anderko made her German Christmas Market in a Cake as a part of our second annual TABLE Magazine Holiday Bake-Off where five professionals and five student pastry chefs battled head-to-head for the most decadent dessert.

Print
clock clock iconcutlery cutlery iconflag flag iconfolder folder iconinstagram instagram iconpinterest pinterest iconfacebook facebook iconprint print iconsquares squares iconheart heart iconheart solid heart solid icon
A cake with white icing decorated with orange slices and cranberry displayed on a glass cake plate on a table with a green table cloth.

German Christmas Market in a Cake


  • Author: Nelly Anderko

Description

Speculoos biscuits, Viennese sponge cakes, orange mascarpone, cream cheese cream, and mulled wine jelly all come together. 


Ingredients

Scale

For the speculoos base: 

  • 200 g speculoos biscuits
  • 50–70 g unsalted butter, melted

For the viennese sponge cake (2 layers):

  • 12 eggs
  • 400 g sugar
  • Pinch salt
  • 1 tsp vanilla extract
  • 150 g all-purpose flour
  • 150 g cornstarch
  • 50 g speculoos biscuits, finely ground
  • 150 g unsalted butter, melted

For the orange mascarpone cream-cheese cream:

  • 250 g cream cheese
  • 250 g mascarpone
  • 700 g heavy cream
  • 60 g powdered sugar
  • Orange marmalade to taste

For the orange marmalade:

  • 4 navel oranges, organic
  • 4 cups sugar
  • 3 cinnamon sticks

For the mulled wine jelly:

  • 500 ml mulled wine
  • 7.5 g agar agar


Instructions

For the speculoos base:

  1. Preheat oven to 350 degrees
  2. In food processor, finely grind the biscuits, mix with melted butter.
  3. Press the mixture onto a springform pan into an even layer.
  4. Bake the crust at 350 degrees for 8-10 minutes.

For the viennese sponge cake (2 layers):

  1. Preheat oven to 350 degrees
  2. Set up a water bath.
  3. Combine flour & cornstarch and whisk until combined, sift 2 times.
  4. Combine the eggs and sugar, whisk until smooth. Set over water bath and whisk constantly, heat up mixture until temperature reaches 113 degrees.
  5. Remove from water bath, with a whisk attachment, whisk the mixture until light, airy, and room temperature, 10-15 minutes.
  6. Add flour-cornstarch mixture, speculoos crumbs, fold in gently, add melted butter a little at a time, making sure not to overmix the batter.
  7. Pour batter in an ungreased 10-inch cake pan. Bake at 350 degrees for 15 minutes, reduce temperature to 325 degrees and bake for a further 25-30 minutes. Let sponges cool.

For the orange mascarpone cream-cheese cream: 

  1. With a paddle attachment, beat cream cheese until smooth, add mascarpone and powdered sugar to combine. Change attachment to whisk, slowly add heavy cream and whisk until firm. Don’t overmix. Add orange marmalade to taste, cream cheese should taste of orange.

For the orange marmalade: 

  1. Use a vegetable peeler to remove a thin layer of the orange rind from the oranges.
  2. Fill a medium saucepan with 2 cups of water and bring it to a boil over high heat. Once boiling, add the julienned orange rind and continue boiling over medium-high heat for 10 minutes.
  3. Drain the water from the saucepan, then fill the saucepan with 2 cups of water again (keeping the orange rind in the saucepan).
  4. Place the saucepan over the stove over high heat and set the timer for 10 minutes (it’s okay that it hasn’t begun to boil yet when you start the time).
  5. One last time, drain the water from the saucepan and then fill with 2 cups water, place over high heat, and set the timer for 10 minutes.
  6. Drain the water from the saucepan and, to the rind in the saucepan, add the orange slices, the sugar, the lemon juice, and 2 cups of water.
  7. Bring the mixture to a boil over high heat. After about 6 minutes, the contents of the pot should be boiling. Reduce the heat to medium-low so that the mixture is simmering.
  8. Cook the marmalade for 40 more minutes, giving it a stir every 3 – 5 minutes. You want to stir it frequently to keep the contents from overflowing in the saucepan.

For the mulled wine jelly:

  1. Whisk together wine and agar agar until there are no lumps.
  2. Set over medium heat, bring to a boil, whisking constantly. Boil for 2 minutes, whisking constantly.
  3. Remove from heat and pour into round silicone molds, let jellies set.

To assemble:

  1. Cut sponges in half so you get a total of four layers.
  2. Begin with the speculoos base, a layer of sponge cake, a layer of orange cream, mulled wine jelly, another layer of orange cream, and top with another sponge layer, repeating these steps until the last sponge layer.
  3. Leave the top layer blank (no cream). Chill for 4 hours, or better, overnight.
  4. Ice outside of cake, decorating the cake with a Christmas theme

Check out more recipes from our Annual Holiday Bake Off!

Recipe by Nelly Anderko
Photography by Laura Petrilla

Subscribe to TABLE Magazine‘s print edition.

Caribbean Christmas Tart

0
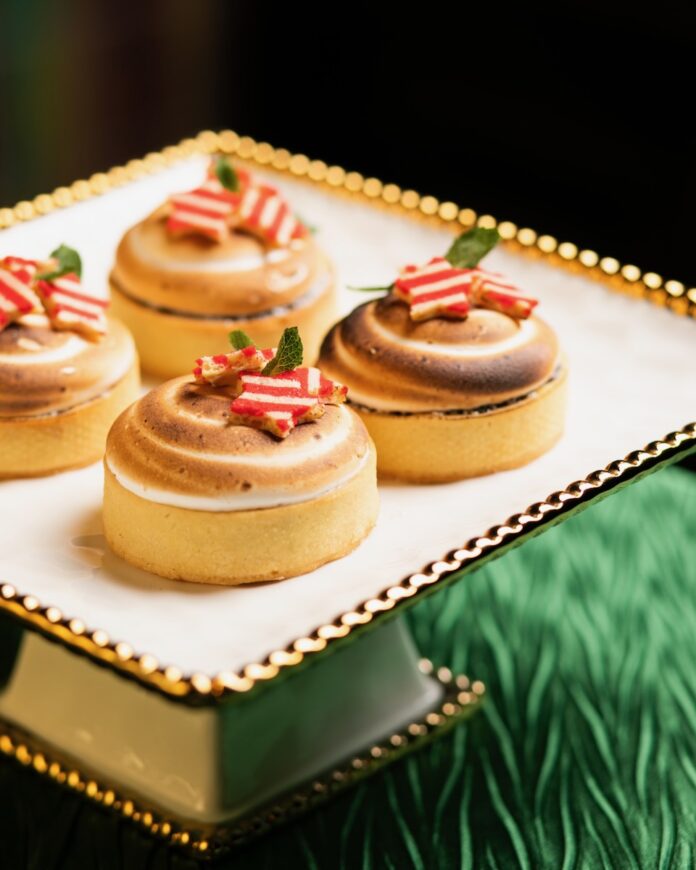
Four smaller circle tarts with peppermint candies on top, all on a green table top.

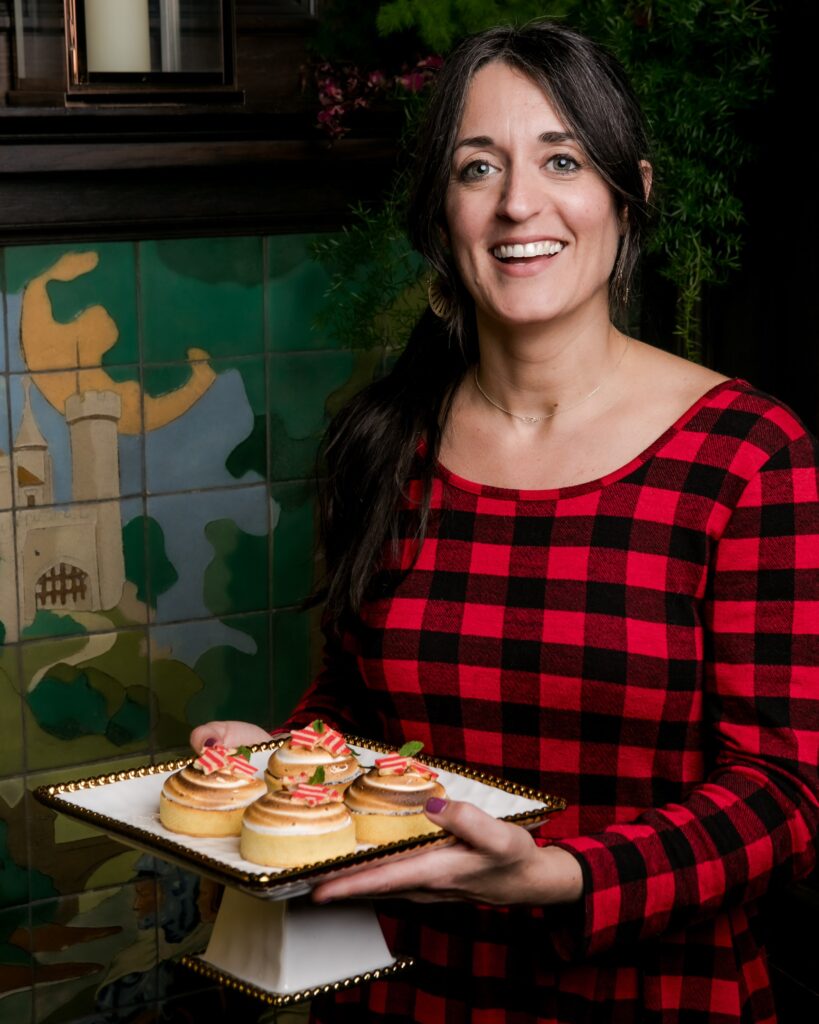
A buttery crust holds layers of silky passion fruit curd and rich chocolate mint truffle, creating a vibrant balance of tangy and deep cocoa flavors in this Caribbean Christmas Tart. Topped with a swirl of toasted marshmallow fluff, this dessert by Chef Dianne DeStefano evokes the warmth of island holidays while nodding to classic Christmas decadence. It’s tropical sunshine wrapped in holiday spirit.

 layers of silky passion fruit curd and rich chocolate

The Third Place Winner of Our Holiday Bake Off

We held our second annual TABLE Magazine Holiday Bake Off where five professionals and five student pastry chefs went head-to-head in a battle for the most decadent. Third place in the judges’ category went to Chef Dianne DeStefano of Lilith for this Caribbean Christmas Tart, featuring passionfruit curd and chocolate mint truffle. Inspired by her business partner Jamilka Borges’s Puerto Rican roots, she developed the combination after creating a similar wedding cake. Though she’d participated in other events, this was her first competition and she loved how it connected local culinary talent.

Print
clock clock iconcutlery cutlery iconflag flag iconfolder folder iconinstagram instagram iconpinterest pinterest iconfacebook facebook iconprint print iconsquares squares iconheart heart iconheart solid heart solid icon
Caribbean Christmas Tart by Chef Dianne DeStefano, Lilith. - JUDGES' CHOICE 3RD PLACE

Caribbean Christmas Tart


  • Author: Chef Dianne DeStefano
  • Yield: One 10 inch tart 1x

Description

Let this tropical Christmas dessert take you to the beach.


Ingredients

Scale

For the tart crust:

  • 3 oz butter (room temperature)
  • 2 oz powdered sugar
  • 2 each egg yolk
  • 6.4 oz all-purpose flour
  • ¼ tsp salt
  • 2 tsp heavy cream

For the passion fruit curd:

  • 7.5 oz sugar
  • 5 oz Passion Fruit purée
  • 5 oz egg yolks
  • 6 oz butter

For the chocolate mint truffle:

  • 6 oz heavy cream
  • 6–8 sprigs fresh mint
  • 6 oz dark chocolate
  • 1 tbsp corn syrup

For the marshmallow fluff:

  • 13 oz sugar
  • 1.5 oz corn syrup
  • ¼ tsp cream of tartar
  • Pinch salt
  • 1 tbsp vanilla
  • 6 each egg whites


Instructions

For the tart crust:

  1. Combine butter and sugar in the bowl of a stand mixer fitted with a paddle attachment and cream until light and fluffy.
  2. Add egg yolk and mix until incorporated.
  3. Turn mixer to low and add flour and salt. When dough is almost together, add cream.
  4. Shape dough into a disc, wrap, and chill for 20 minutes.
  5. Roll dough on floured surface to ¼ inch thick, transfer to tart pan.
  6. Line shell with parchment paper and pie weights and bake at 325 degrees until done.

For the curd:

  1. Over double boiler, combine sugar and fruit purée, then add egg yolks and soft butter.
  2. Using spatula, mix over heat until mixture is thick enough to coat the back of a spoon.
  3. Pour through strainer into baked tart shell until shell is half full.
  4. Refrigerate until cool. You may have curd left over.

For the truffle:

  1. Steep mint sprigs in hot cream for 15 minutes, then strain and discard mint.
  2. Chop chocolate to very fine, scald cream, and pour over chocolate, stirring to melt and combine.
  3. Add corn syrup.
  4. Pour this mixture into tart shell to fill.
  5. Refrigerate until set, one hour.

For the fluff:

  1. Combine all ingredients in metal bowl, whisk over double boiler until mixture is hot, about 160 degrees, and sugar is fully dissolved.
  2. Pour mixture into clean mixer bowl and whip on high using whisk attachment until mixture has cooled to room temperature and is very white and fluffy.
  3. Pipe mixture onto tart in desired pattern, use torch to toast fluff.

Check out more recipes from our Annual Holiday Bake Off!

Recipe by Chef Dianne DeStefano
Photography by Laura Petrilla

Subscribe to TABLE Magazine‘s print edition.

Chocolate Olive Oil Cake

0
Chocolate Mousse Olive Oil Cake with Beet Caramel by Rachel Walton of Dianoia's Eatery

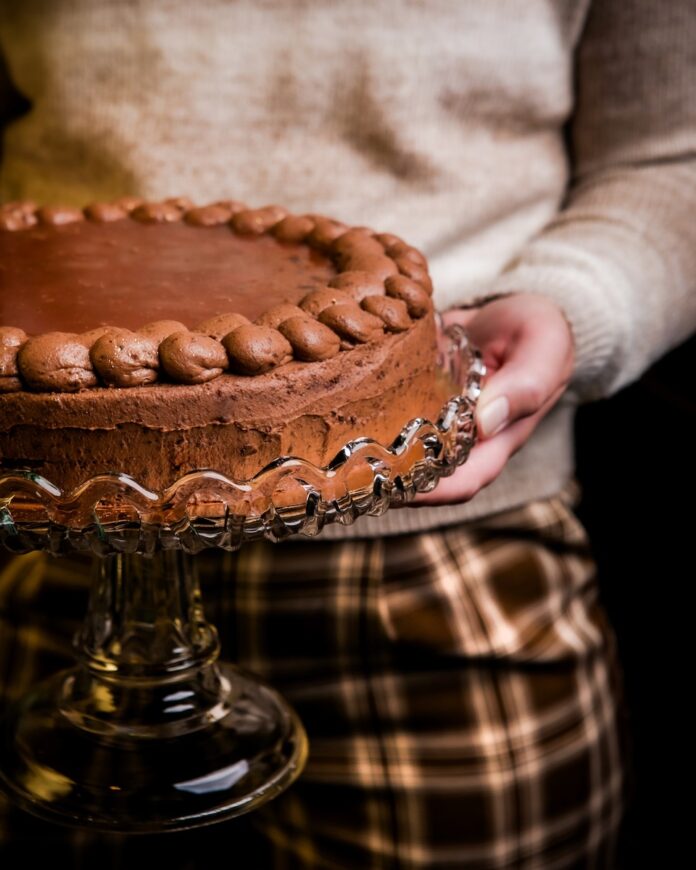
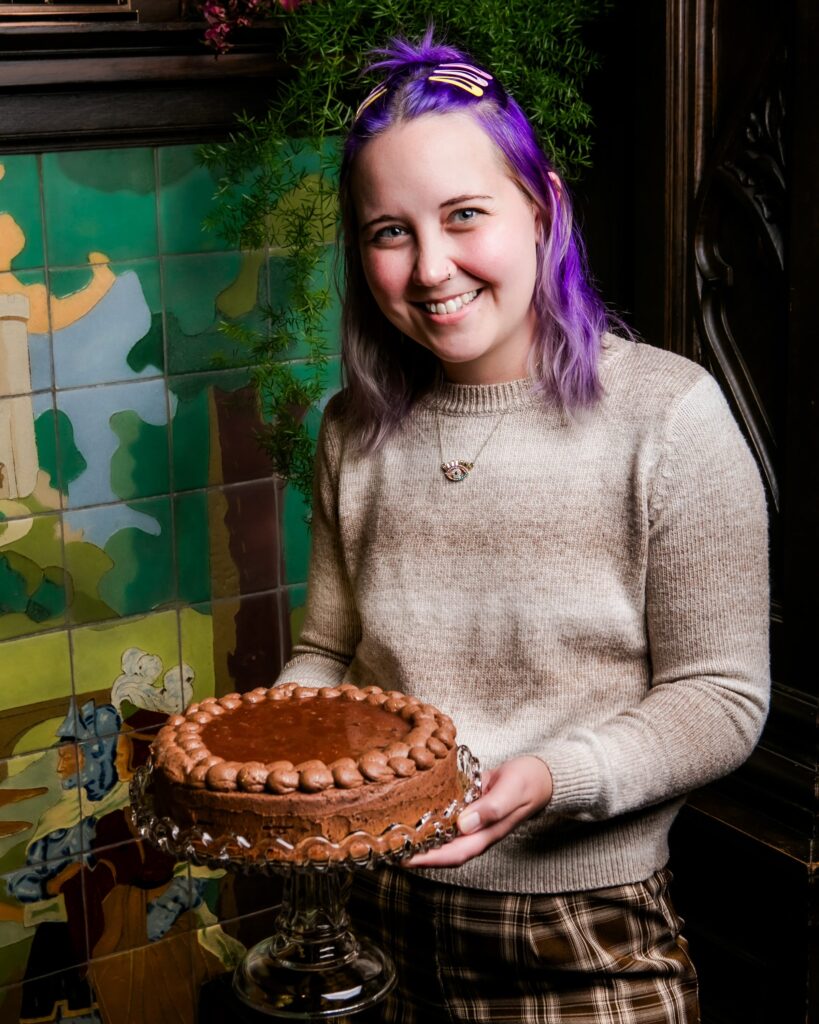
Rachel Walton, last year’s defending champion of TABLE’s Cookie Bake Off and executive pastry chef at DiAnoia’s Eatery, presented her Chocolate Mousse Olive Oil Cake with Beet Caramel at this year’s Holiday Bake Off. Though short on prep time, she hoped her Thanksgiving-inspired dessert would charm the judges again. The Chocolate Olive Oil Cake is a rich, modern twist on a classic chocolate dessert.

Chocolate Olive Oil Cake

Our second annual TABLE Magazine Holiday Bake Off brought together five professionals and five student pastry chefs to go head-to-head in a battle for the most decadent dessert.

Print
clock clock iconcutlery cutlery iconflag flag iconfolder folder iconinstagram instagram iconpinterest pinterest iconfacebook facebook iconprint print iconsquares squares iconheart heart iconheart solid heart solid icon
Chocolate Mousse Olive Oil Cake with Beet Caramel by Rachel Walton of Dianoia's Eatery

Chocolate Olive Oil Cake


  • Author: Rachel Walton

Description

A rich, modern twist on a classic chocolate dessert. 


Ingredients

Scale

For the Chocolate Olive Oil Cake:

  • 3 eggs, separated  

  • 150 g sugar

  • 1 cup heavy cream 

  • 1/4 olive oil 

  • 1/4 tsp salt

  • 3/4 tsp baking powder

  • 150 g flour

  • 30 g cocoa powder

  • 120 g mini dark chocolate

For the Chocolate Mousse Frosting:

  • 6 oz dark chocolate 

  • 4 oz butter

  • 4 egg yolks

  • 2 egg whites 

  • 1/2 cup sugar

  • 1 tsp sugar 

  • ⅛ cup cocoa powder

  • ¼ cup cream 

  • 6 oz mascarpone 

For the Beet Caramel:

  • ½ cups beet juice 
  • 1 ¾ cups sugar
  • 1 cups cream 
  • 3 tbsp butter
  • 1 tbsp vanilla 


Instructions

For the Chocolate Olive Oil Cake:

  1. In a bowl add egg yolks and sugar whisk until combined. 

  2. Whisk in cream and olive oil until combined. 

  3. In a separate bowl add salt, baking powder, flour and cocoa powder and sift together. 

  4. Add flour mixture and chocolate chips to bowl and whisk until combined. 

  5. In a mixer fitted with a whisk attachment add egg whites and whip until stiff.

  6. Fold in egg whites to cake batter.

  7. Pour into the prepared pan.

  8. Bake at 325 for around 20-30 minutes until a tooth pick comes out clean.

For the Chocolate Mousse Frosting:

  1. Melt chocolate and butter over a double boiler until both have melted completely, cool to at least 90 degrees.
  2. In a small bowl whisk together egg yolks, the larger amount of sugar, and cocoa powder. 
  3. Add to the chocolate mixture, stir until all is combined.  
  4. In a kitchenaid fitted with a whisk attachment, whip egg whites, and the smaller amount of sugar to stiff peaks.
  5. In a kitchenaid fitted with a whisk attachment whip heavy cream to stiff peaks.  
  6. Gently fold the egg white mixture and heavy cream into the chocolate mixture.
  7. Set in desired pan overnight 
  8. On the next day add 6 oz of mascarpone to a mixing bowl with a paddle attachment and add set terrine mousse and whip until combined. Spread over the top and sides of the sides of the cake and add extra frosting to the edge of the top so you have somewhere to set the caramel. 

For the Beet Caramel:

Check out more recipes from our Annual Holiday Bake Off!

Recipe by Rachel Walton
Photography by Laura Petrilla

Subscribe to TABLE Magazine‘s print edition.
Spiced Orange Cranberry Bars

0
Cranberry Orange Bar by Josiah Moore

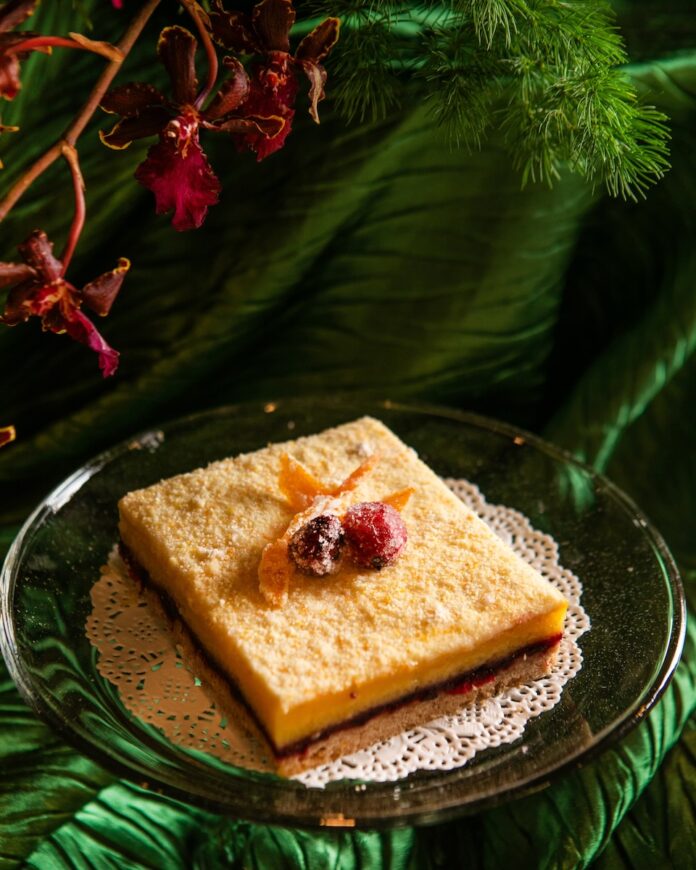
Josiah Moore, a second-semester Baking & Pastry Arts student at Community College of Allegheny County, made Spiced Orange Cranberry Bars inspired by lemon bars but with seasonal flavors. A buttery, spiced crust provides a warm base for a bright orange filling topped with tart cranberry compote, creating a balance of sweet and tangy notes in every bite. “I’m very proud of what I made,” Moore said, describing the dessert as a comforting twist perfect for the holidays.

Spiced Orange Cranberry Bars

Moore made her Spiced Orange Cranberry Bars as a part of our second annual TABLE Magazine Holiday Bake Off where five professionals and five student pastry chefs went head-to-head in a battle for the most decadent.

Print
clock clock iconcutlery cutlery iconflag flag iconfolder folder iconinstagram instagram iconpinterest pinterest iconfacebook facebook iconprint print iconsquares squares iconheart heart iconheart solid heart solid icon
Cranberry Orange Bar by Josiah Moore

Spiced Orange Cranberry Bars


  • Author: Josiah Moore

Description


Ingredients

Scale

For the crust:

  • 3 ¾ cups flour
  • 1 cup powdered sugar
  • ¾ tsp salt
  • 1 lb + 2 tbsp butter
  • 2 tsp cinnamon
  • 1 tsp nutmeg
  • 1 ½ tbsp orange zest

For the orange filling:

  • 2 cups sugar
  • 1 cup orange juice
  • 8 eggs each
  • 4 tbsp orange zest
  • ½ cup all-purpose flour

For the cranberry compote:

  • 2 cups (approx. 8 oz) cranberries, frozen
  • ⅓ cup sugar
  • ½ cup water


Instructions

For the crust:

  1. Preheat oven to 350°F. Grease and line a 9×13-inch baking pan with parchment paper, leaving some overhang for easy removal.
  2. In a large bowl, whisk together flour, powdered sugar, salt, cinnamon, nutmeg, and orange zest.
  3. Cut in the butter using a pastry cutter or your hands until the mixture resembles coarse crumbs.
  4. Press the dough evenly into the prepared pan to form a crust.
  5. Bake for 20–25 minutes, or until lightly golden around the edges. Set aside to cool slightly.

For the orange filling:

  1. In a medium bowl, whisk together sugar, eggs, orange juice, and orange zest until smooth.
  2. Sift in the flour and whisk until fully incorporated.
  3. Pour the filling over the slightly cooled crust and spread evenly.
  4. Bake for 20–25 minutes, or until the center is just set and no longer jiggly.
  5. Allow to cool completely before topping with cranberry compote.

For the cranberry compote:

  1. In a small saucepan, combine cranberries, sugar, and water over medium heat.
  2. Cook, stirring occasionally, until the cranberries burst and the mixture thickens, about 10–12 minutes.
  3. Remove from heat and let cool completely.

To assemble:

  1. Spread the cooled cranberry compote evenly over the orange layer.
  2. Refrigerate for at least 1 hour before slicing.
  3. Dust with powdered sugar before serving, if desired.

Check out more recipes from our Annual Holiday Bake Off!

Recipe by Josiah Moore
Photography by Laura Petrilla

Subscribe to TABLE Magazine‘s print edition.
How to Pittsburgh: The Event 2025

0
Groups of guests walk around a large party space.
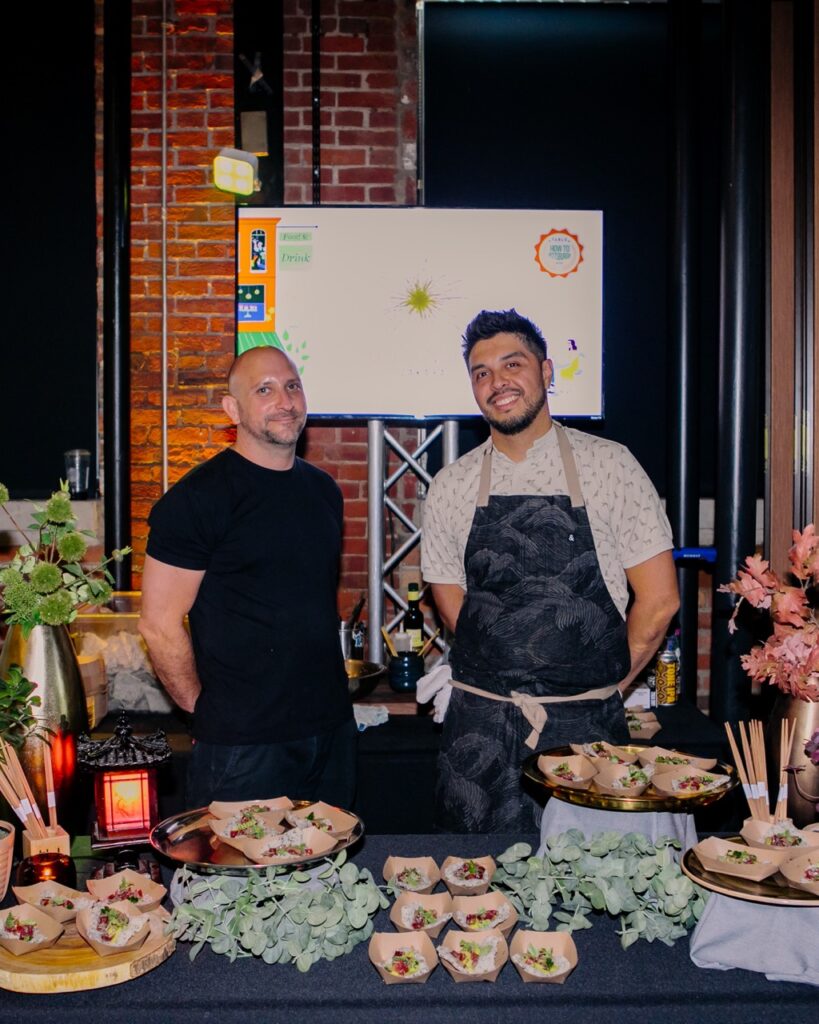
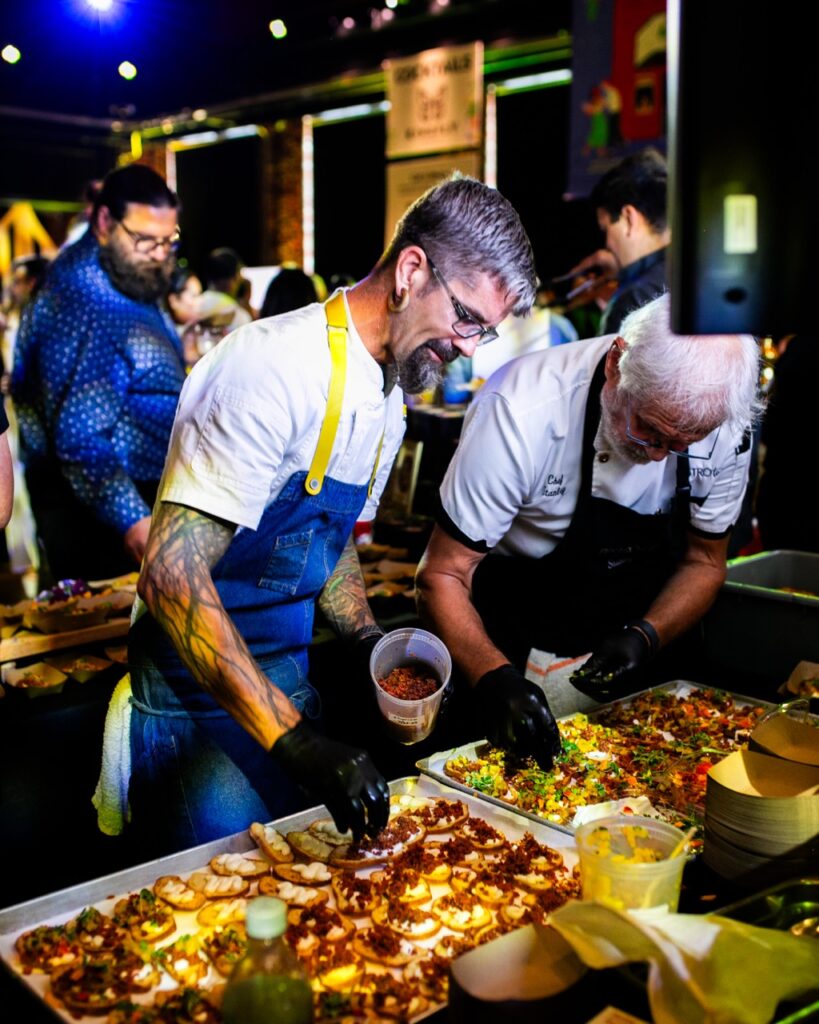
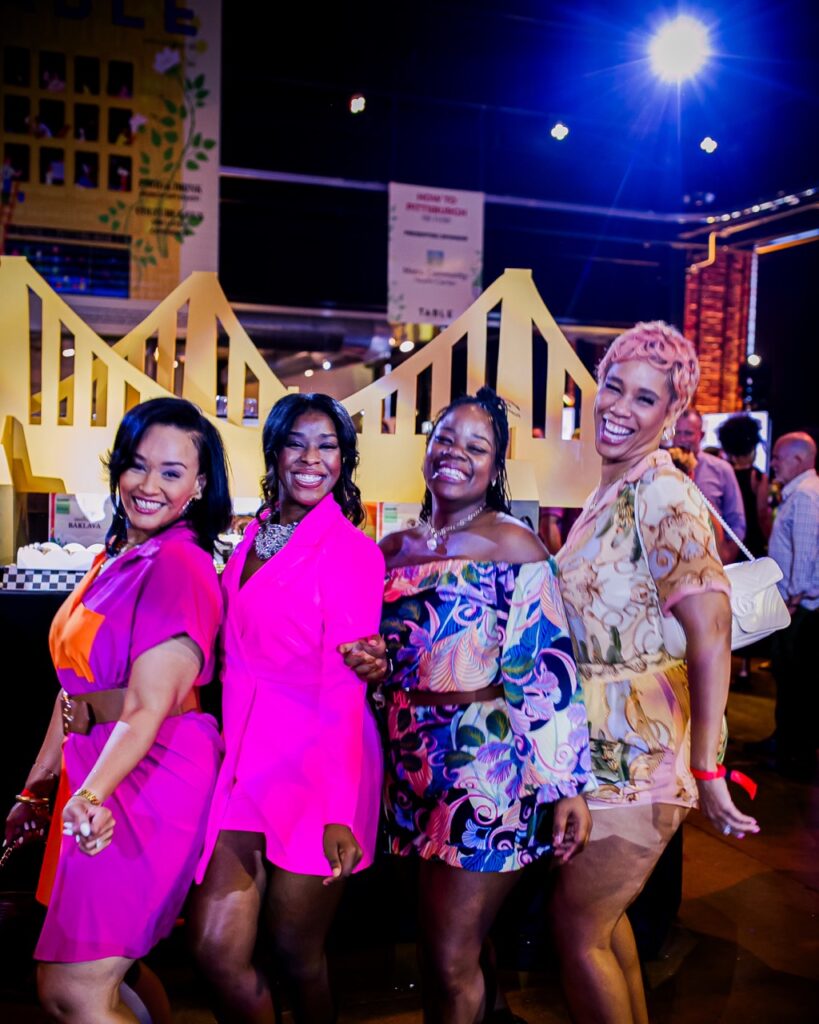
Guests stopped at various food sample stations and explored a yellow bridge cookie table

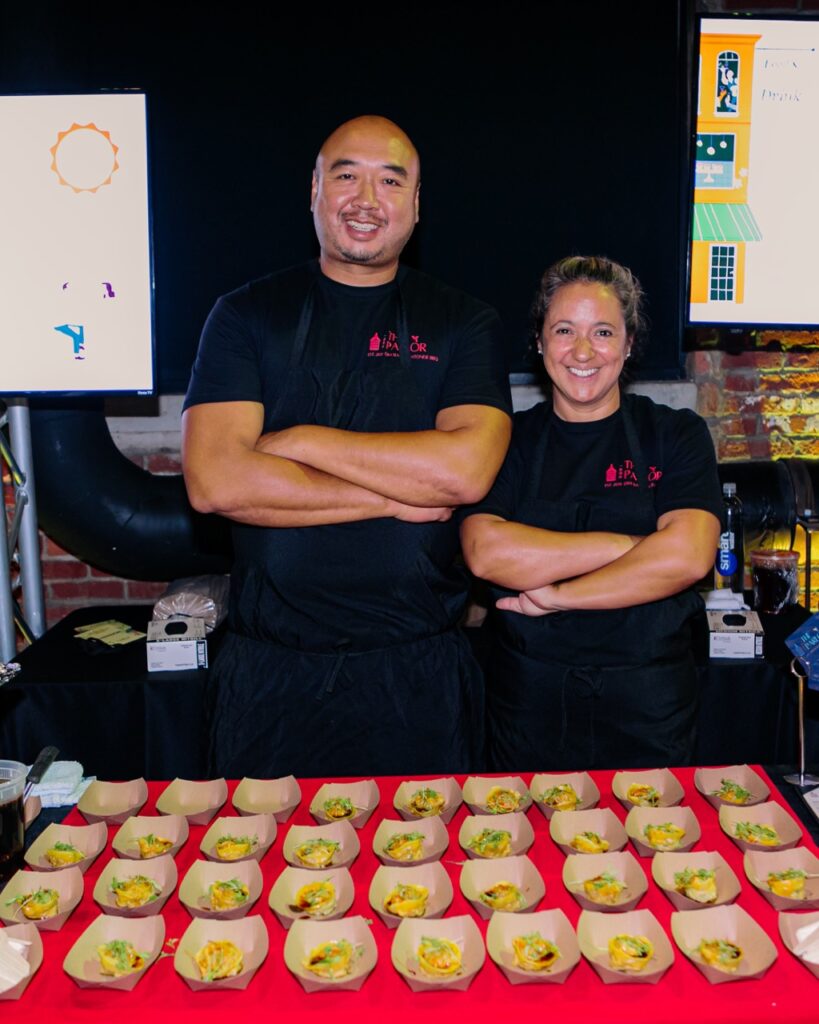
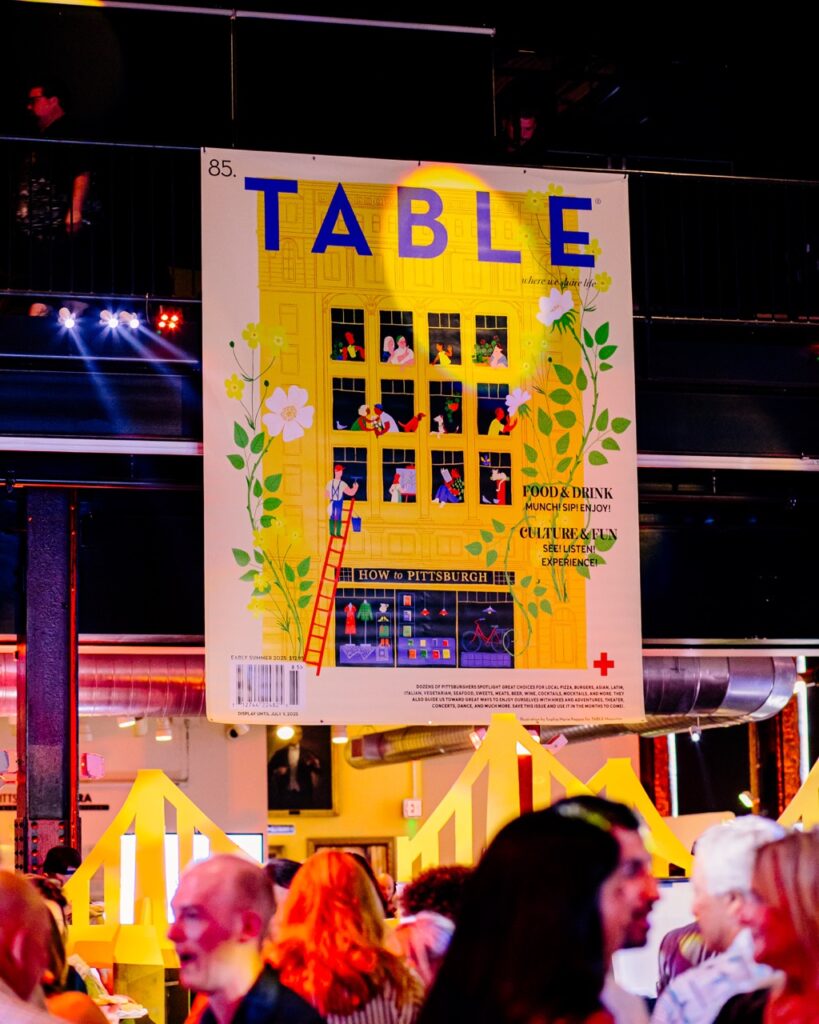
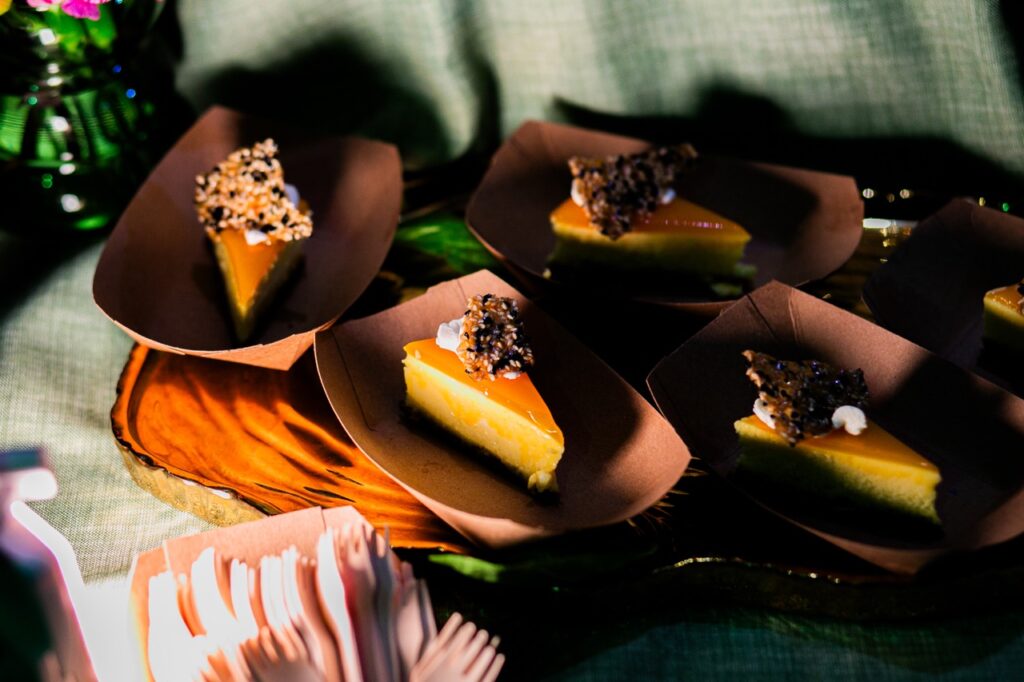
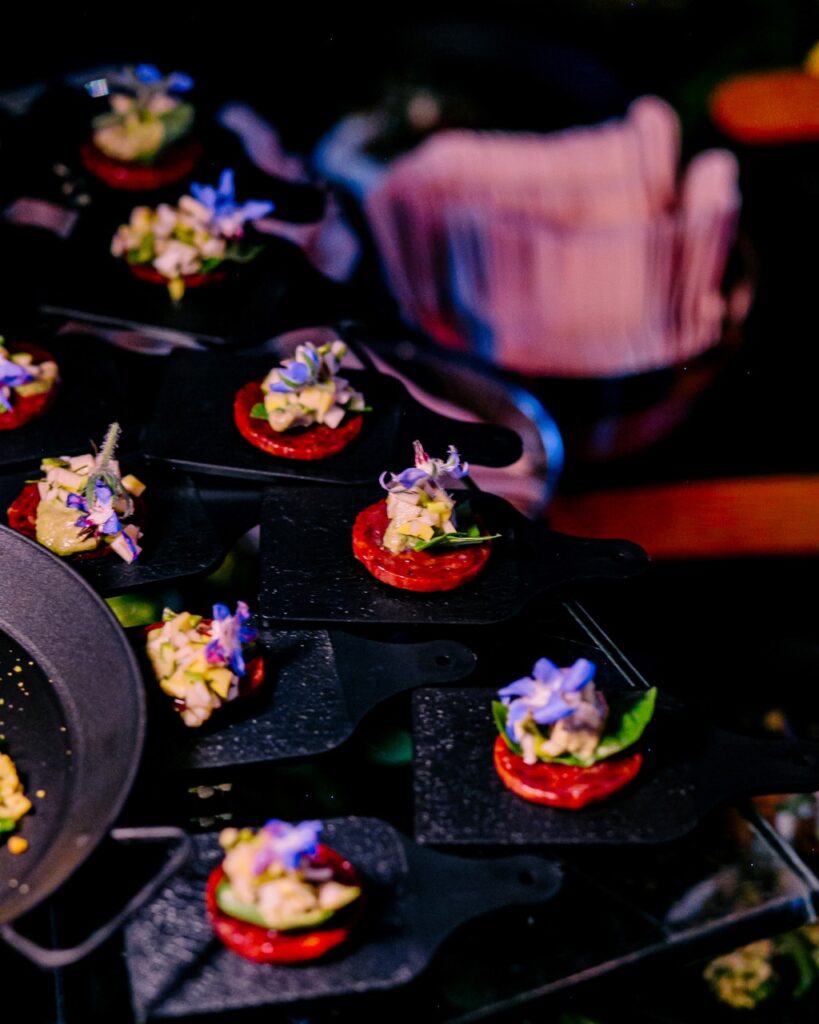
TABLE’s How to Pittsburgh issue comes out every May to celebrate the must see, must-hear, must-taste, must-do facets of our beloved ‘Burgh. The 2025 launch party gathered 20+ restaurants, 5 bakeries, 3 bars, and 2 farms for an incredibly delicious evening of bites and sips. 400 guests joined us at the Bitz Opera Factory, accompanied by a live performance of a new song from Frzy, the Pittsburgh Opera, and the spinning vibes of Selecta as the DJ. From start to finish, this completely sold-out event was the happiest place in town… and we are already laying plans for 2026.

How to Pittsburgh: The Event, July 23, 2025

Story by Keith Recker
Photos Courtesy of Laura Petrilla and Cody Baker

Subscribe to TABLE Magazine‘s print edition.

Owner of Hens and Chicks, Nathan McCarthy, to Open New Retail Shop, Archive

0
Bottles of perfume and pink boxes stack on a white table.

In Pittsburgh’s competitive world of luxury florals for weddings and events, Nathan McCarthy has carved a niche as a taste leader with his business, Hens and Chicks. Famous for his exceptional eye for detail and innovative design, Nathan knows how to transform often “plain vanilla” event spaces into breathtaking experiences. He is about to harness those powers in the retail sector with his new concept shop, Archive, opening on November 15 on Smallman Street in the Strip District of Pittsburgh.

Nathan’s career has been fueled by a deep appreciation for the natural beauty of flowers and a keen interest in design aesthetics. At Hens and Chicks, Nathan and his team meticulously curate each event, ensuring that every element aligns with the client’s vision while pushing the boundaries of traditional design. Archive is a chance for him to speak in his personal design language in ways he can share with the rest of us in Pittsburgh. We can look forward to lush textures, vibrant colors, and unexpected elements, melded together with a timeless, up to date sense of style. 

4 Questions with Nathan McCarthy About His New Pittsburgh Retail Shop, Archive

TABLE: Why are you creating Archive?

Nathan McCarthy: Why else? Pursuit of beauty.

What stores around the world have inspired your design and merchandising thoughts?

NM: Well of course, Barneys…Taste/Luxury/Humor was their motto and they are, I think, words to live by. Sadly, some of my favorite stores are no longer-but I love/loved Takashimaya, TotoKaelo, Dover Street Market (specifically in London), Tortoise (LA), Maxfield’s (LA), Jeffrey…and I will always be a sucker for a Parisian store with a great dining option such as Galleries Layfayette and Bon Marché.

The look of the new JW Anderson shop in London as well as his store in store experiences are so inspirational to me. The combination of folk, luxe, craft, and curiosity is so perfect-the raw woods, and earth tones with a clash of hyper color, and then a quiet touch of antique is so fantastic.

With the store being called “Archive” I wanted the experience to feel as though this is a found space or discovered shipping container with practical and impractical finds. I used rough OSB boards for fixtures, antique curved glass display cases from auctions, industrial cavas drop cloth drapery juxtaposed with plush silk/wool carpets and velvet seating, all installed into a rough semi crumbling warehouse space.

Can you list the brands you’ll be stocking?

NM: We will have womenswear staples like Seroya, Faithfull, and Simon Miller, as well as an exciting unisex brand called Workware. I am testing out small selections of JW Anderson, Isabel Marant, and Stella McCartney as well. The vintage mix has everything from Prada to unlabeled interesting pieces. A line of in house designed pillows were handmade by a quilter and also feature antique tapestry and recycled denim. As well, heritage brands for fragrance and home from Bienaime, and d’Orsay as well as contemporary staples such as Adlan, Bjork and Berries, and Naomi Goodsir.

Henne Jewelers will be adding vintage and one of a kind pieces.

How are you finding your vintage goods?

NM: Literally anywhere and everywhere. I am an insatiable sourcer! I work with a few dealers out of Chicago (Dial M for Modern provided the gorgeous 1940’s Czech brutalist desk and Baker Ferguson for postmodern Arteluce sconces and primitive oak chairs). But I am not a snob. Things can be from a roadside shop, a woodworker from the midwest, or an auction house. If its good, its good!

Story by Keith Recker
Photo Courtesy of Nate McCarthy

Subscribe to TABLE Magazine‘s print edition.
Gingerbread House Recipe

0
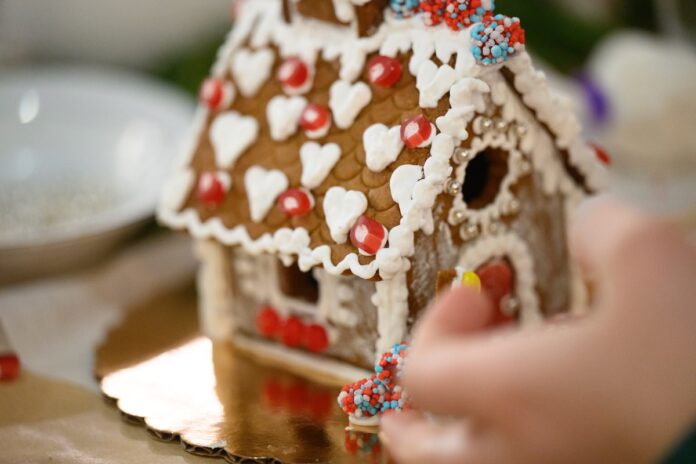
Gingerbread house with hearts on it

Build a festive masterpiece with Lauren Bohl White’s classic Gingerbread House Recipe. Fragrant with cinnamon, nutmeg, and cloves, this sturdy dough bakes into the perfect base for creative holiday decorating. Finished with strong, glossy royal icing, it’s a joyful way to fill your kitchen with warmth, spice, and seasonal spirit.

If you plan to eat your creation, proceed with care. The gingerbread is meant for building, not snacking. Lauren laughs, “If you’re going to eat it, dunk it in hot chocolate.”

Read about Lauren’s gingerbread house-making classes here!

Print
clock clock iconcutlery cutlery iconflag flag iconfolder folder iconinstagram instagram iconpinterest pinterest iconfacebook facebook iconprint print iconsquares squares iconheart heart iconheart solid heart solid icon
Gingerbread house with hearts on it

Gingerbread House Recipe


  • Author: Lauren Bohl White
  • Total Time: Ready in 1.5 -2 hours
  • Yield: Yields 3 houses 1x

Description

Build a festive masterpiece with Lauren Bohl White’s classic Gingerbread House Recipe. Fragrant with cinnamon, nutmeg, and cloves, this sturdy dough bakes into the perfect base for creative holiday decorating. Finished with strong, glossy royal icing, it’s a joyful way to fill your kitchen with warmth, spice, and seasonal spirit.


Ingredients

Scale
  • 6 ½ cups (850g) all-purpose flour
  • ¾ tsp ground cinnamon
  • ¼ tsp ground ginger
  • ½ tsp ground nutmeg
  • ¼ tsp ground cloves
  • ¾ tsp salt
  • 7/8 cups (7oz or 198g) vegetable shortening
  • 7/8 cups (6oz or 170g) granulated sugar
  • 16fl oz molasses
  • 1 egg

For the Royal Icing:

  • 8 oz (226g) powdered sugar
  • 2 tbsp + 1 ½ tsp meringue powder
  • 3 tbsp + 1 ½ tsp water + more as needed


Instructions

  1. Sift dry ingredients together in bowl and set aside.
  2. Melt shortening in microwave or on stovetop until it turns to liquid but not hot.
  3. In the bowl of a stand mixer with paddle attachment, mix shortening, sugar, and molasses together. Add in the egg and mix until well combined.
  4. Add in flour mixture and mix until combined and until a smooth ball forms, do not over mix.
  5. Divide dough into two. On a piece of plastic wrap, press one of the halves into a rectangle approx. ½ thick, wrap, and refrigerate for at least 30 minutes.
  6. Preheat oven to 300 degrees.
  7. When ready to roll out and cut shapes, pull dough from fridge, let warm up for 5-10 minutes. Roll dough out on a lightly floured surface to an even ¼ inch thickness. If you have guards for your rolling pin, use the ¼ inch guards.
  8. Cut shapes out using your templates. Remove excess dough which can be used to re-roll and make more pieces.
  9. Bake on parchment paper or Silpat for 50-60 minutes until very firm.
  10. Let gingerbread fully cool before moving. It is now ready to be assembled!
  11. Make Royal Icing: Rule #1 in making royal icing, grease is your enemy and will create weak and crumbly icing, start by washing your mixing bowl, whisk, and bowl scraper really well in soapy water; this also goes for pipping bag, coupler, and pipping tips if you are using them.  In mixing bowl, fitted with a whisk attachment mix powdered sugar and meringue powder. Add in water slowly, reserve 1 ½ teaspoon to add if mixture is too stiff, add more water if necessary but you want a stiff icing to build your gingerbread house. Mix on high for 5 minutes to build the strength of your icing.
  12. Once icing has mixed and is stiff peak consistency, it is ready to use and build your house and decorate. Stiffness is key to keeping things in place, you can always add water to a smaller amount of royal icing to thin it out a bit more for pipping decorative details.

Notes

Tips: Not everyone has reusable or disposable pipping bags on hand, another easy option is using quart Ziplock bags as your pipping bag and trimming a small tip off of one corner to pipe the icing through; cut only a little bit to start and then trim more if needed.

The key to building a sturdy gingerbread house is to build it on a cake board/plate or platter. Pipe a line of royal icing on the bottom edge of each wall and then the corners so the walls attach to the board or plate. Don’t be afraid to use a jar to act as a wall support as you are assembling walls.

Recipe By By Lauren Bohl White
Photography by Jeff Swensen
Shot on location at Local Provisions

Subscribe to TABLE Magazine‘s print edition.
Gingerbread House Classes at Local Provisions

0
A gingerbread house with M&Ms all over the gingerbread.

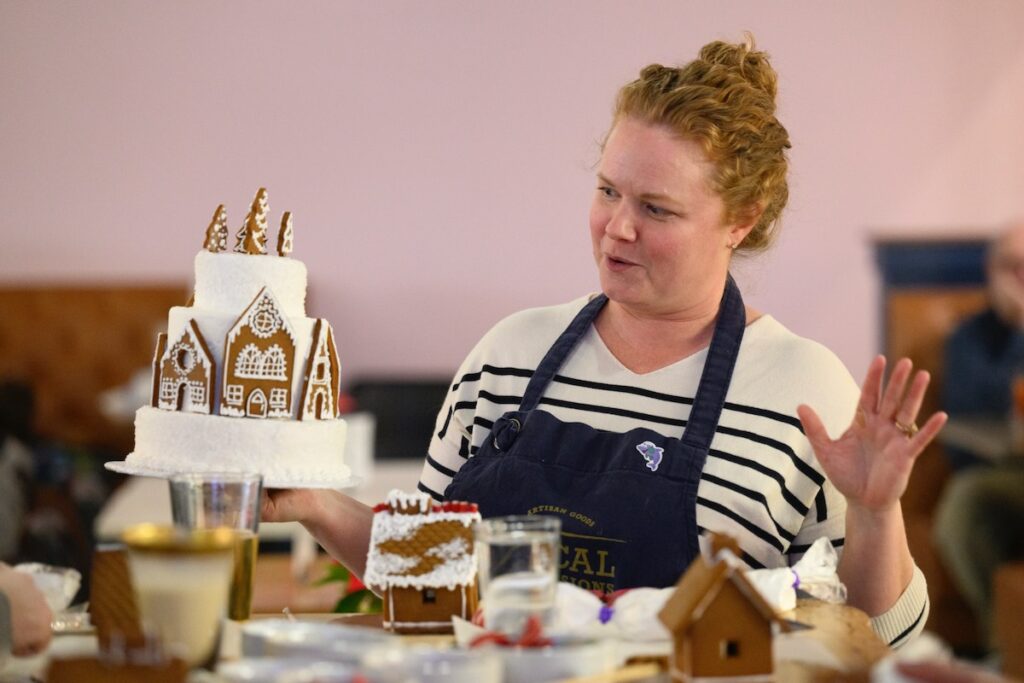
Lauren Bohl White, pastry chef at Aspinwall’s Local Provisions, helps parents and kids build gingerbread houses during the holidays. No two are exactly alike, but everyone leaves with the same joyful holiday spirit when they go to Gingerbread House Classes at Local Provisions.

If you want to try it yourself, take a look at her Gingerbread House Recipe!

Taking a Gingerbread House Class at Local Provisions

As the in-house pastry chef at Local Provisions Market & Café in Fox Chapel Plaza, Lauren Bohl White has built a loyal following for her signature treats — from chocolate chip cookies to Rice Krispie bars and chocolate snack cakes. Before coming to Pittsburgh, she ran a custom wedding cake business in New York City. Now, her focus turns to gingerbread, inviting families to join her for festive, hands-on classes.

“It’s a fun community way to have people come in,” says Lauren. “It’s a stressful time of year. We want to make it magical.” Parents can join in the decorating or unwind with a glass of wine while their kids craft sugary masterpieces and sip hot chocolate.

How the Gingerbread Classes Work

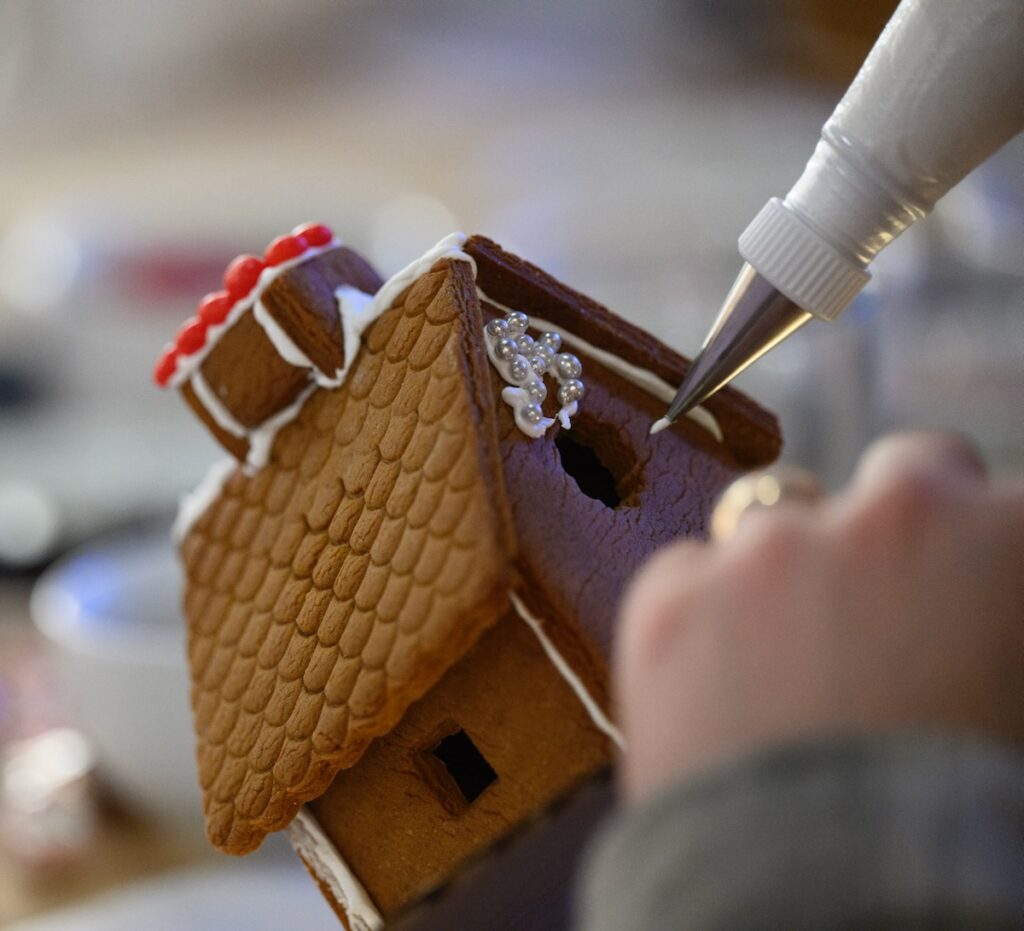
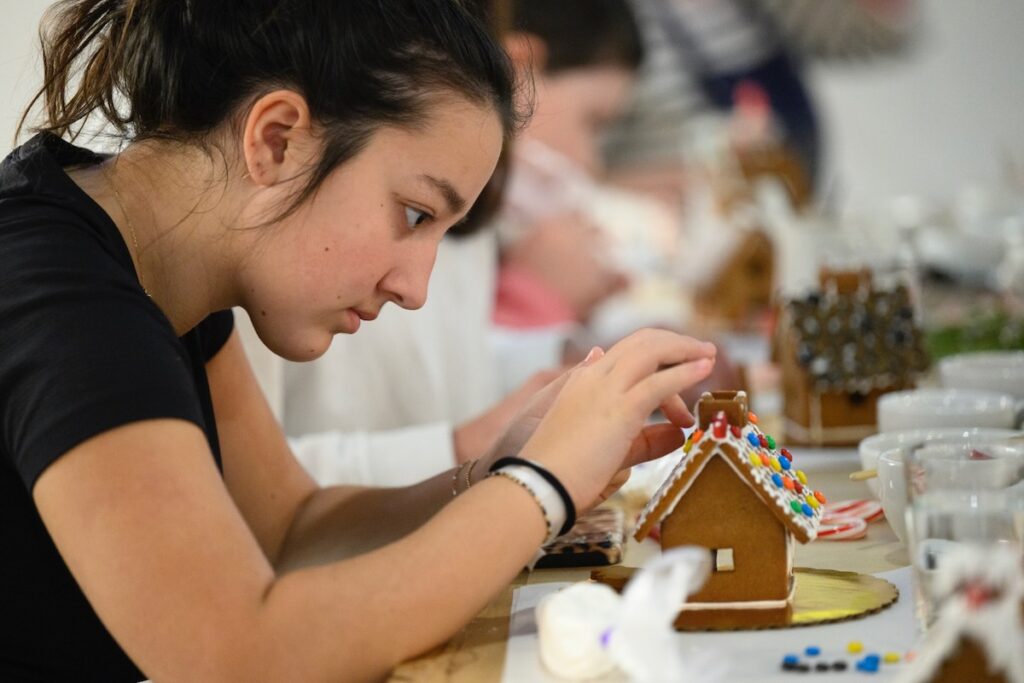
Constructing gingerbread houses can be challenging, but Lauren’s years of experience building flawless tiered cakes make it a piece of cake. To keep things light and stress-free, she preps everything in advance. Each participant receives a pre-assembled house, piping bag of icing, and assorted candies — letting creativity take center stage.

Creative Candy Ideas for Gingerbread Houses

Lauren hunts for candy at Market District, Aldi, and Grandpa Joe’s, selecting sweets that double as design elements — M&Ms, gumdrops, gummy ropes, silver dragées, sprinkles, Red Hots, and Skittles. “Ask yourself, ‘What can you make with the candy?’” she says. “Cut gumdrops into flowers. Give it a little sparkle.”

Tips for Making a Gingerbread House at Home

If you’re inspired to try this at home, Lauren recommends having kitchen shears, small piping tips (No. 2 or 3), and a paintbrush for dusting on “snow.” Once you’ve mastered the basics, get creative — one class participant even built a replica of her own house, complete with lighted gelatin windows.

If you plan to eat your creation, proceed with care. The gingerbread is meant for building, not snacking. Lauren laughs, “If you’re going to eat it, dunk it in hot chocolate.”

Sign Up for Local Provisions Classes

Local Provisions offers family-friendly gingerbread house classes and adult workshops for groups of up to 12. Find the schedule and other special events by signing up for the newsletter at localprovisionspgh.com/get-updates.

Story by Susan Fleming Morgans
Photography by Jeff Swensen
Shot on location at Local Provisions

Subscribe to TABLE Magazine‘s print edition.

Black Forest Cherry Yule Log (Buche De Noel)

0
Black Forest Cherry Yule Log by Alyssa Zimmerman and Marla Harvey, Georgie's Corner Bakery & Café - PEOPLE'S CHOICE 3RD PLACE

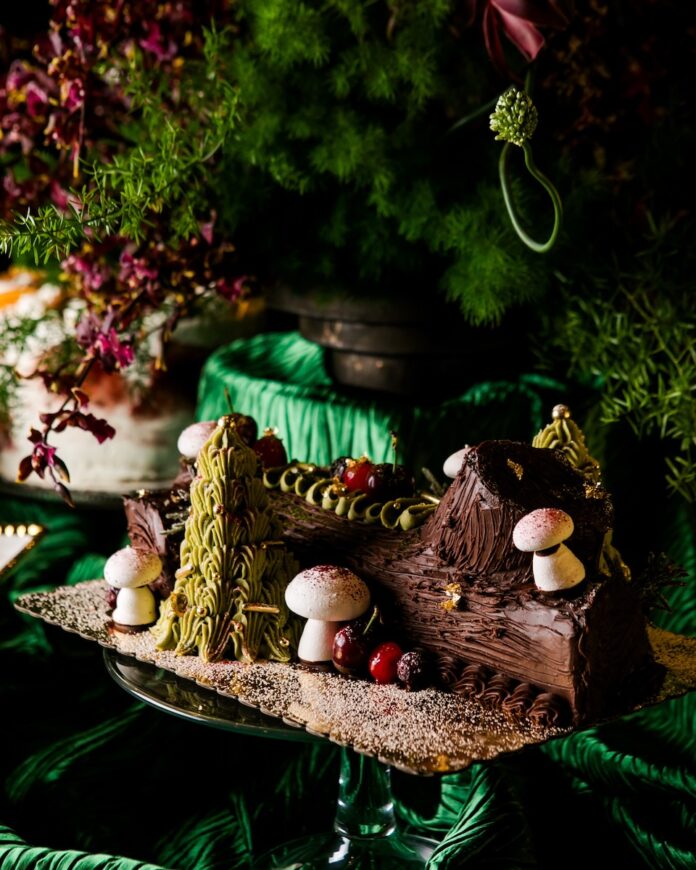
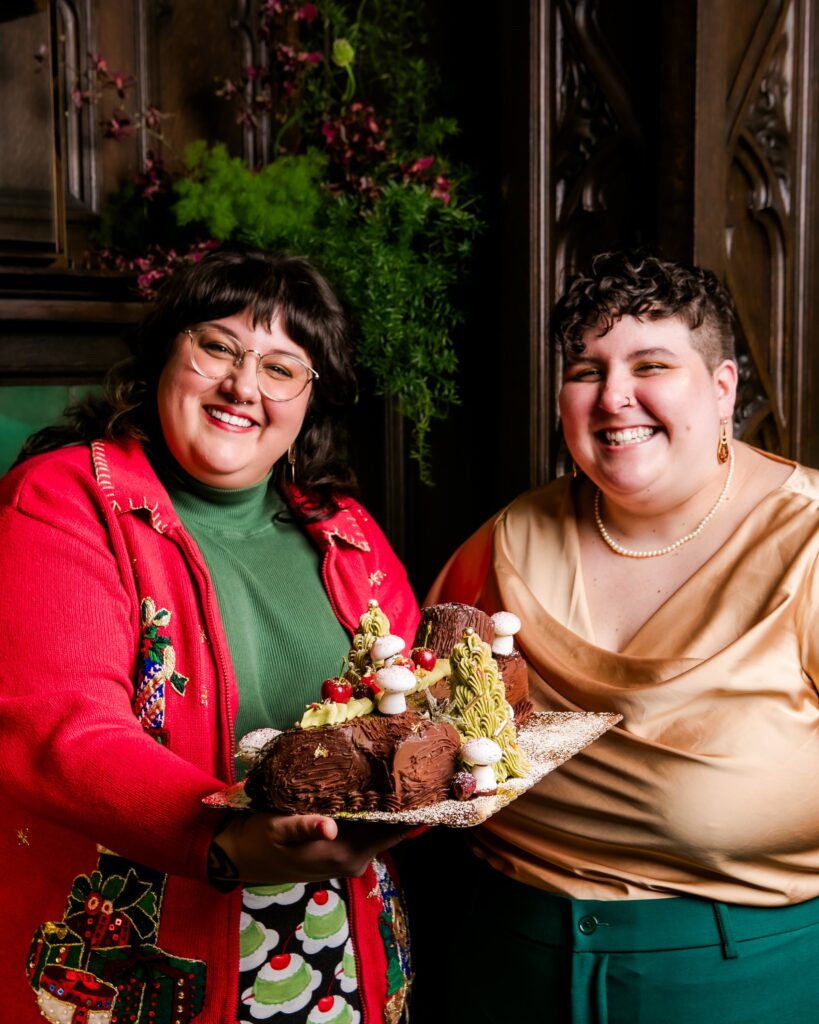
At Georgie’s Corner Café, Head Pastry Chef Marla Harvey and Sous Pastry Chef Alyssa Zimmerman transform tradition into artistry with their Black Forest Cherry Yule Log. Layers of airy chocolate sponge cake, tart cherry whipped filling, and a splash of cherry liqueur create bold, balanced flavor. They finish the dessert with whipped chocolate ganache, meringue mushrooms, and sugared rosemary to evoke a snowy forest. The result blends nostalgia and innovation in a stunning holiday centerpiece.

Georgie’s Corner Café

Their Black Forest Cherry Yule Log was made as a part of our second annual TABLE Magazine Holiday Bake Off where five professionals and five student pastry chefs went head-to-head in a battle for the most decadent.

Black Forest Cherry Yule Log
Print
clock clock iconcutlery cutlery iconflag flag iconfolder folder iconinstagram instagram iconpinterest pinterest iconfacebook facebook iconprint print iconsquares squares iconheart heart iconheart solid heart solid icon
Black Forest Cherry Yule Log by Alyssa Zimmerman and Marla Harvey, Georgie's Corner Bakery & Café - PEOPLE'S CHOICE 3RD PLACE

Black Forest Cherry Yule Log (Buche De Noel)


  • Author: Marla Harvey and Alyssa Zimmerman
  • Yield: Yields: 3, 12 inch yule log cakes ~ 10-12 servings per cake

Description

A show-stopping holiday dessert.


Ingredients

Scale

For the chocolate cake:

  • 15 egg yolks
  • 1.5 tsp vanilla extract
  • 219 g canola oil
  • 92 g cocoa powder
  • 473 ml hot water
  • 2 tsp salt
  • 656 g all-purpose flour
  • 825 g granulated sugar
  • 15 egg whites
  • 1 ¼ tsp cream of tartar

For the cherry liquor simple syrup: 

  • 1 cup granulated sugar
  • 1 cup water
  • 4 tbsp cherry liquor

For the cherry whipped filling:

  • 34 g freeze-dried tart cherries, crushed
  • 3 lb cream cheese or mascarpone (room temperature)
  • ½ lb unsalted butter (room temperature)
  • 2 lb powdered sugar (sifted)
  • 1 tbsp salt
  • 2 tbsp vanilla bean paste
  • 1 tbsp tart cherry juice

For the meringue mushrooms: 

Yields: 50 mushrooms

  • 200 g egg whites
  • 150 g granulated sugar 1
  • 325 g granulated sugar 2
  • 83 g water
  • ¼ tsp cream of tartar
  • Salt to taste

For the chocolate ganache:

  • 670 g 70% Valhrona dark chocolate
  • 678 g 36% heavy cream
  • 4 tbsp tart cherry concentrate
  • ¾ tsp salt
  • 2 tsp vanilla bean paste

For the sugared rosemary:

  • 2-3 fresh rosemary sprigs
  • ½ cup cherry simple syrup
  • 1 cup granulated sugar


Instructions

For the chocolate cake:

  1. Preheat oven to 325 degrees.
  2. Prepare 3 half-sheet trays generously sprayed with non-stick spray and a Silpat (any nonstick mat or parchment paper should work, too).
  3. In a large stainless-steel bowl, bloom your cocoa powder with all of the hot water and whisk until smooth, set aside.
  4. In the bowl of a stand mixer with the whisk attachment, whisk your egg yolks until pale and fluffy on medium high.
  5. Slowly stream in the canola oil and whip until doubled in size.
  6. Slowly stream in your water/cocoa mixture.
  7. Remove the yolk mixture into a separate bowl and wash your mixing bowl out so there is NO oil residue left over.
  8. In a separate stainless-steel bowl, sift all your dry ingredients together.
  9. Fold the yolk mixture with the dry mixture until there are no dry spots, set aside.
  10. In the bowl of your stand mixer, place your egg whites and cream of tartar.
  11. Whip the egg whites slowly and add your sugar a few tablespoons at a time until fully incorporated.
  12. Once all your sugar is added, add your vanilla.
  13. Whip until you have medium stiff peaks.
  14. With a rubber spatula, fold your whites into the other mixture.
  15. Fold until there are no visible whites, but do not over mix because you will lose air.
  16. Once mixed, take your sheet trays and fill each one with 900 grams of batter.
  17. Even out the batter with an offset spatula and bake for 10-15 minutes or until cake springs back when touched.
  18. Place on a rack to cool for about 5 minutes while you prepare your parchment paper and powdered sugar.
  19. Using a full sheet of parchment paper, place piece flat on your table and, using a sifter, generously sprinkle powdered sugar.
  20. Flip your cake onto the parchment and remove the Silpat from the back.
  21. Add more powdered sugar to the top of the cake and then gently roll onto a log with the long side.
  22. Let sit rolled up until COMPLETELY cooled.
  23. Unravel and fill with filling.

For the cherry liquor simple syrup:

  1. Bring water and sugar to a boil in a small saucepan.
  2. Add in cherry liquor.
  3. You can adjust the amount of cherry liquor if you want a stronger syrup.
  4. Let cool completely before using.

For the cherry whipped filling:

  1. Whip butter and cream cheese (or mascarpone) together in a stand mixer with a whip attachment. If using mascarpone, you’ll want to strain out some of the liquid using a cheese cloth or else your filling may seem wet.
  2. Slowly add in your sifted powdered sugar, one cup at a time.
  3. Once the powdered sugar is fully incorporated, add in your cherry juice, salt, and vanilla bean paste.
  4. Once everything is mixed together, remove the bowl and the whip, and using a rubber spatula, fold the freeze-dried cherries into the filling.
  5. You’ll want to spread this on your COOLED cake at room temperature.

For the meringue mushrooms:

  1. In a medium saucepan, combine sugar #2 and water.
  2. Cook on medium until it reaches 240 degrees.
  3. While the sugar syrup is cooking, gather a stand mixer bowl and add in the egg whites, cream of tartar, and salt.
  4. With a whisk attachment, whip the egg whites on medium high and slowly add in sugar #1 as soon as the whites look foamy.
  5. Add about a tablespoon at a time until fully incorporated.
  6. While your whites are whipping, your syrup should be starting to reach 240 degrees.
  7. After it reaches 240 degrees, remove from the heat and with your mixer still on medium, slowly stream in the sugar syrup.
  8. Be careful to not let splatter around the sides of the bowl.
  9. Whip on high once all incorporated until stiff peaks form.
  10. Pipe into mushroom shape and bake at 220 degrees  for 2 hours, keeping the oven CLOSED or they will crack.

For the chocolate ganache: 

  1. Bring your heavy cream and cherry concentrate to a scalding boil in a small saucepan.
  2. Break up your chocolate into small pieces.
  3. Pour heavy cream mixture over chocolate.
  4. Add salt and vanilla.
  5. Let sit until chocolate is completely melted.
  6. Let come to room temperature.
  7. With a stand mixer and whisk attachment, pour ganache into bowl and whip on medium until double in size.
  8. Use to decorate.

For the sugared rosemary: 

  1. Dip desired amount of rosemary sprigs into the cherry simple syrup.
  2. Place on sheet tray with a wire rack and let dry until tacky.
  3. Using granulated sugar, roll rosemary around until fully coated.
  4. Use as needed for decoration.

Check out more recipes from our Annual Holiday Bake Off!

Recipe by Georgie’s Corner Café: Marla Harvey, Head Pastry Chef and Alyssa Zimmerman, Sous Pastry Chef
Photography by Laura Petrilla

Subscribe to TABLE Magazine‘s print edition.
Don't Miss